Microservices and Message Queues, Part 5: Building the first service
The previous article
gave a high-level overview of the demo project’s architecture.
It stated how we’d adopt the micro-service architecture, and that
the demo project will be broken down into two smaller services.
This article will walk us through building the first service,
GetMeHired-producer. But first, let’s recap what this service is about.
As mentioned earlier, the GetMeHired-producer will serve as the producer
of messages in our microservices and RabbitMQ architecture.
Primarily, this service will receive an http request to perform a job
search and publish the request as a message to RabbitMQ.
We will create one REST API endpoint in this service to implement the
functionality we just mentioned. Users’ requests would come into the
service through the endpoint. The endpoint we build will also be
responsible for validating the email address in the payload,
and publishing the request it receives to RabbitMQ.
However, for the sake of modularity, we will have separate functions or
classes that handle the email validation and forwarding of requests to
RabbitMQ. We will use FastAPI to implement this service.
To begin, let’s set things up.
Also, note that the completed code for this project is
hosted on GitHub.
You can refer to it if you get stuck at any point.
Setting up the project
Take the following steps to set up your development environment and
subsequently the project:
Step 1: Creating a virtual environment
In your terminal, run python3 -m venv get-me-hired-producer-env on Unix and macOS or python -m venv get-me-hired-producer-env on Windows to create a virtual environment named get-me-hired-producer-env.
Run source get-me-hired-producer-env/bin/activate on Unix and macOS or .\get-me-hired-producer-env\Scripts\activate on Windows to activate the virtual environment.
Step 2: Create a FastAPI project
With your virtual environment activated, take the following steps to
bootstrap a FastAPI project.
In your terminal run, code mkdir get-me-hired-producer to create a new directory for our project.
In your terminal run cd get-me-hired-producer && touch __init__.py main.py requirements.txt Essentially, this command would navigate into the get-me-hired-producer folder and create three files in it:__init__.py, main.py, and requirements.txt If you are on Windows, the touch command will not work. In that case, only run the first part of the command to navigate into the newly created folder: cd get-me-hired-producer. You can then open the folder in the IDE you are working with and manually create the three files.
If not done already, open the
get-me-hired-producer
folder in your favorite IDE, and then copy and paste the snippet below into your
requirements.txt
file.
These are the external dependencies we will need in our project for now.
In your terminal, run
pip install -r requirements.txt
This command will install all the dependencies listed in the
requirements.txt
file. Also, ensure that you are in the project directory in the terminal
before running that command.
Next, copy the snippet below and paste it into the
main.py
file
Recall we installed a dependency named uvicorn in the previous step.
To run our application locally and even on the cloud and have it
receive and process requests, we will need a server program that could
load our application. This is what uvicorn does for us.
Take the following steps to run our application with uvicorn and test
it out:
In your terminal run
uvicorn main:app --reload
In the output in your terminal, you should see this line
INFO: Uvicorn running on http://127.0.0.1:8000 (Press CTRL+C to quit)
It shows the URL where your app is being served on your local machine.
Also note that the command
main:app --reload refers to:
main: the file main.py (the Python “module”)
app: the object created inside of main.py with the line app = FastAPI()
--reload: make the server restart after code changes - only used for development.
Lastly, open your browser at
http://127.0.0.1:8000,
and you will see a JSON like this:
{"message": "Hello World"}
Step 4: Exploring the documentation page
One of the coolest things about FastAPI is that it generates a
documentation page for your project out of the box. In our case,
FastAPI has created a page that documents the rudimentary endpoint
we just created.
To access the documentation page, first run the application
(if not running already). Next, point your browser to
http://127.0.0.1:8000/docs.
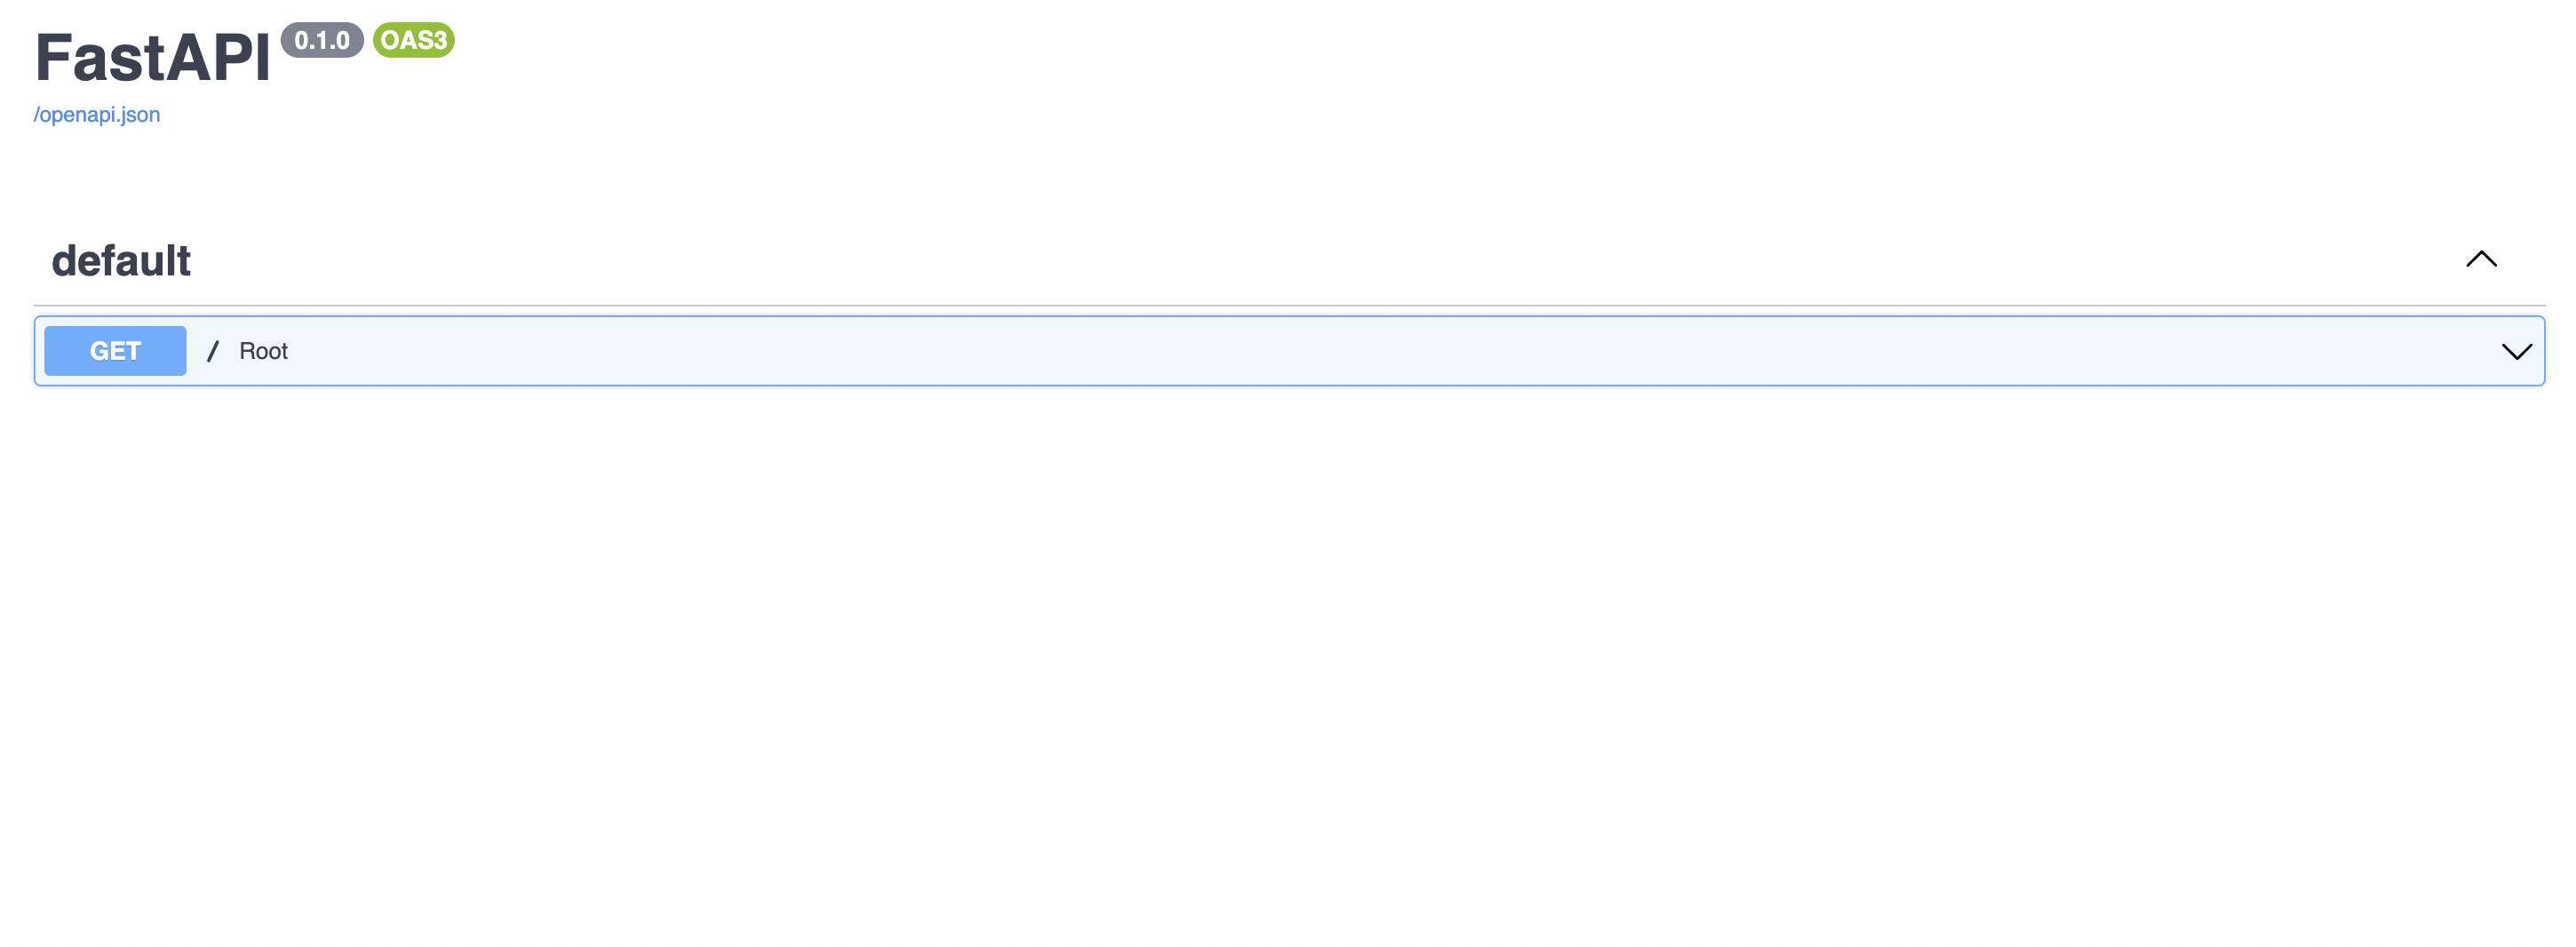
You will be greeted with an interface like the one shown in the image
below:
Figure 1 - FastAPI auto-generated docs
Note:
In addition to listing all the available endpoints in your
application(in our case only one endpoint - as shown in the image above), the documentation
page also allows you to test those endpoints right in your browser.
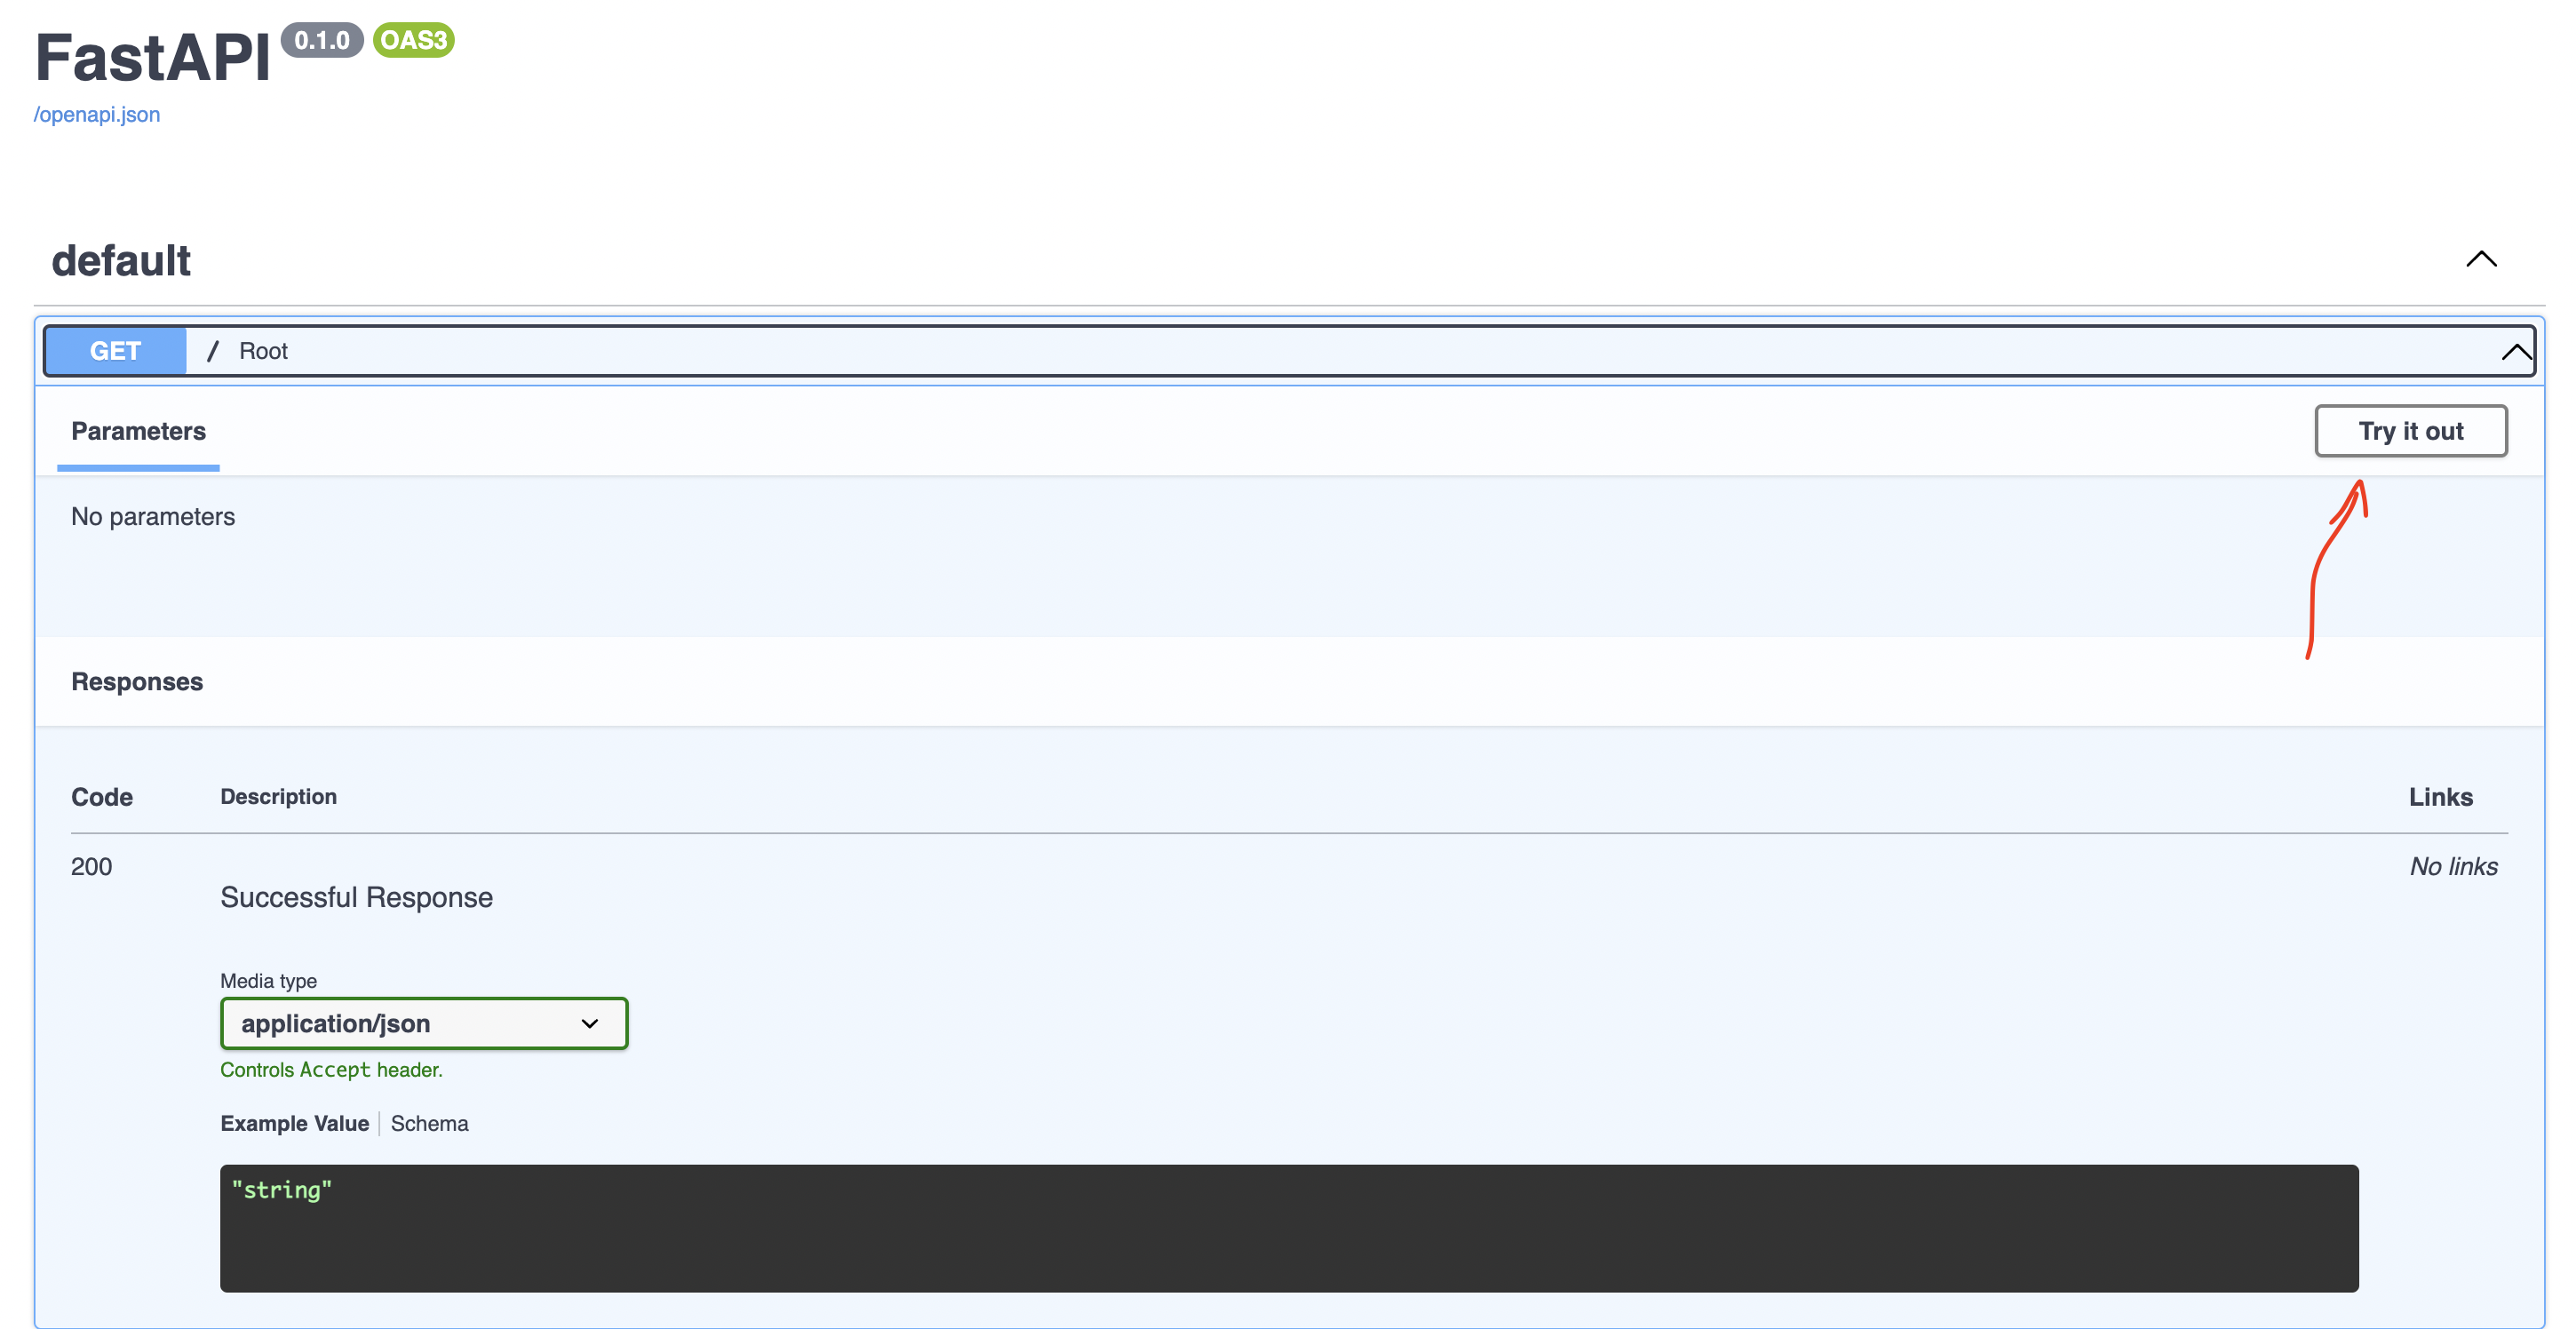
To test an endpoint, click on the button labeled
Try it out
and, subsequently, the
execute button.
See the image below:
Figure 2 - Testing an endpoint
Creating the job search endpoint
We need to do three things to create our endpoint:
First, we will create a helper function that we will use in validating if an email is valid or not
Next, we will create a schema for the job search payload. Schemas are more like serializers in FastAPI
Lastly, we will define the main endpoint that invokes the email validator and the schema and returns a response to the user
Step 1: Create the email validator function
Create a file
validators.py
in the project folder
and add the snippet below to the file:
fromemail_validatorimportvalidate_email,EmailNotValidErrordefis_valid_email(email:str):"""Verifies the correctness of an email address"""try:# Check that the email address is valid.
validate_email(email,check_deliverability=True)returnTrueexceptEmailNotValidError:# Email is not valid.
returnFalse
The code snippet above uses a python package,
email-validator, to verify the correctness of an email address.
Note that this helper function is not very robust.
It mostly just focuses on verifying if the email passed follows
the right format - for example, 11@gmail.com would be considered a
valid email address even though it most likely does not exist.
Step 2: Adding the input schema
Create a file
schemas.py in the project folder and add the snippet below to the
file
frompydanticimportBaseModelclassJobsQueryModel(BaseModel):""" Defines the allowed format of job queries """search_term:strlocation:stremail:strclassConfig:schema_extra={"example":{"search_term":"Junior Python Engineer","location":"Nigeria","email":"spongebob@gmail.com"}}
Step 3: Adding the endpoint
To create the route for our new endpoint, replace the entire content of
the main.py file with the snippet below:
fromfastapiimportFastAPIfromfastapi.exceptionsimportHTTPExceptionfromschemasimportJobsQueryModelfromvalidatorsimportis_valid_emailapp=FastAPI()@app.get("/")asyncdefroot():return{"message":"Hello World"}@app.post("/jobs")deffind_jobs(jobs_query:JobsQueryModel):""" Accepts job queries and adds them to RabbitMQ """email=jobs_query.emailsearch_term=jobs_query.search_termlocation=jobs_query.location# Verify that all request parameters are passed
ifemailisNoneorsearch_termisNoneorlocationisNone:returnHTTPException(detail={'message':'Error! Pass all request paramaters'},status_code=400)# Check if email is valid
ifnotis_valid_email(email):returnHTTPException(detail={'message':'The email passed is not valid!'},status_code=400)return ("Your request has been queued, we will email the list"" of available jobs to you shortly")
In the snippet above, we loaded the email validator function and the
input schema with two new imports. We also added the
find_jobs function that’s bound to the/jobs route.
This
find_jobs
function is the core of this service. First, it checks to see if all the
required parameters are present in the payload; otherwise, it raises an
exception. Next, it uses the utility function we defined to validate the
correctness of an email address. It then returns a response to the user,
letting them know that their request has been queued.
Ideally, we are supposed to push each request to our RabbitMQ instance
on CloudAMQP, but we haven’t done that yet. Let’s implement that.
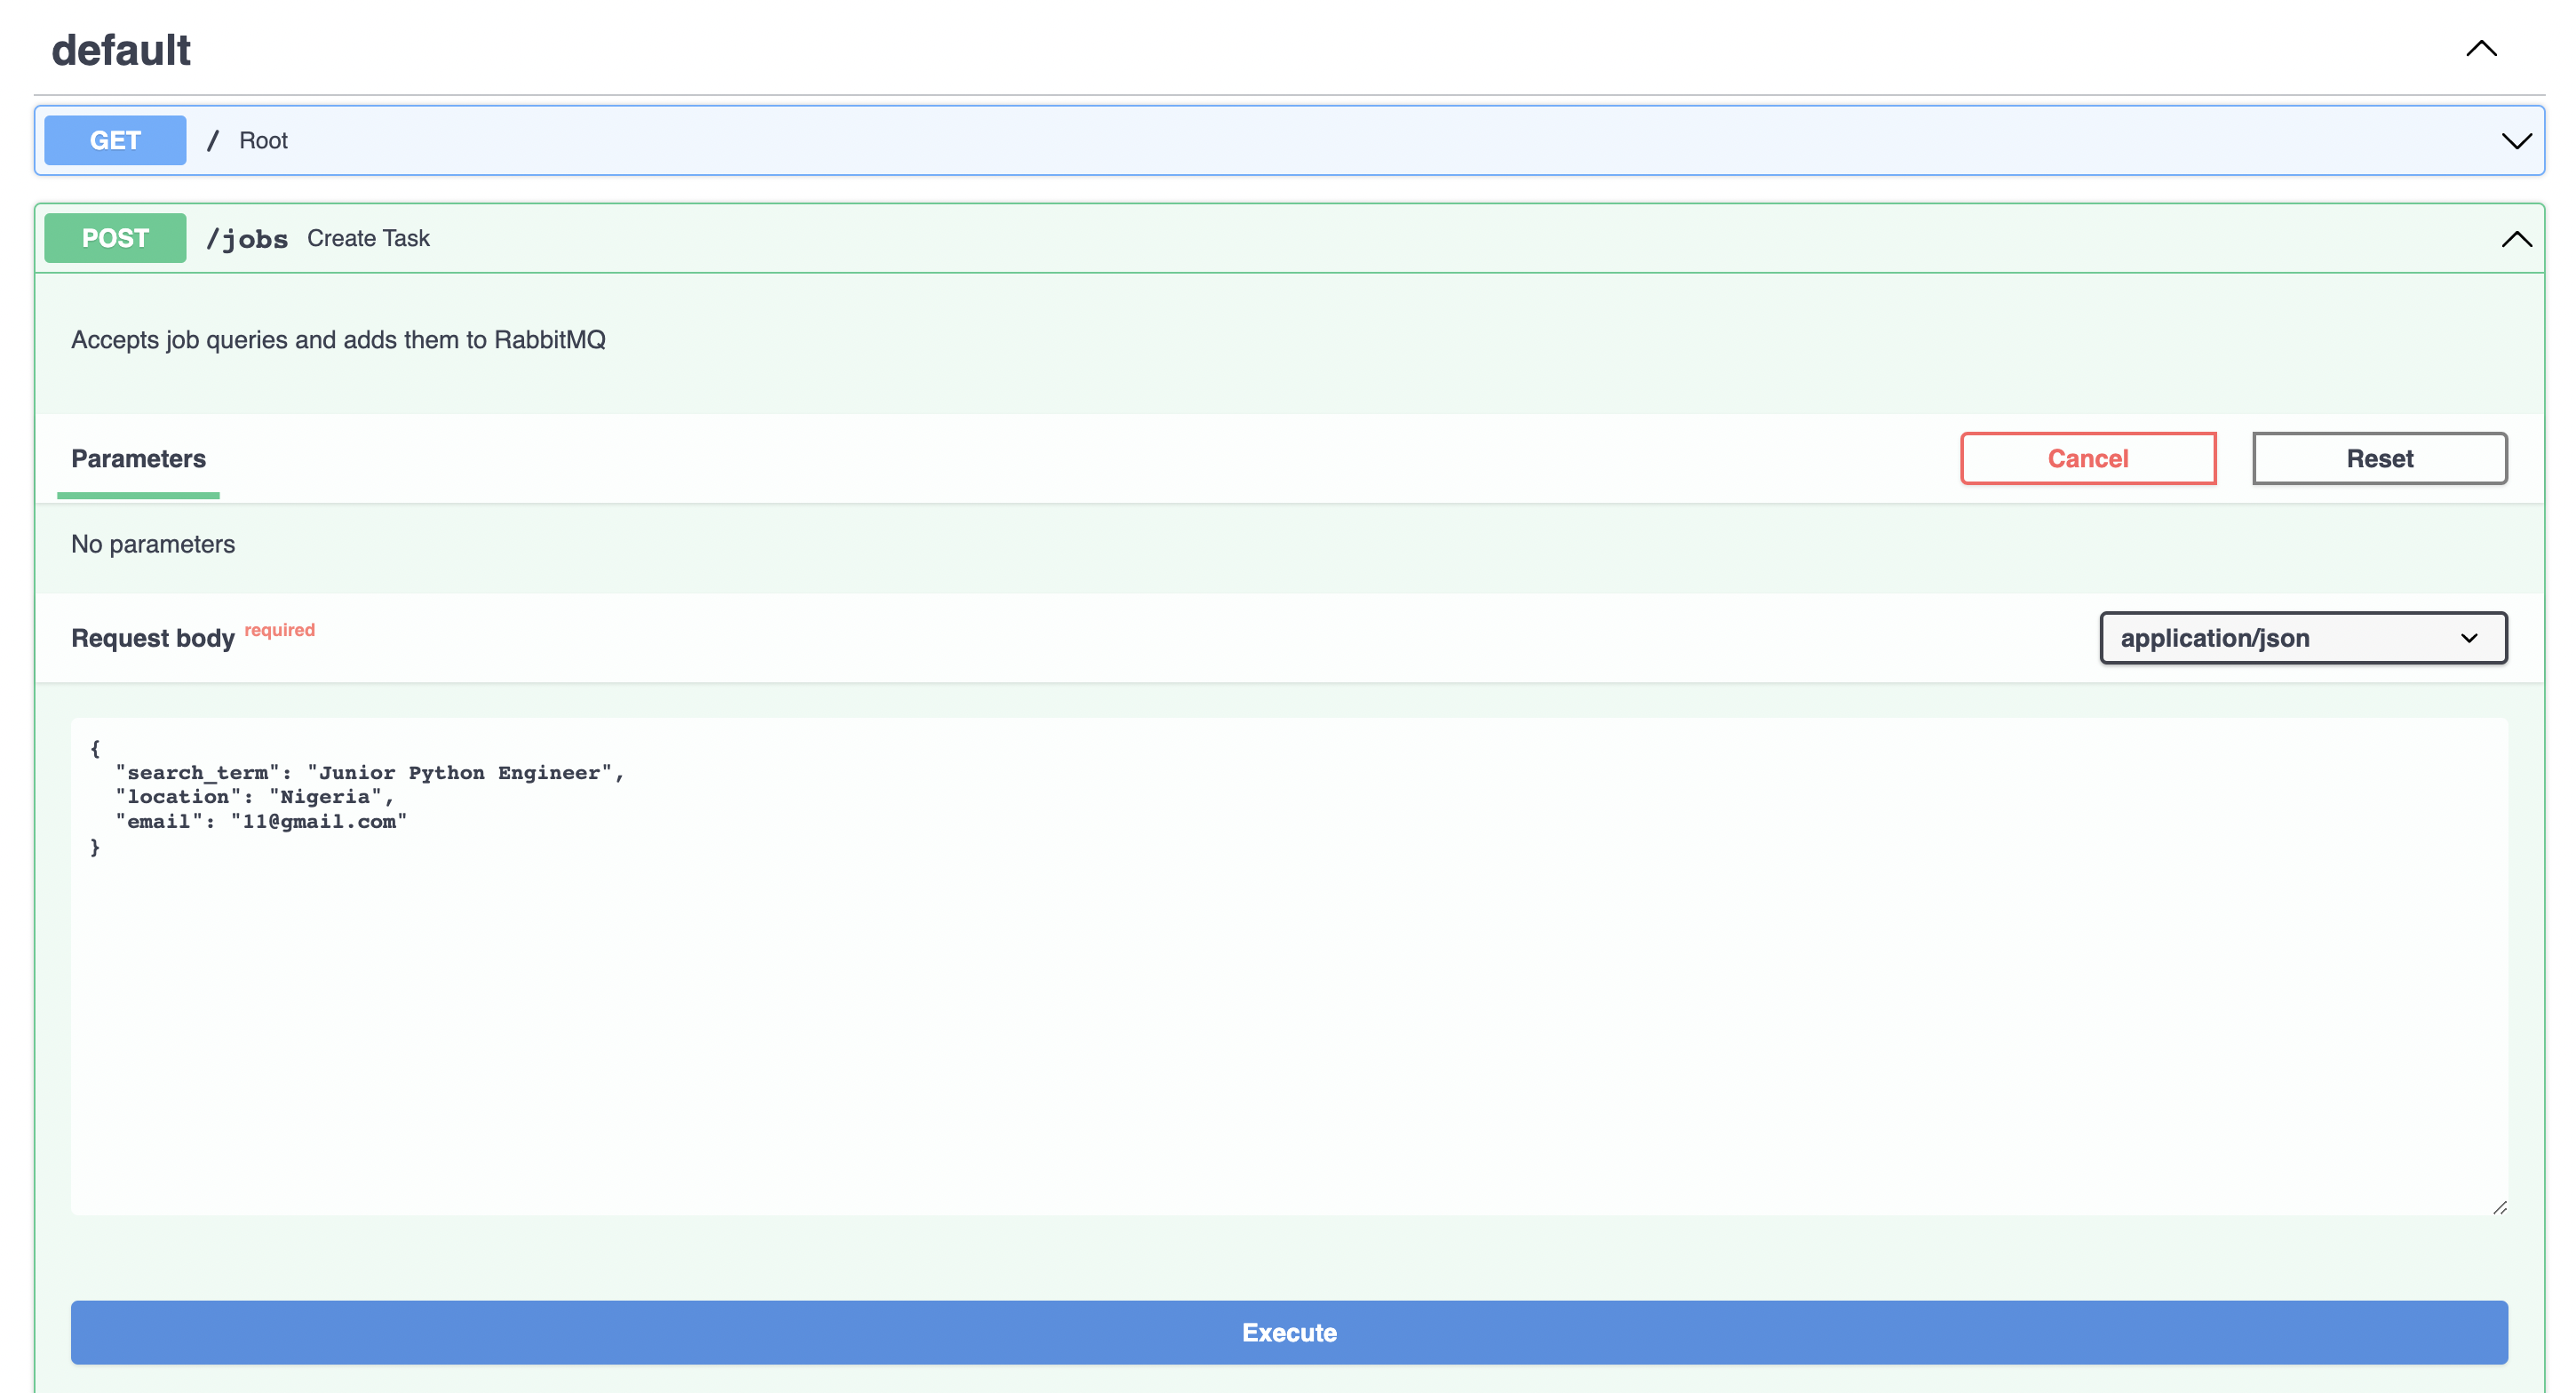
Before then, if you run your application at this point and go to the
documentation page, you will see the newly created endpoint listed there.
See the image below.
Figure 3 - Jobs endpoint documentation
Pushing requests to our RabbitMQ instance on CloudAMQP
To be able to connect our application to a RabbitMQ instance on CloudAMQP,
we will need to take the following steps.
First, sign up with CloudAMQP to create a RabbitMQ instance if you haven’t done this already
Next, copy your instance’s credentials and add them to a .env file in the project directory
Implement a CloudAMQP utility class that will allow us to connect to CloudAMQP, create exchanges and queues and then publish messages
We will then invoke the utility class in our /jobs route and have it publish users’ requests to CloudAMQP
As a bonus step, we’d also explore the RabbitMQ management interface to see the messages we’ve published
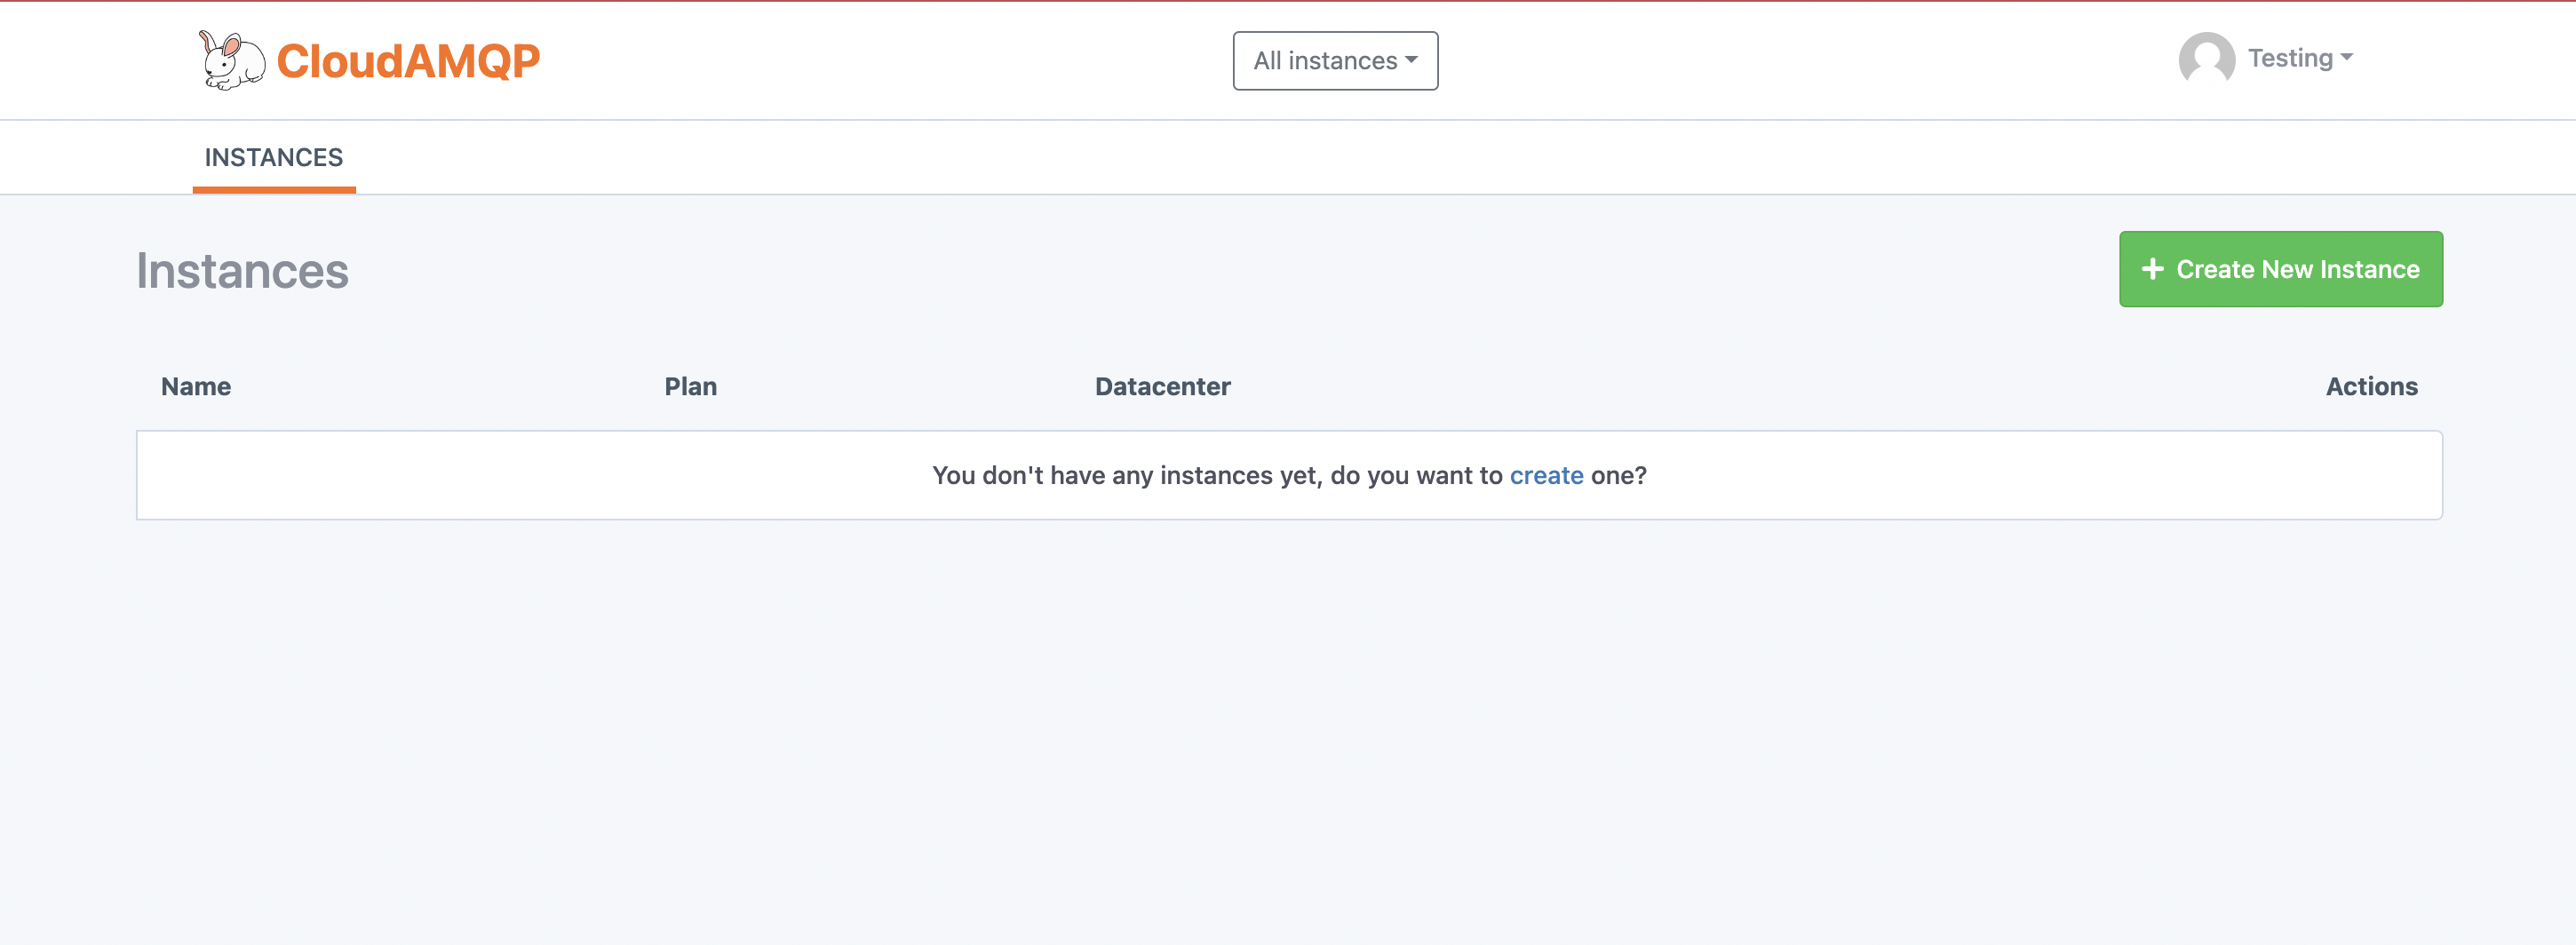
If you are accessing CloudAMQP for the first time, you’d be prompted to
create a team after login. Give your team any name and create a RabbitMQ
instance by clicking the Create New Instance button in the image below.
Figure 4 - CloudAMQP new RabbitMQ instance
On clicking the button above, you’d be prompted to give your instance a name
(I called mine get-me-hired). Also, select a region and then proceed to create your
instance.
Step 2: Adding CloudAMQP credentials to the project
With your instance created, click on the instance’s name to go to its page.
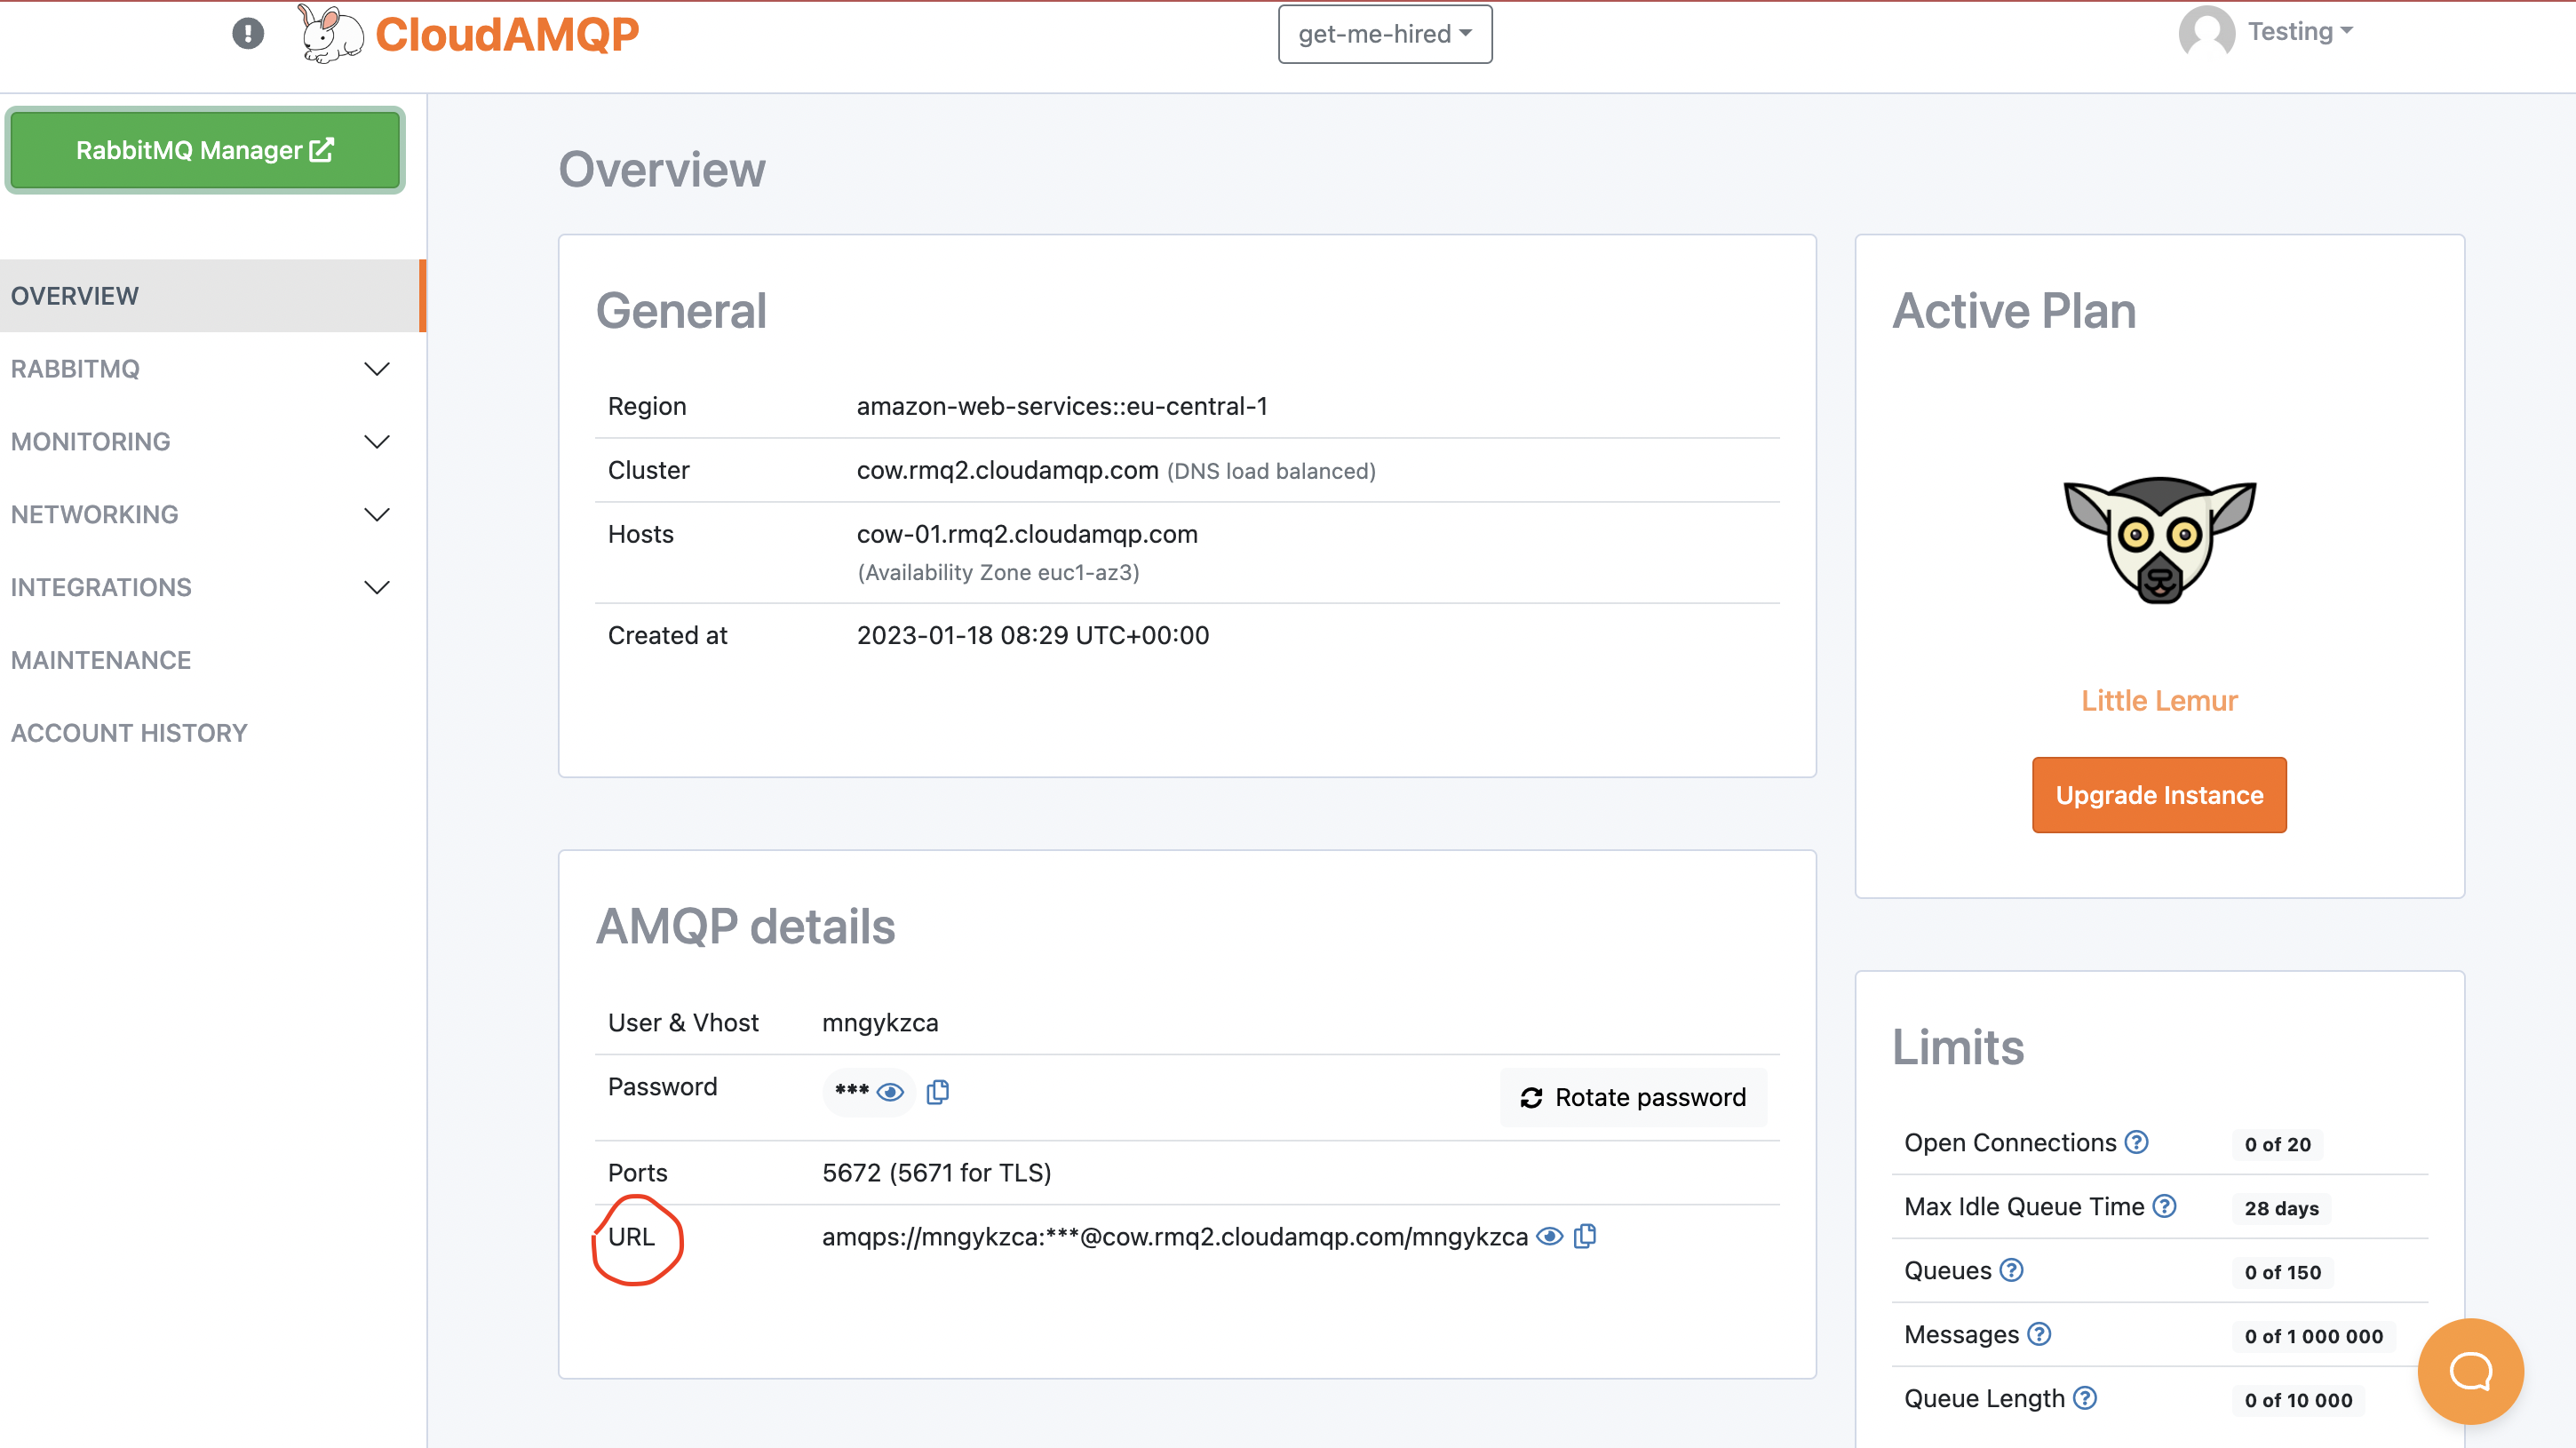
You will be taken to the instance’s overview page. Go to the AMQP details sub-section on the page and copy the URL.
See the image below.
Figure 5 - CloudAMQP URL
Next, create a file named .env in your project folder and paste the snippet
below:
CLOUDAMQP_URL=your CloudAMQP URL here
We just created an environment variable that we will later access.
Remember to update the variable with your correct CloudAMQP URL.
Step 3: Implementing the CloudAMQP helper class
Next, we are going to encapsulate the logic of connecting to CloudAMQP,
declaring queues and exchanges, and publishing messages into a Python
class. We will then use the class in our
find_jobs function.
Create a file
cloudamqp_helper.py
in the project directory and add the snippet below to it.
importos,jsonimportpika# from pika.exchange_type import ExchangeType
fromdotenvimportload_dotenv# Load the .env file
load_dotenv()classCloudAMQPHelper:""" The interface between this project and CloudAMQP """EXCHANGE="get_me_hired_exchange"EXCHANGE_TYPE="direct"QUEUE_NAME="get_me_hired_queue"ROUTING_KEY="jobs_search"def__init__(self)->None:""" Sets up a connection and a channel when this class is instantiated """url=os.environ["CLOUDAMQP_URL"]params=pika.URLParameters(url)self.__connection=pika.BlockingConnection(params)# Connect to CloudAMQP
def__create_channel(self)->pika.BlockingConnection:channel=self.__connection.channel()# start a channel
returnchannelasyncdef__create_exchanges_queues(self)->None:""" Declares a queue and an exchange using the channel created """# Get channel
channel=self.__create_channel()# Create an exchange
channel.exchange_declare(exchange=self.EXCHANGE,exchange_type=self.EXCHANGE_TYPE)# Create a queue
channel.queue_declare(queue=self.QUEUE_NAME)# Bind queue with exchange
channel.queue_bind(self.QUEUE_NAME,self.EXCHANGE,self.ROUTING_KEY# The routing key here is the binding key
)asyncdefpublish_message(self,message_body)->None:""" Publishes a message to CloudAMQP """# First declare an exchange and a queue
awaitself.__create_exchanges_queues()# Get channel
channel=self.__create_channel()channel.basic_publish(exchange=self.EXCHANGE,routing_key=self.ROUTING_KEY,body=json.dumps(message_body))print ("[x] Message sent to consumer")self.__connection.close()# Create an instance
cloudamqp:CloudAMQPHelper=CloudAMQPHelper()
In the snippet above, we, first of all, used the python-dotenv to load
our .env file just so it’s accessible in our project. Next, we created
the
CloudAMQPHelper
class that exposes one public method, publish_message.
In the next step, we will use the
publish_message
function to publish messages to RabbitMQ. We are not explaining the
details of the code snippet because most concepts have been covered in
Part 3 of this series.
Step 4: Forwarding requests/publishing messages to CloudAMQP
Here we will import the CloudAMQP instance we created in the previous
step into our main.py file. We will then invoke the instance’s
publish_message
function in our
find_jobs
function.
To import the instance of the
CloudAMQPHelper,
we created the
cloudamqp_helper.py
file.
Add the snippet below to the list of imports in the main.py file:
from cloudamqp_helper import cloudamqp
Next, add the snippet below just right above the return statement of the
find_jobs
function in the
main.py
file
# Publish request to CloudAMQP
awaitcloudamqp.publish_message(Message_body={"email":email,"search_term":search_term,"location":location})
In the end, the content of your main.py file should match what
we have on GitHub.
Lastly, to confirm that the published message has indeed been pushed to
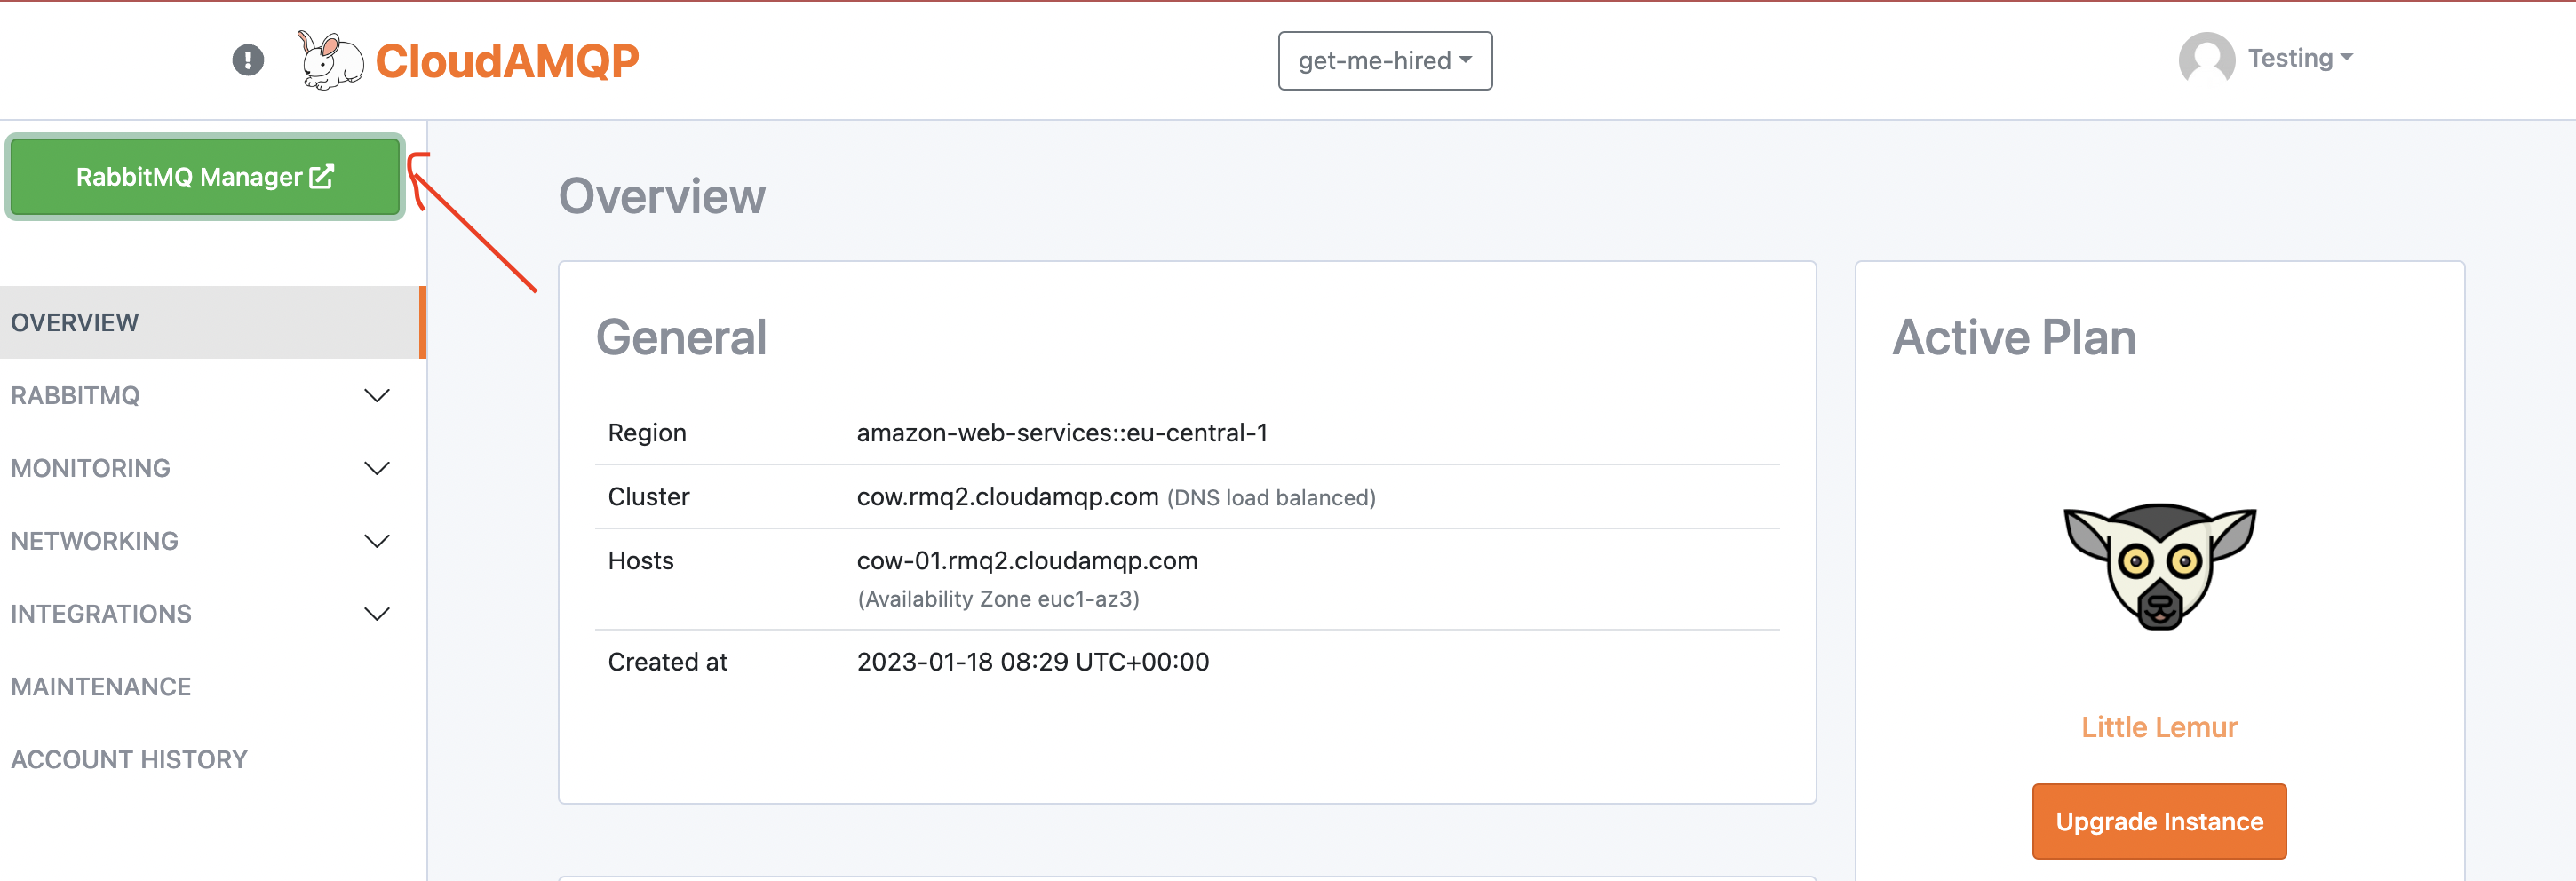
CloudAMQP, you can visit the RabbitMQ management interface. To do that,
go to the overview page of your RabbitMQ instance on CloudAMQP and click
on the Rabbit Manager button. See the image below.
Figure 6 - RabbitMQ admin interface trigger
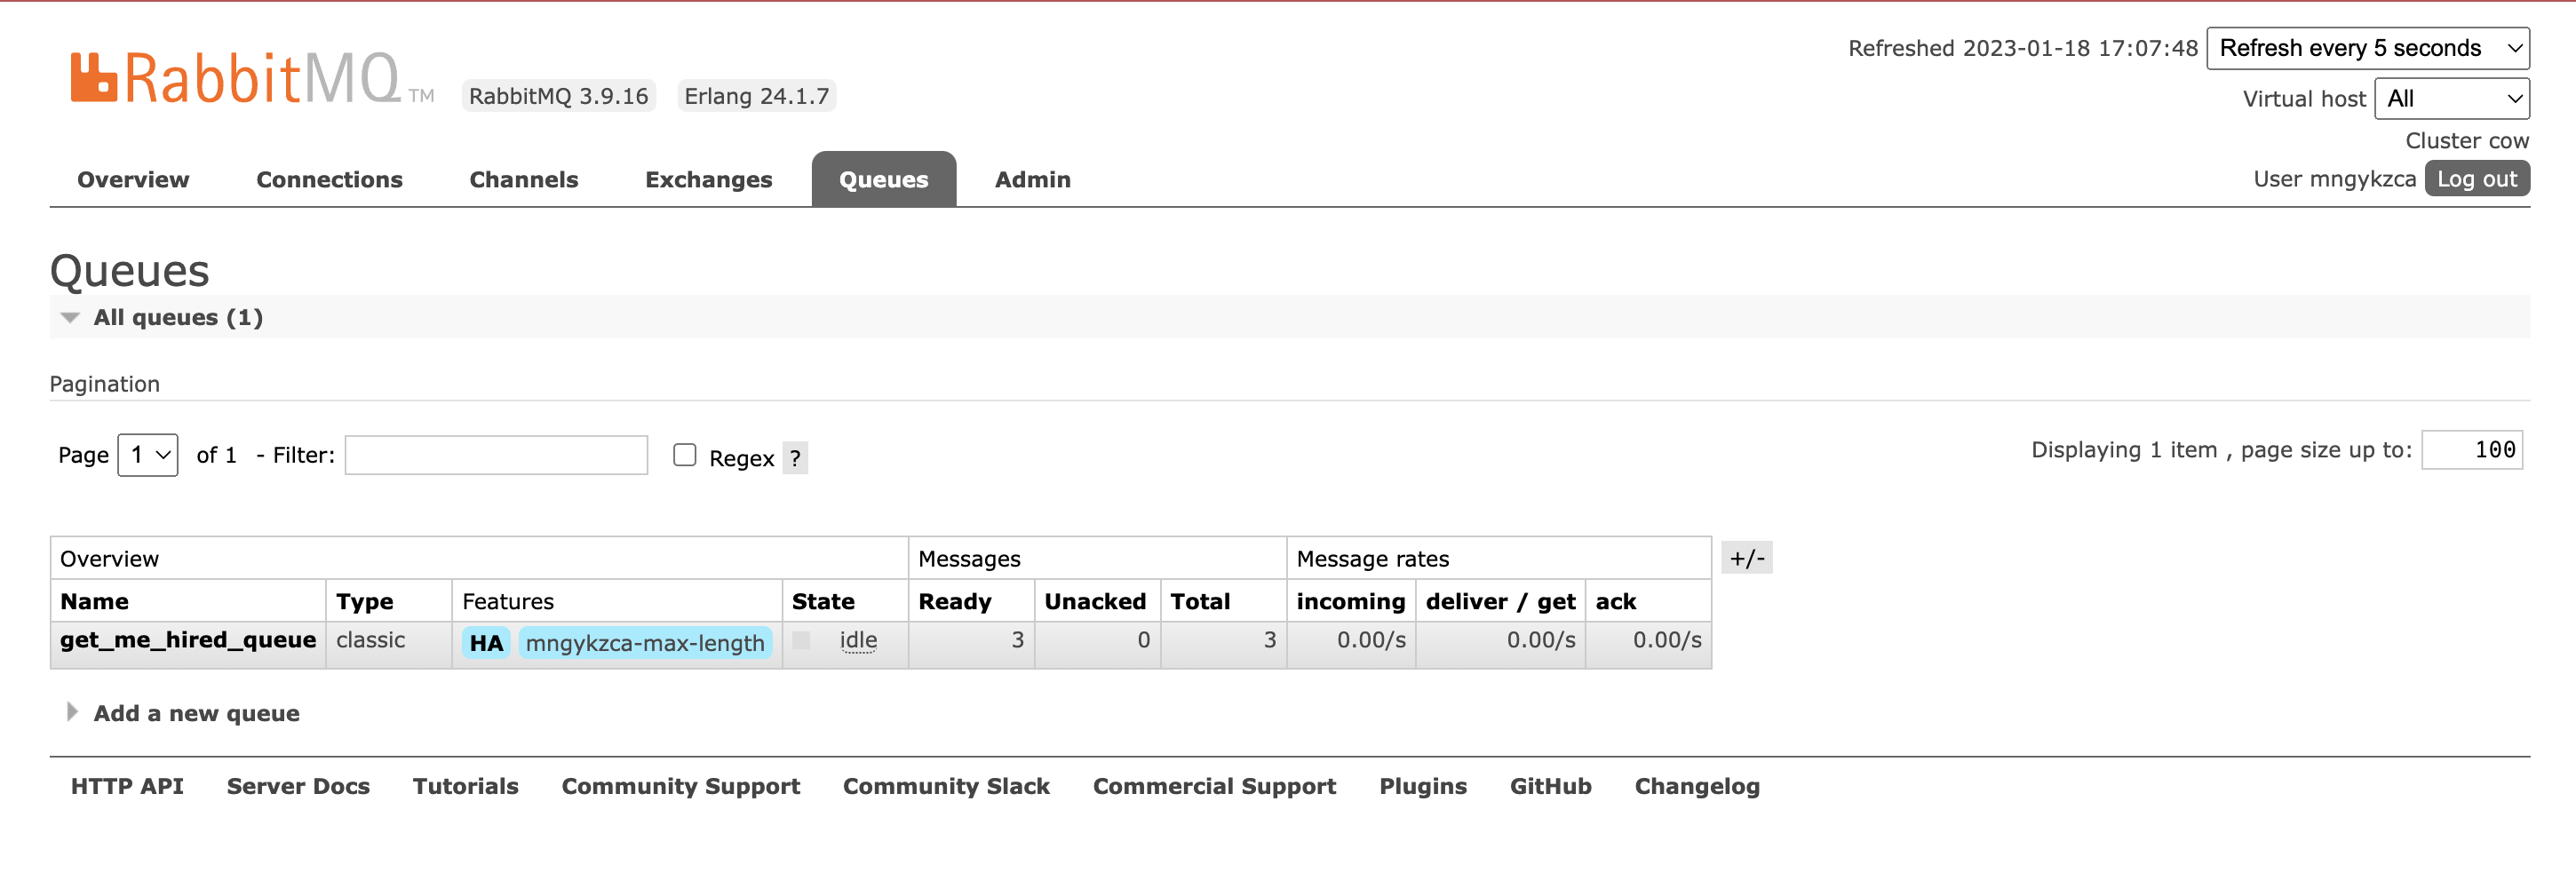
You will be taken to the RabbitMQ admin page. From there, select the
Queues tab. If everything works, you should see the
get_me_hired_queue
listed on that page and the number of messages the queue holds(in my case 3).
Clicking on the queue would also allow you to see other things like the
bindings on the queue. See the image below.
Figure 7 - Declared queues
And that’s pretty much it.
Conclusion
In this article, we built a minimal REST API backend from scratch with
FastAPI. Overall, we are seeking to implement a distributed architecture
with two services, and this is the first service.
The goal of this service is to have producers that receive requests
from users and forward them to CloudAMQP.
The next article will walk us through implementing the second service
that will serve as the consumer of messages in this architecture.
We’d be happy to hear from you! Please leave your suggestions, questions,
or feedback in the comment section below or get in touch with us at
contact@cloudamqp.com
Guide — Microservices and Message Queues
CloudAMQP - industry-leading RabbitMQ as a Service
Fully managed RabbitMQ clusters on all major clouds. Free plan available - no credit card required.

 Nyior Clement