How to create virtual hosts in LavinMQ
Vhosts let you divide your LavinMQ instance into separate logical workspaces. Each workspace has its connections, exchanges, queues, bindings, user permissions, and policies. This allows you to keep environments separated.
Vhosts do not separate physical resources. They share the same resources within the instance where they’re created. High activity in one vhost can affect the performance of others.
This tutorial explains how to create vhosts in LavinMQ step by step. It covers both the Management UI and the HTTP API.
Creating vhosts using the Management UI
- Log in to your CloudAMQP account.
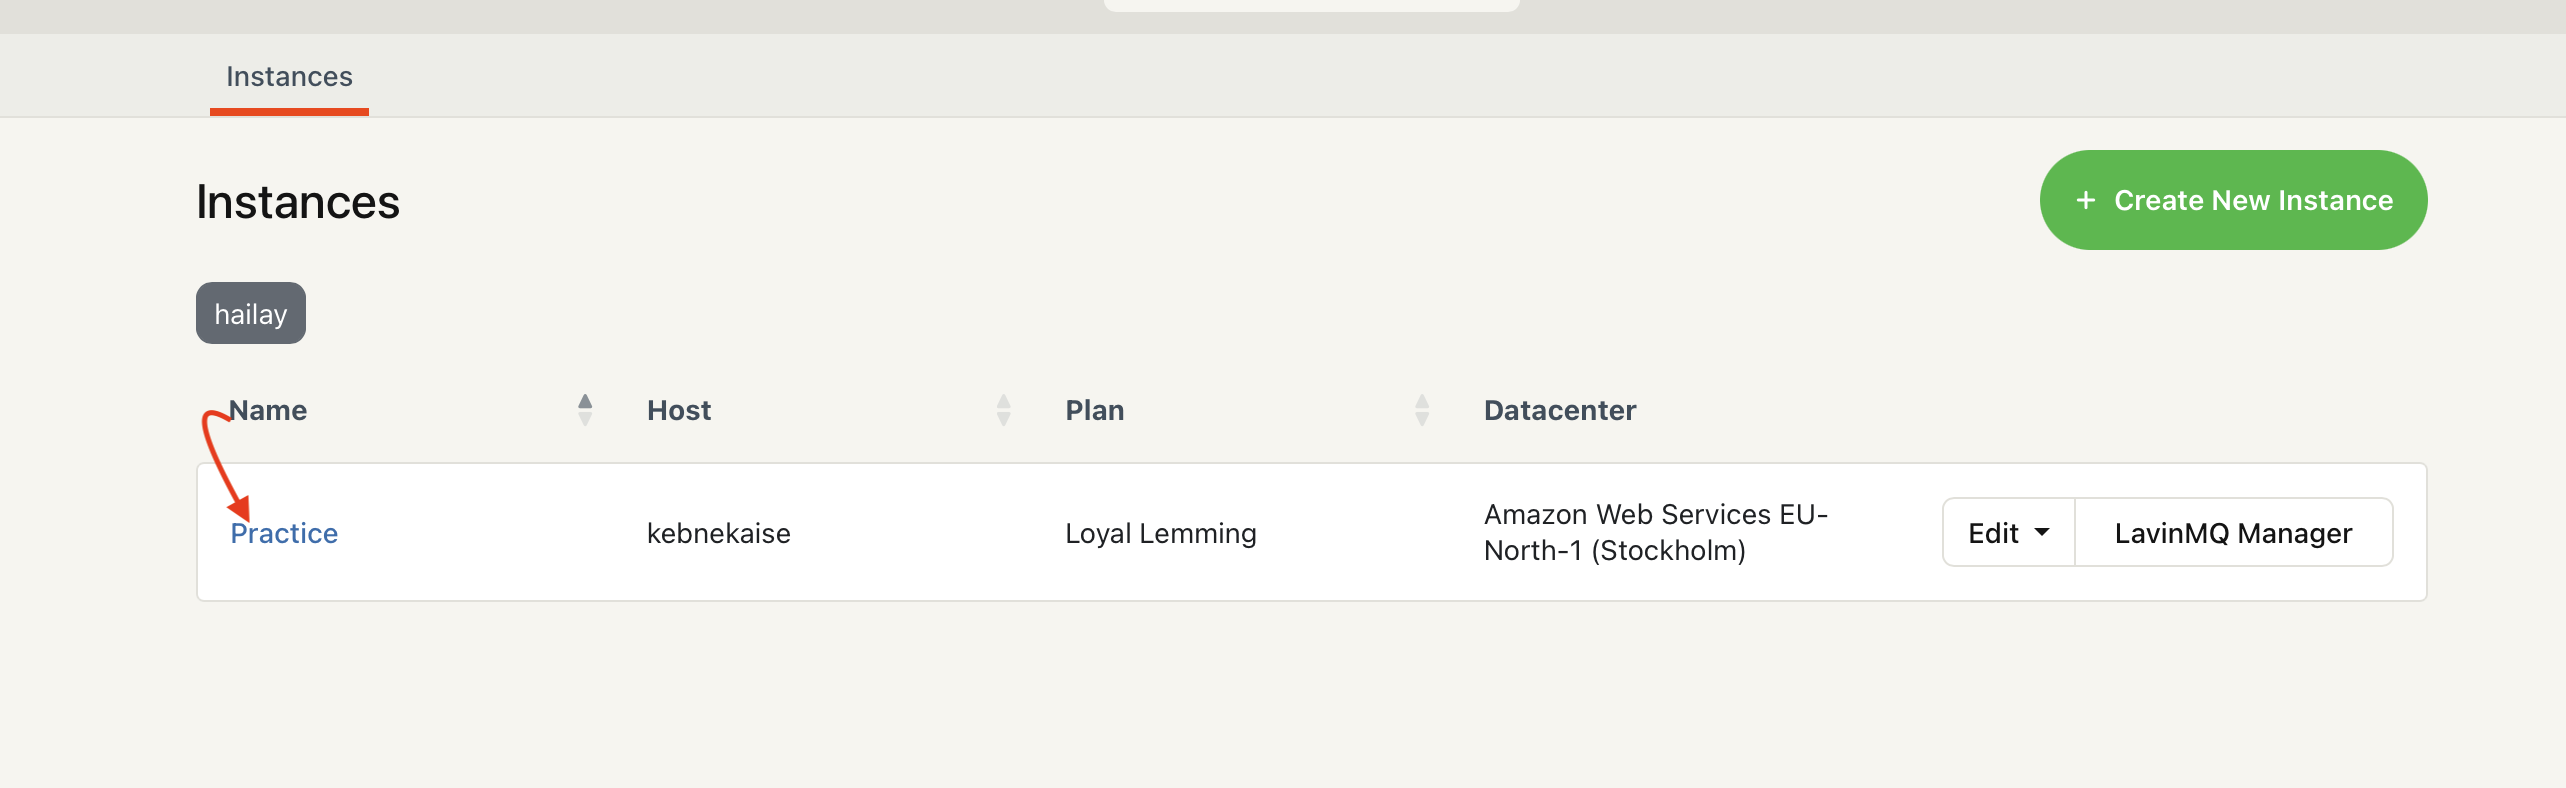
- Click the instance name under the name column (indicated by a red arrow in the screenshot below). If you don't have an instance yet, go ahead and create one first
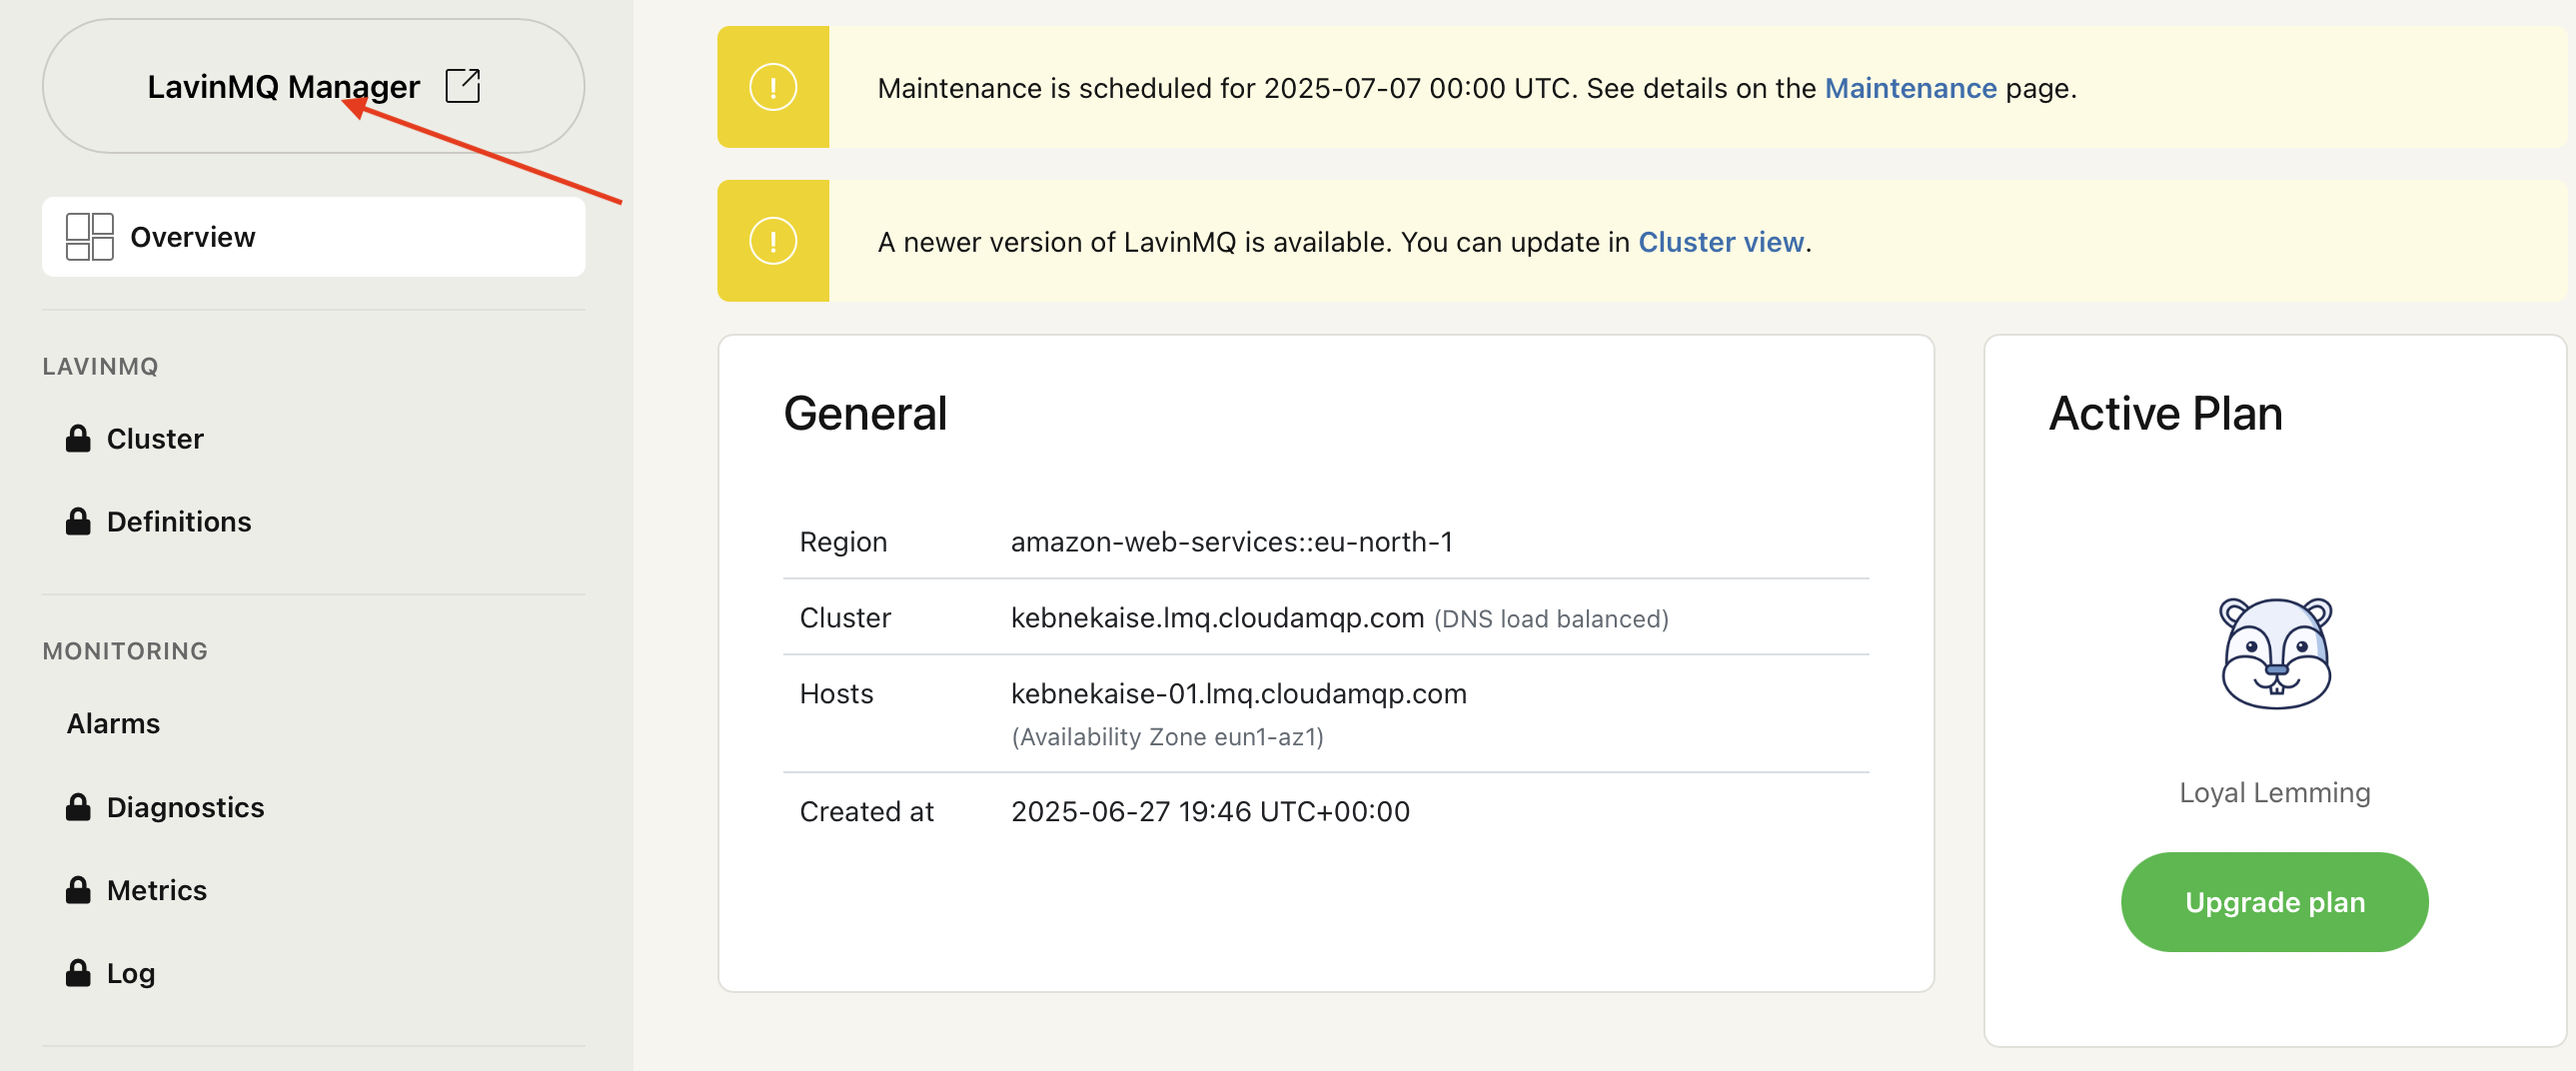
- Click LavinMQ Manager at the top-left corner (indicated by a red arrow in the screenshot below)
-
Click Virtual Hosts in the left-hand menu (indicated by a red arrow in the screenshot below)

- Enter a name for your Vhost in the field indicated by a yellow arrow in the screenshot above and click Add virtual hosts.
- Go to the Users section, select a user, and assign permissions for the new virtual host. For more details on how to configure permissions, see managing permissions in LavinMQ.
If you are using the CloudAMQP free plan, you will not be able to add vhosts. Each user has only one virtual host, which is the default one. To create more, consider upgrading to a paid plan.
Creating vhosts using LavinMQ HTTP API
To create a new Vhost, run:
curl -u <username>:<password> -X PUT https://<host>/api/vhosts/<vhost_name>To check if the virtual host was created successfully, run:
STATUS=$(curl -s -o /dev/null -w "%{http_code}" -u <username>:<password> https://<host>/api/vhosts/<vhost_name>);
if [ "$STATUS" -eq 200 ]; then
echo "Vhost created"
elif [ "$STATUS" -eq 404 ]; then
echo "Vhost not found"
else
echo "Unexpected response: $STATUS"
fi- Returns “Vhost created” if the user exists
- Returns “Vhost not found” if the user does not exist
- Any other response indicates an unexpected issue
Replace the placeholders:
-
<username>and<password>With your LavinMQ HTTP API credentials -
<host>With your instance’s API URL -
<vhos_namet>with the name you’d like to use
You will find all of these details on your CloudAMQP instance’s overview page.
By default, new vhosts contain exchanges, but no users and permissions. Users must have permissions to connect and use them. See managing permissions in LavinMQ.