Introducing OAuth 2.0 configuration from the CloudAMQP console and API
We're excited to announce that it's now possible to configure OAuth 2.0 for your RabbitMQ clusters. This new feature gives you the freedom to set up and manage OAuth 2.0 authentication directly, without requiring assistance from our support team.
What is OAuth 2.0 and why does it matter?
OAuth 2.0 is an industry-standard authorization protocol that enables secure access to resources without credential sharing. Implementing OAuth 2.0 for your clusters provides further security through token-based authentication. It also allows for integration with third-party applications and services and to control access for team members. Configuring OAuth 2.0 supports integration with identity providers such as UAA, Keycloak, Auth0, Azure, and Okta. With self-service configuration, you can set up OAuth 2.0 at your convenience and make immediate adjustments as your needs change.
How to configure OAuth 2.0 for your RabbitMQ clusters
To configure OAuth 2.0 for your cluster, follow these steps:
-
Setup an OAuth 2.0 application on your resource identity provider
- The steps to do so may differ on the specific resource provider. But the following general steps are usually required:
- Create an application/client and or API for RabbitMQ
- Set it to a Single Page Application (SPA)
- Make sure that the application login URI maps to the RabbitMQ cluster
-
Some applications require a callback or redirect URI as well, that should be set to
/js/oidc-oauth/login-callback.html - Remember the domain and client ID before going to the console
-
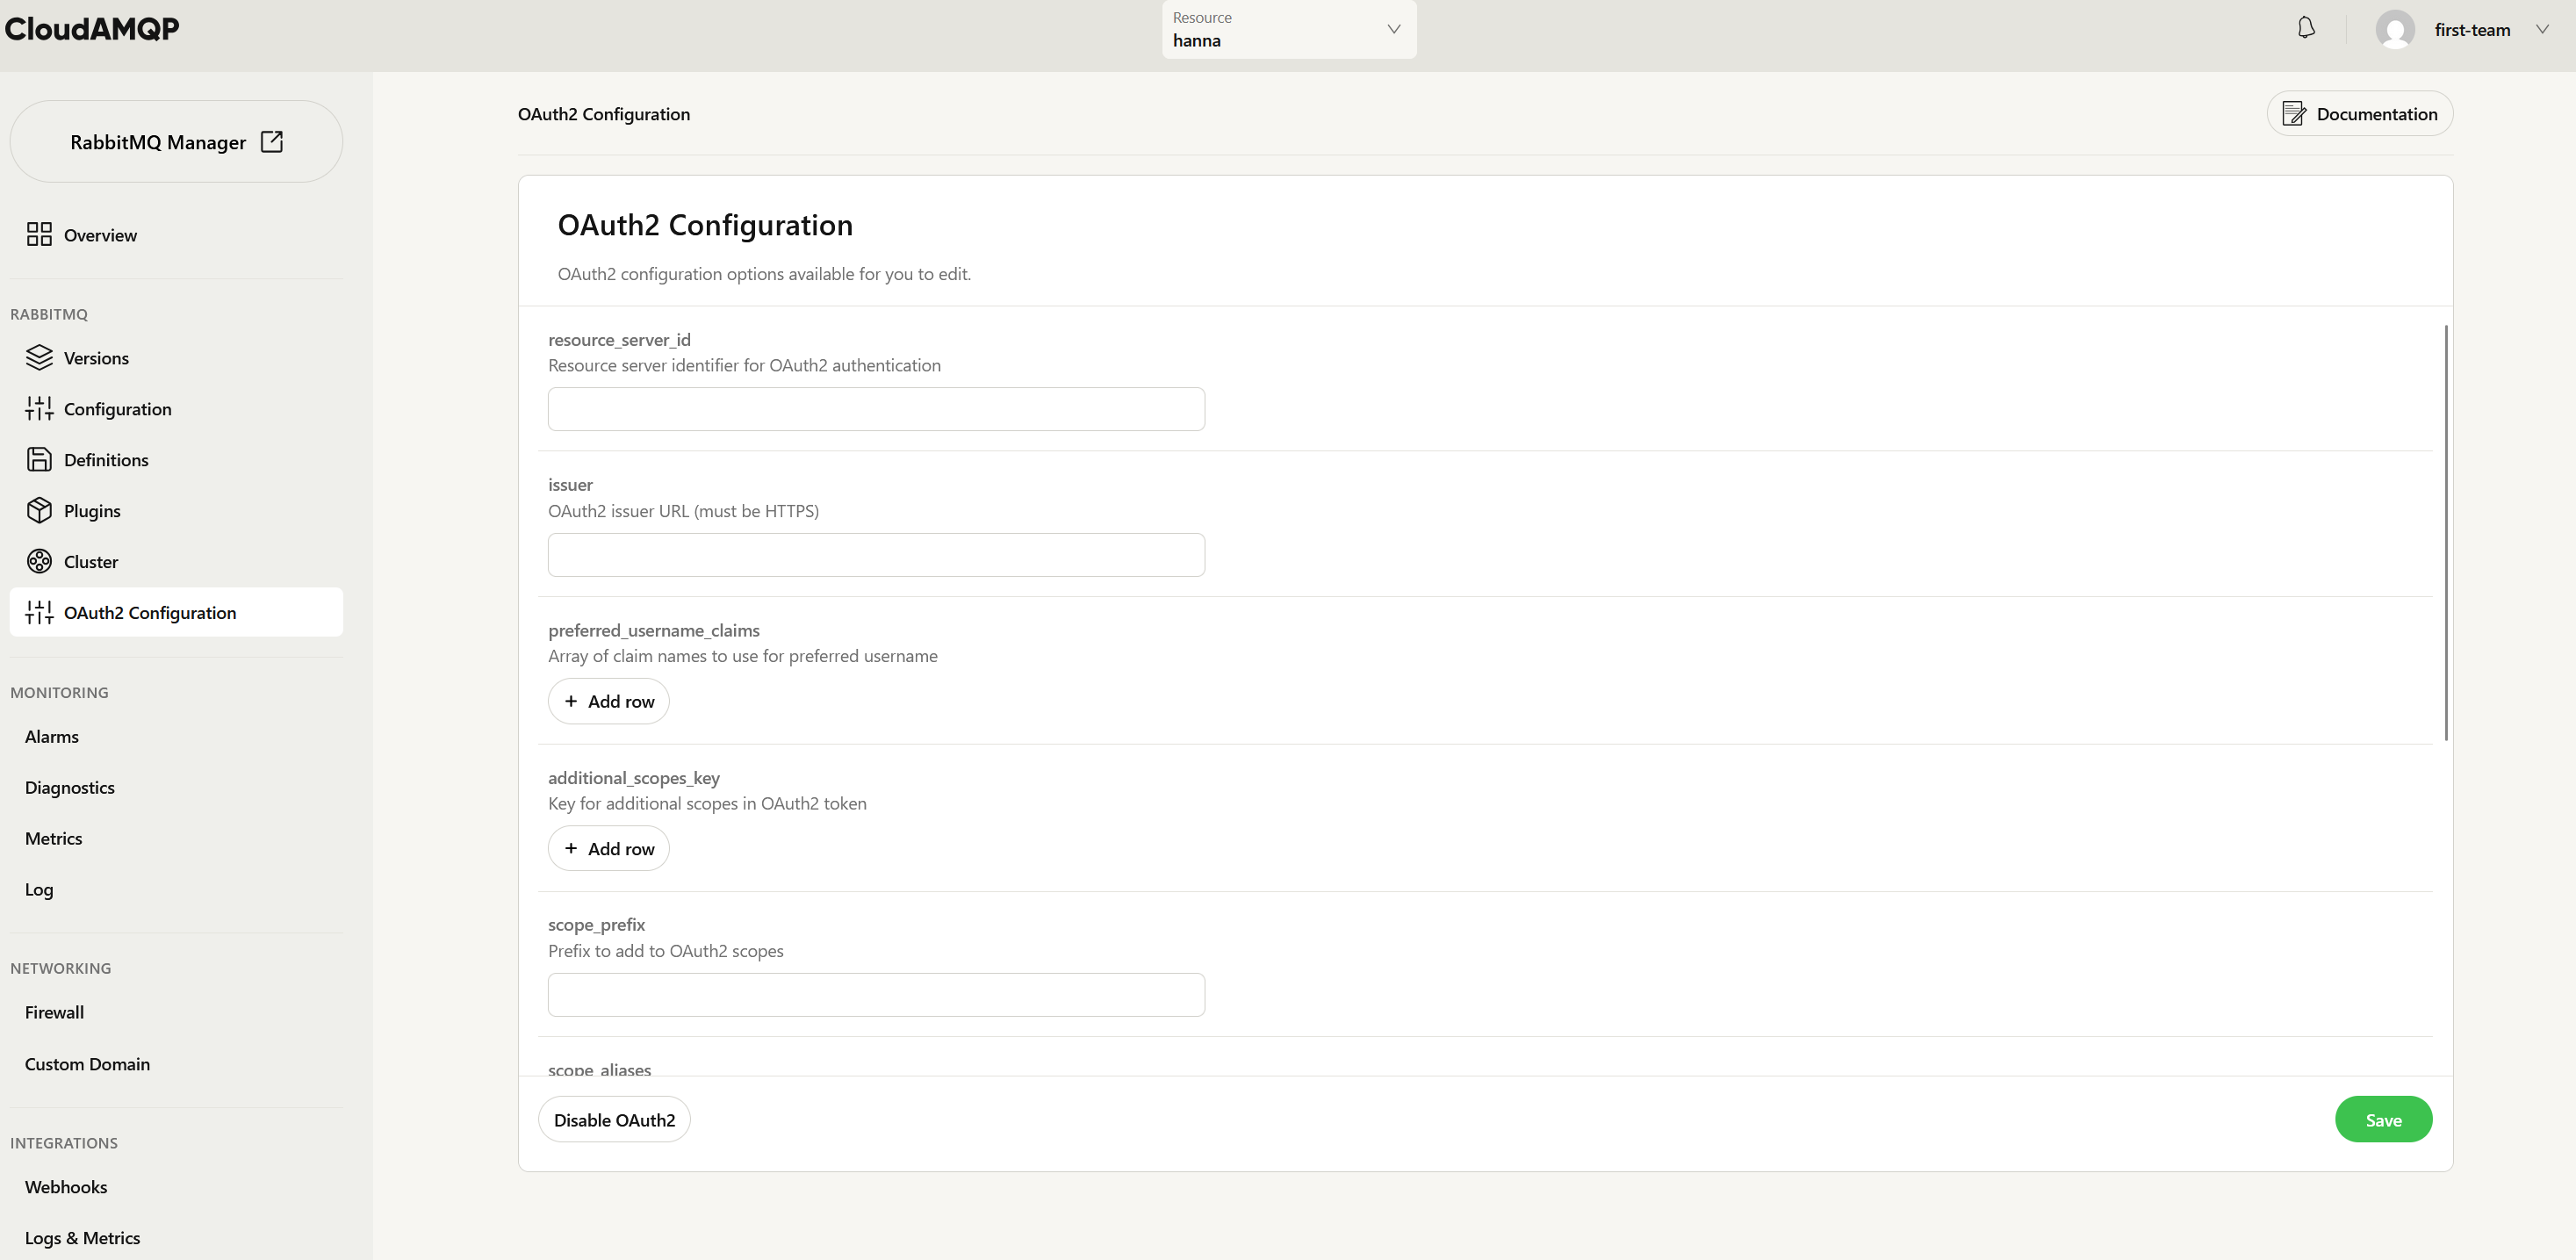
In the console under RabbitMQ find → OAuth 2.0 configuration
-
Enter the identifier that represents your RabbitMQ instance as an OAuth 2.0 resource server in the
resource_server_idfield. Note that this value should match what you configure in your OAuth provider as the audience for RabbitMQ (it's usually the same as the name of your OAuth 2.0 application). -
In the
issuerfield, enter the URL of your OAuth 2.0 authorization server. This will be the domain that was generated by your OAuth 2.0 application. -
In the
client_idfield enter the client ID that was generated by your OAuth 2.0 application. -
Enable
verify_audunless the instance is a test or development instance.
-
Enter the identifier that represents your RabbitMQ instance as an OAuth 2.0 resource server in the
-
Configure permissions/scopes in your OAuth 2.0 provider
- At your OAuth 2.0 provider, configure scopes that match RabbitMQ's permission model:
-
{resource_server_id}.configure:vhost/resource- Configure permissions -
{resource_server_id}.read:vhost/resource- Read permissions -
{resource_server_id}.write:vhost/resource- Write permissions -
{resource_server_id}.tag:management- Management UI access
Create a user or role in your resource provider and add these permissions. Make sure to add them under
oauth_scopesin the console.Save your changes in the console. After saving, a broker restart is required for the changes to take effect.
Please note: If your clusters already have OAuth 2.0 configured and you want them visible in the console, you must manually add them and click save Please reach out to us if you’re experiencing issues or need help.
We hope you like this feature and if you're experiencing difficulties with setting up or running OAuth 2.0, please reach out to support@cloudamqp.com for assistance. Our support team is ready to help you.
Share your feedback
This self-service configuration is part of our effort to expand the level of self control for your cluster. We'd love to hear your feedback. Share your thoughts and suggestions with us on contact@cloudamqp.com