There are two primary ways to use CA certificates with RabbitMQ. Verification can be used for the source of the connection request or a user. To
use CA certificates on CloudAMQP, a dedicated server is required to enable the rabbitmq_auth_mechanism_ssl plugin.
Part 1
of this series explains core concepts and benefits of using CA certificates with RabbitMQ.
This first section will demonstrate how to configure a client to present its certificates to a RabbitMQ cluster. In the second section we show how to configure clients for certificate based authentication. Finally, we will demonstrate a special case with shovels. Examples in this post use the Python PIka client library here, but most other libraries utilize similar concepts to managing client certificates.
Verifying client machines
In this section, we describe how to configure both RabbitMQ and an AMQP client for the case where client certificates are required and user credentials are also passed to RabbitMQ.
On the RabbitMQ side, the important SSL configuration parameters are as follows:
- verify (default ‘none’): This setting specifies whether or not RabbitMQ will check for client certificates. The value ‘none’ is the default alue, which means that RabbitMQ will not check for client certs. To force RabbitMQ to check, set the value to “verify_peer”. Note that clients that do not include certs will not automatically fail authentication if just this value is set.
- fail_if_no_peer_cert (default ‘false’): When this parameter is set to ‘true’, RabbitMQ will require clients to include certs if they are to successfully connect.
For the current case of verifying the client machine, we will use the following settings:
verify=verify_peer
fail_if_no_peer_cert=true
On the client side, we will need to include certificates in the connection parameters. We will include the client username and password in addition to the client certificates. Most AMQP libraries will use the programming language’s TLS/SSL default library for the TLS configuration.
In Python, the TLS library is ssl. The following snippet of code will initialize the TLS context and add the client’s certificates. It also
explicitly includes the root CA for the CloudAMQP RabbitMQ server.
import ssl

# here we are explicitly setting the CA to contain the root CA from Let's Encrypt.
context = ssl.create_default_context(cafile=f"{certDir}/isrgrootx1.pem")
context.verify_mode = ssl.CERT_REQUIRED
context.load_cert_chain(
certfile=f"{certDir}/client-cert.pem",
keyfile=f"{certDir}/client-key.pem"
)
The client certs are located in the path specified by the variable certDir. You will need to point this value to the folder
that contains the client certs.
Now that the SSL context has been established, we need to pass it to the Pika client library.
ssl_options = pika.SSLOptions(context)
Finally, we need to pass those ssl_options to our connection parameters and use those parameters to open the connection. This can be done as follows:
import pika
credentials = pika.PlainCredentials(username,password)
conn_params = pika.ConnectionParameters(
	  port=5671,
	  host=host,
	  virtual_host=virtualHost,
	  ssl_options=ssl_options,
	  credentials=credentials
   )
   conn = pika.BlockingConnection(conn_params)
host, virtualHost and credentials must be specified to match your RabbitMQ cluster's properties.
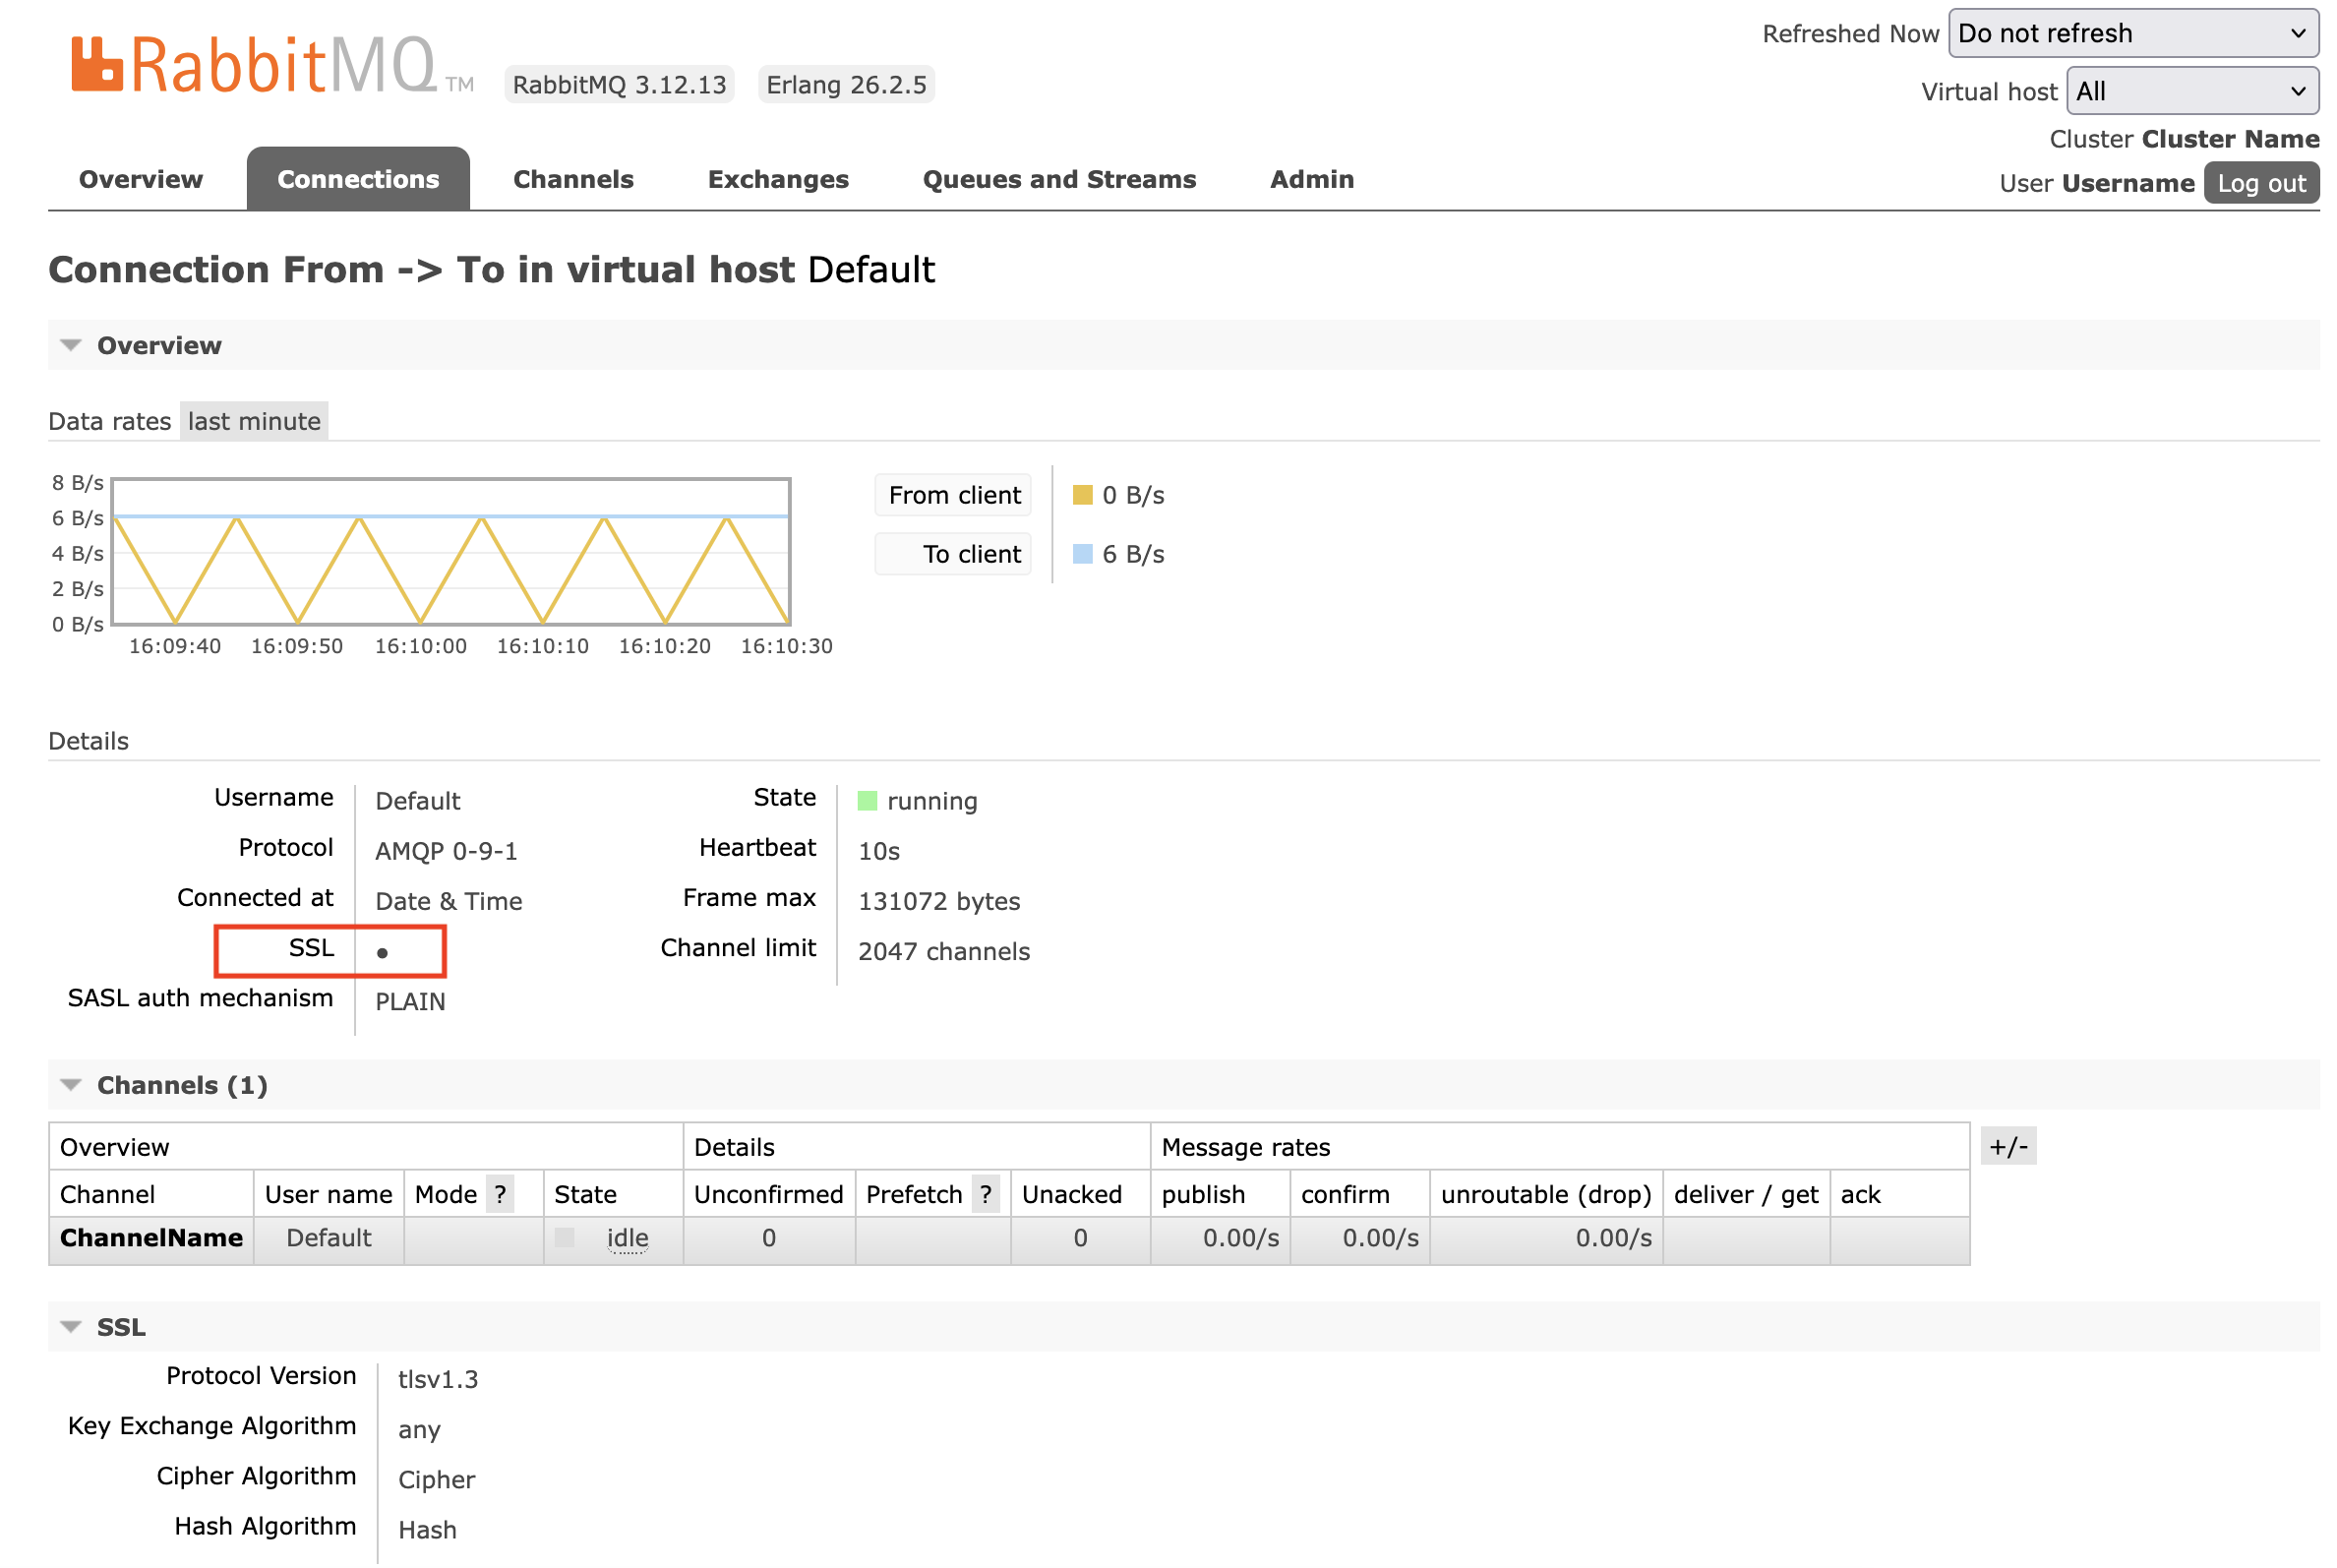
Once the connection is successfully opened, we can look for it in the RabbitMQ management interface. Navigate to the connections tab and select the
connection. Filter if needed.
Client configuration for cert-based authentication [not really recommended]
For the case where the client certificate is to be used as the client’s credentials, a few changes need to be made to the above case.
The auth_mechanisms configuration parameter must include 'EXTERNAL' e.g.,
{auth_mechanisms, ['PLAIN', 'AMQPLAIN', 'EXTERNAL']}
There are several options for the source of the username in the client, including common_name and subject_alternative_name.
Note that additional parameters can be set according to the documentation of the ssl auth plugin
here.
A RabbitMQ restart is necessary after changing this configuration in order for it to take effect.
The plugin rabbitmq_auth_mechanism_ssl must be enabled (this is installed, but not enabled, by default on CloudAMQP RabbitMQ clusters).
All users specified by client certificates must be created. That can be done using the RabbitMQ management interface. Go to the `admin` then ‘users’ view. In the ‘add user’ section, type in the username and specify "no password".
The client code will look similar to the above case where user credentials are included. The difference is in the credentials parameter of the connection parameters. Here is an example of doing so with Python Pika:
conn_params = pika.ConnectionParameters(
	  port=5671,
	  host=host,
	  virtual_host=virtualHost,
	  credentials = pika.credentials.ExternalCredentials(),
	  ssl_options=ssl_options
   )
The change from the username/password parameter is the ‘credentials’ parameter. This lets RabbitMQ know to use the “External credentials” authentication mechanism, which is the client certificates.
Special case: use client certs with a RabbitMQ shovel or federation
RabbitMQ contains a built-in AMQP client that can be used to transfer messages across clusters. That client is used for the shovel and federation plugins. It can be configured to use client certificates in the same way as any other AMPQ client library.
What follows is an example for setting up a shovel where RabbitMQ will use client certificates that are stored on the RabbitMQ server. Set the cert paths in the url string for the shovel. If the CloudAMQP cluster is hosting the shovel, the cacertfile will need to include the root certificate of the other RabbitMQ cluster. CloudAMQP customers can request support to install a custom cacert file on their server.
Examples:
With a username and password included
amqps://user:password@server-name?cacertfile=/etc/rabbitmq/ca.pem&certfile=/etc/rabbitmq/cert.pem&keyfile=/etc/rabbitmq/key.pem&verify=verify_peer
If using the certs for authentication, then the username and password will not be included in the URI. Note that the additional URL parameter
auth_mechanism is included where its value is set to external.
amqps://server-name?cacertfile=/etc/rabbitmq/cacert.pem&certfile=/etc/rabbitmq/cert.pem&keyfile=/etc/rabbitmq/key.pem&verify=verify_peer&auth_mechanism=external
Some customers simply need to validate the certificates of the target RabbitMQ cluster of a shovel or federation. In that case, the needed root certificate can be uploaded to the CloudAMQP RabbitMQ cluster, and the URL parameter cacertfile can point to that custom certificate on disk. The support team at CloudAMQP can help with this configuration.
Conclusion
Using CA certificates is a great step to enhance security for your clients. This blog covered core concepts and how to start using CA certificates with CloudAMQP. For further reading we recommend the RabbitMQ SSL documentation. and our FAQ section. Contact our support team when you are ready to configure your RabbitMQ with a custom certificate.
🙋 Need help? CloudAMQP is here to support your message broker configuration. Contact us for support if you have any questions and or requests.