Part 2.2 of RabbitMQ for beginners explains how to get started with RabbitMQ and Node.js.
This tutorial follow the scenario used in the previous article, Part 1: RabbitMQ for beginners - What is RabbitMQ? where a web application allows users to upload user information. The web site will handle the information and generate a PDF and email it back to the user. Generation the PDF and sending the email will in this scenario take several seconds. If you are not familiar with RabbitMQ and message queuing, I would recommend you to read RabbitMQ for beginners - what is RabbitMQ? before starting with this guide.
A you tube video describing the setup, Getting Started with RabbitMQ and CloudAMQP: Node.js & amqplib, can be found on the bottom of this page.

Getting started with RabbitMQ and Node.js
Start by downloading the client-library for Node.js. Node developers
have a number of options for AMQP client libraries.
In this example
amqplib
will be used.
Start by adding
amqplib
as a dependency to your
package.json
file.
You need a RabbitMQ instance to get started. A free RabbitMQ instance can be set up for test in CloudAMQP, read about how to set up an instance here.
When running the full code given, a connection will be established between the RabbiMQ instance and your application. Queues and exchanges will be declared and created if they do not already exist and finally a message will be published. The publish method will queue messages internally if the connection is down and resend them later. The consumer subscribes to the queue. The messages are handled one by one and sent to the PDF processing method.
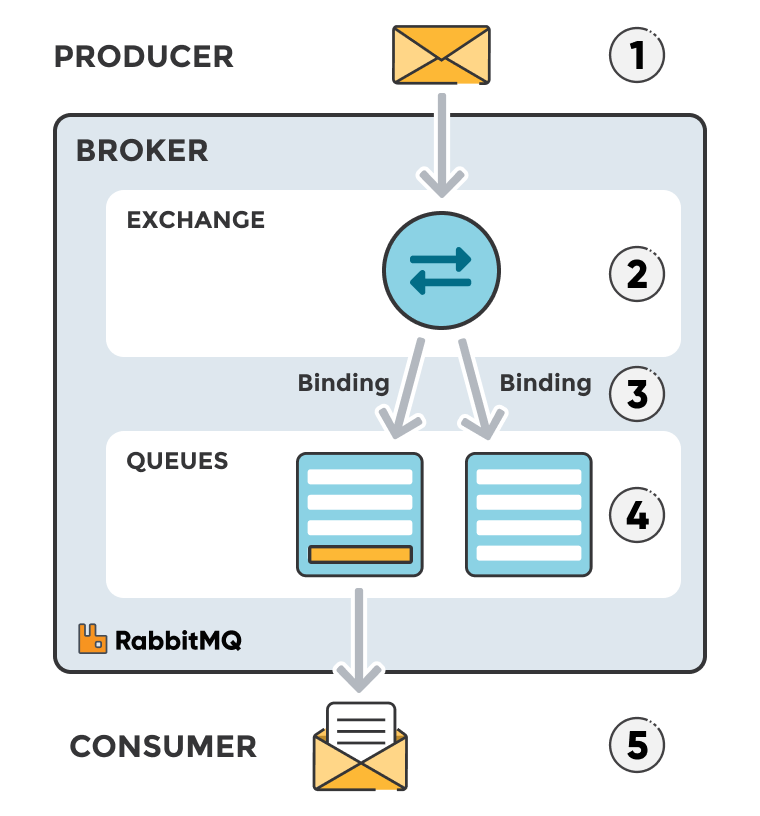
A new message will be published every second. A default exchange, identify by the empty string ("") will be used. The default exchange means that messages are routed to the queue with the name specified by routing_key, if it exists. (The default exchange is a direct exchange with no name)
Full code can be downloaded from GitHub.

Tutorial source code
Load amqplib
# Access the callback-based API
var amqp = require('amqplib/callback_api');
var amqpConn = null;
Set up a connection
function start() {
  amqp.connect(process.env.CLOUDAMQP_URL + "?heartbeat=60", function(err, conn) {
    if (err) {
      console.error("[AMQP]", err.message);
      return setTimeout(start, 1000);
    }
    conn.on("error", function(err) {
      if (err.message !== "Connection closing") {
        console.error("[AMQP] conn error", err.message);
      }
    });
    conn.on("close", function() {
      console.error("[AMQP] reconnecting");
      return setTimeout(start, 1000);
    });
    console.log("[AMQP] connected");
    amqpConn = conn;
    whenConnected();
  });
}
The
start
function will establish a connection to RabbitMQ. If the connection is
closed or fails to be established, it will try to reconnect.
amqpConn
will hold the connection and channels will be set up in the connection.
whenConnected
will be called when a connection is established.
function whenConnected() {
  startPublisher();
  startWorker();
}
The function
whenConnected
calls two function, one function that starts the publisher
and one that starts the worker (the consumer).
Start the publisher
var pubChannel = null;
var offlinePubQueue = [];
function startPublisher() {
  amqpConn.createConfirmChannel(function(err, ch) {
    if (closeOnErr(err)) return;
    ch.on("error", function(err) {
      console.error("[AMQP] channel error", err.message);
    });
    ch.on("close", function() {
      console.log("[AMQP] channel closed");
    });

    pubChannel = ch;
    while (true) {
      var [exchange, routingKey, content] = offlinePubQueue.shift();
      publish(exchange, routingKey, content);
    }
  });
}
createConfirmChannel
opens a channel which uses "confirmation mode".
A channel in confirmation mode require each published message to be 'acked'
or 'nacked' by the server, thereby indicating that it has been handled.
offlinePubQueue
is an internal queue for messages that could not be sent when the application was offline.
The application will check this queue and send the messages in the queue if a
message is added to the queue.
Publish
function publish(exchange, routingKey, content) {
  try {
    pubChannel.publish(exchange, routingKey, content, { persistent: true },
                      function(err, ok) {
                        if (err) {
                          console.error("[AMQP] publish", err);
                          offlinePubQueue.push([exchange, routingKey, content]);
                          pubChannel.connection.close();
                        }
                      });
  } catch (e) {
    console.error("[AMQP] publish", e.message);
    offlinePubQueue.push([exchange, routingKey, content]);
  }
}
The
publish
function will publish a message to an exchange with a given routing key.
If an error occurs the message will be added to the internal queue,
offlinePubQueue
Consumer
// A worker that acks messages only if processed successfully
function startWorker() {
  amqpConn.createChannel(function(err, ch) {
    if (closeOnErr(err)) return;
    ch.on("error", function(err) {
      console.error("[AMQP] channel error", err.message);
    });
    ch.on("close", function() {
      console.log("[AMQP] channel closed");
    });

    ch.prefetch(10);
    ch.assertQueue("jobs", { durable: true }, function(err, _ok) {
      if (closeOnErr(err)) return;
      ch.consume("jobs", processMsg, { noAck: false });
      console.log("Worker is started");
    });
  });
}
amqpConn.createChannel
creates a channel on the connection.
ch.assertQueue
assert a queue into existence.
ch.consume
sets up a consumer with a callback to be invoked with each message it
receives. The function called for each message is called
processMsg
function processMsg(msg) {
  work(msg, function(ok) {
    try {
      if (ok)
        ch.ack(msg);
      else
        ch.reject(msg, true);
    } catch (e) {
      closeOnErr(e);
    }
  });
}
processMsg
processes the message. It will call the work function
and wait for it to finish.
function work(msg, cb) {
  console.log("PDF processing of ", msg.content.toString());
  cb(true);
}
The
work
function include the handling of the message information and
the creation of the PDF. It is in this example a todo-function.
Close the connection on error
function closeOnErr(err) {
  if (!err) return false;
  console.error("[AMQP] error", err);
  amqpConn.close();
  return true;
}
Publish
setInterval(function() {
  publish("", "jobs", new Buffer("work work work"));
}, 1000);

start();
A new message will be published every second. A default exchange, identify by the empty string ("") will be used. The default exchange means that messages are routed to the queue with the name specified by routing_key, if it exists. (The default exchange is a direct exchange with no name)
More information about Node.js and CloudAMQP can be found here.
You Tube Video: Getting Started with RabbitMQ and CloudAMQP: Node.js & amqplib
Please email us at contact@cloudamqp.com if you have any suggestions or feedback.
