Migrate to CloudAMQP from AmazonMQ
You’ve been hosting your RabbitMQ cluster on AmazonMQ and now you want to migrate to CloudAMQP?
This guide will walk you through how to do that with queue-federation. Before we jump into the migration steps, let’s clarify some key terms.
Key terms
-
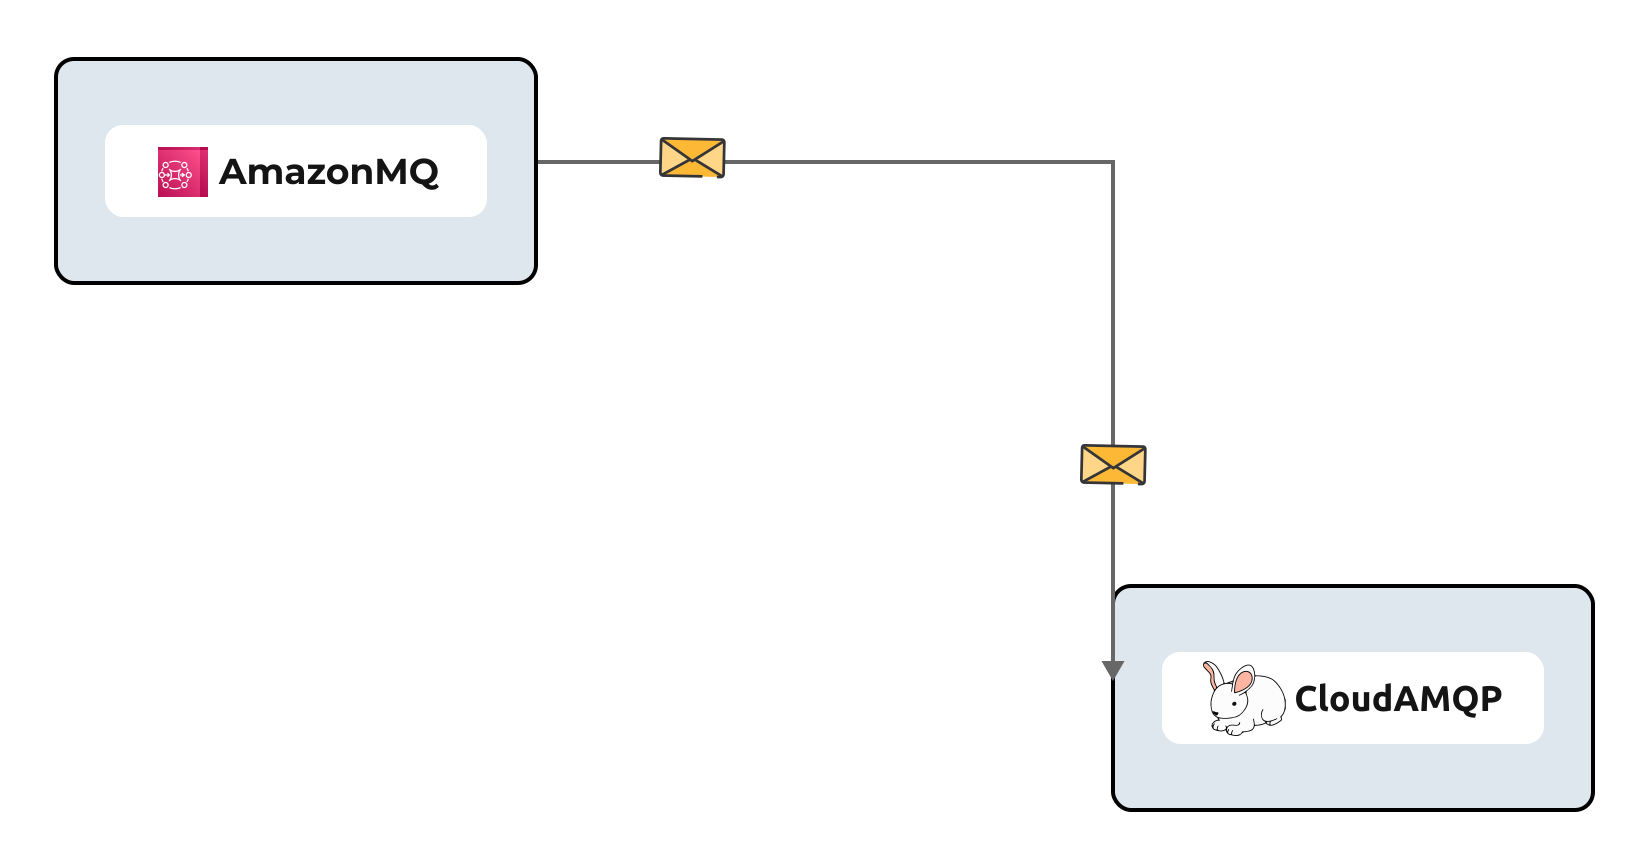
Upstream cluster: This is where messages are published to, initially.
-
Downstream cluster: This is where the messages get forwarded to from the upstream cluster.
In our case, the upstream is the RabbitMQ cluster on AmazonMQ and the downstream is the new RabbitMQ cluster on CloudAMQP you are migrating to.
Next, take the following steps to migrate.
Step 1: Choose a CloudAMQP plan
- Decide the right CloudAMQP plan for your workload. Our team is happy to make recommendations, if you need help with sizing or general guidance on migrating.
Step 2: Create a downstream cluster
-
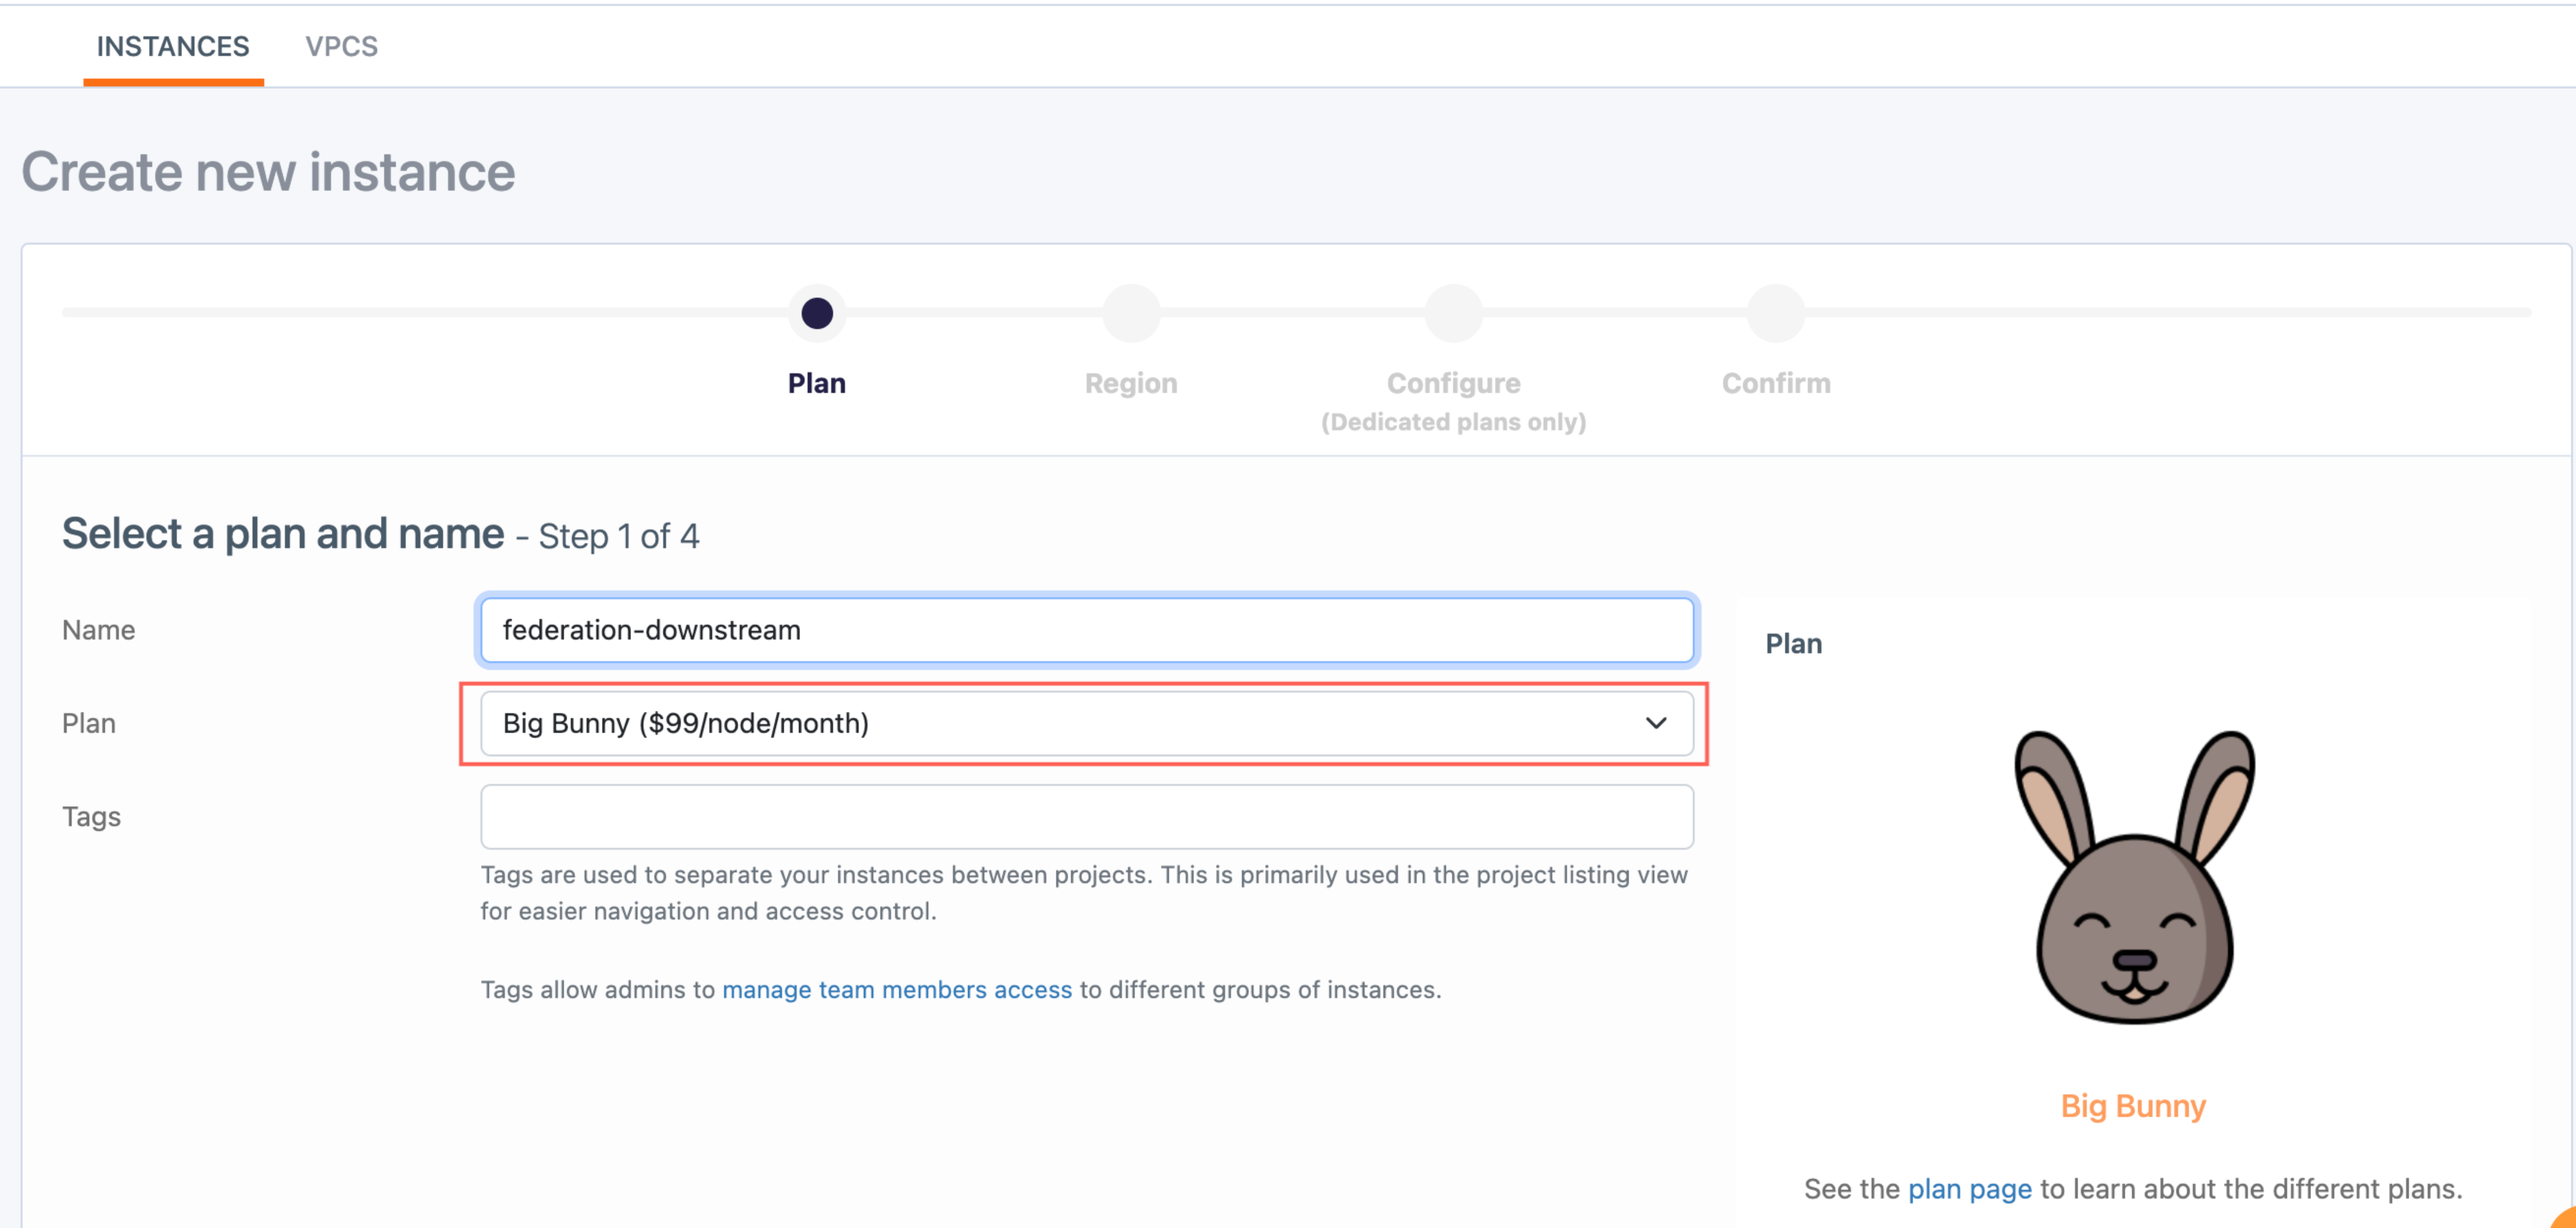
Create a RabbitMQ instance on CloudAMQP based on your selected plan. We also encourage you to consider migrating to our highly performant and super easy to use message broker, LavinMQ.
-
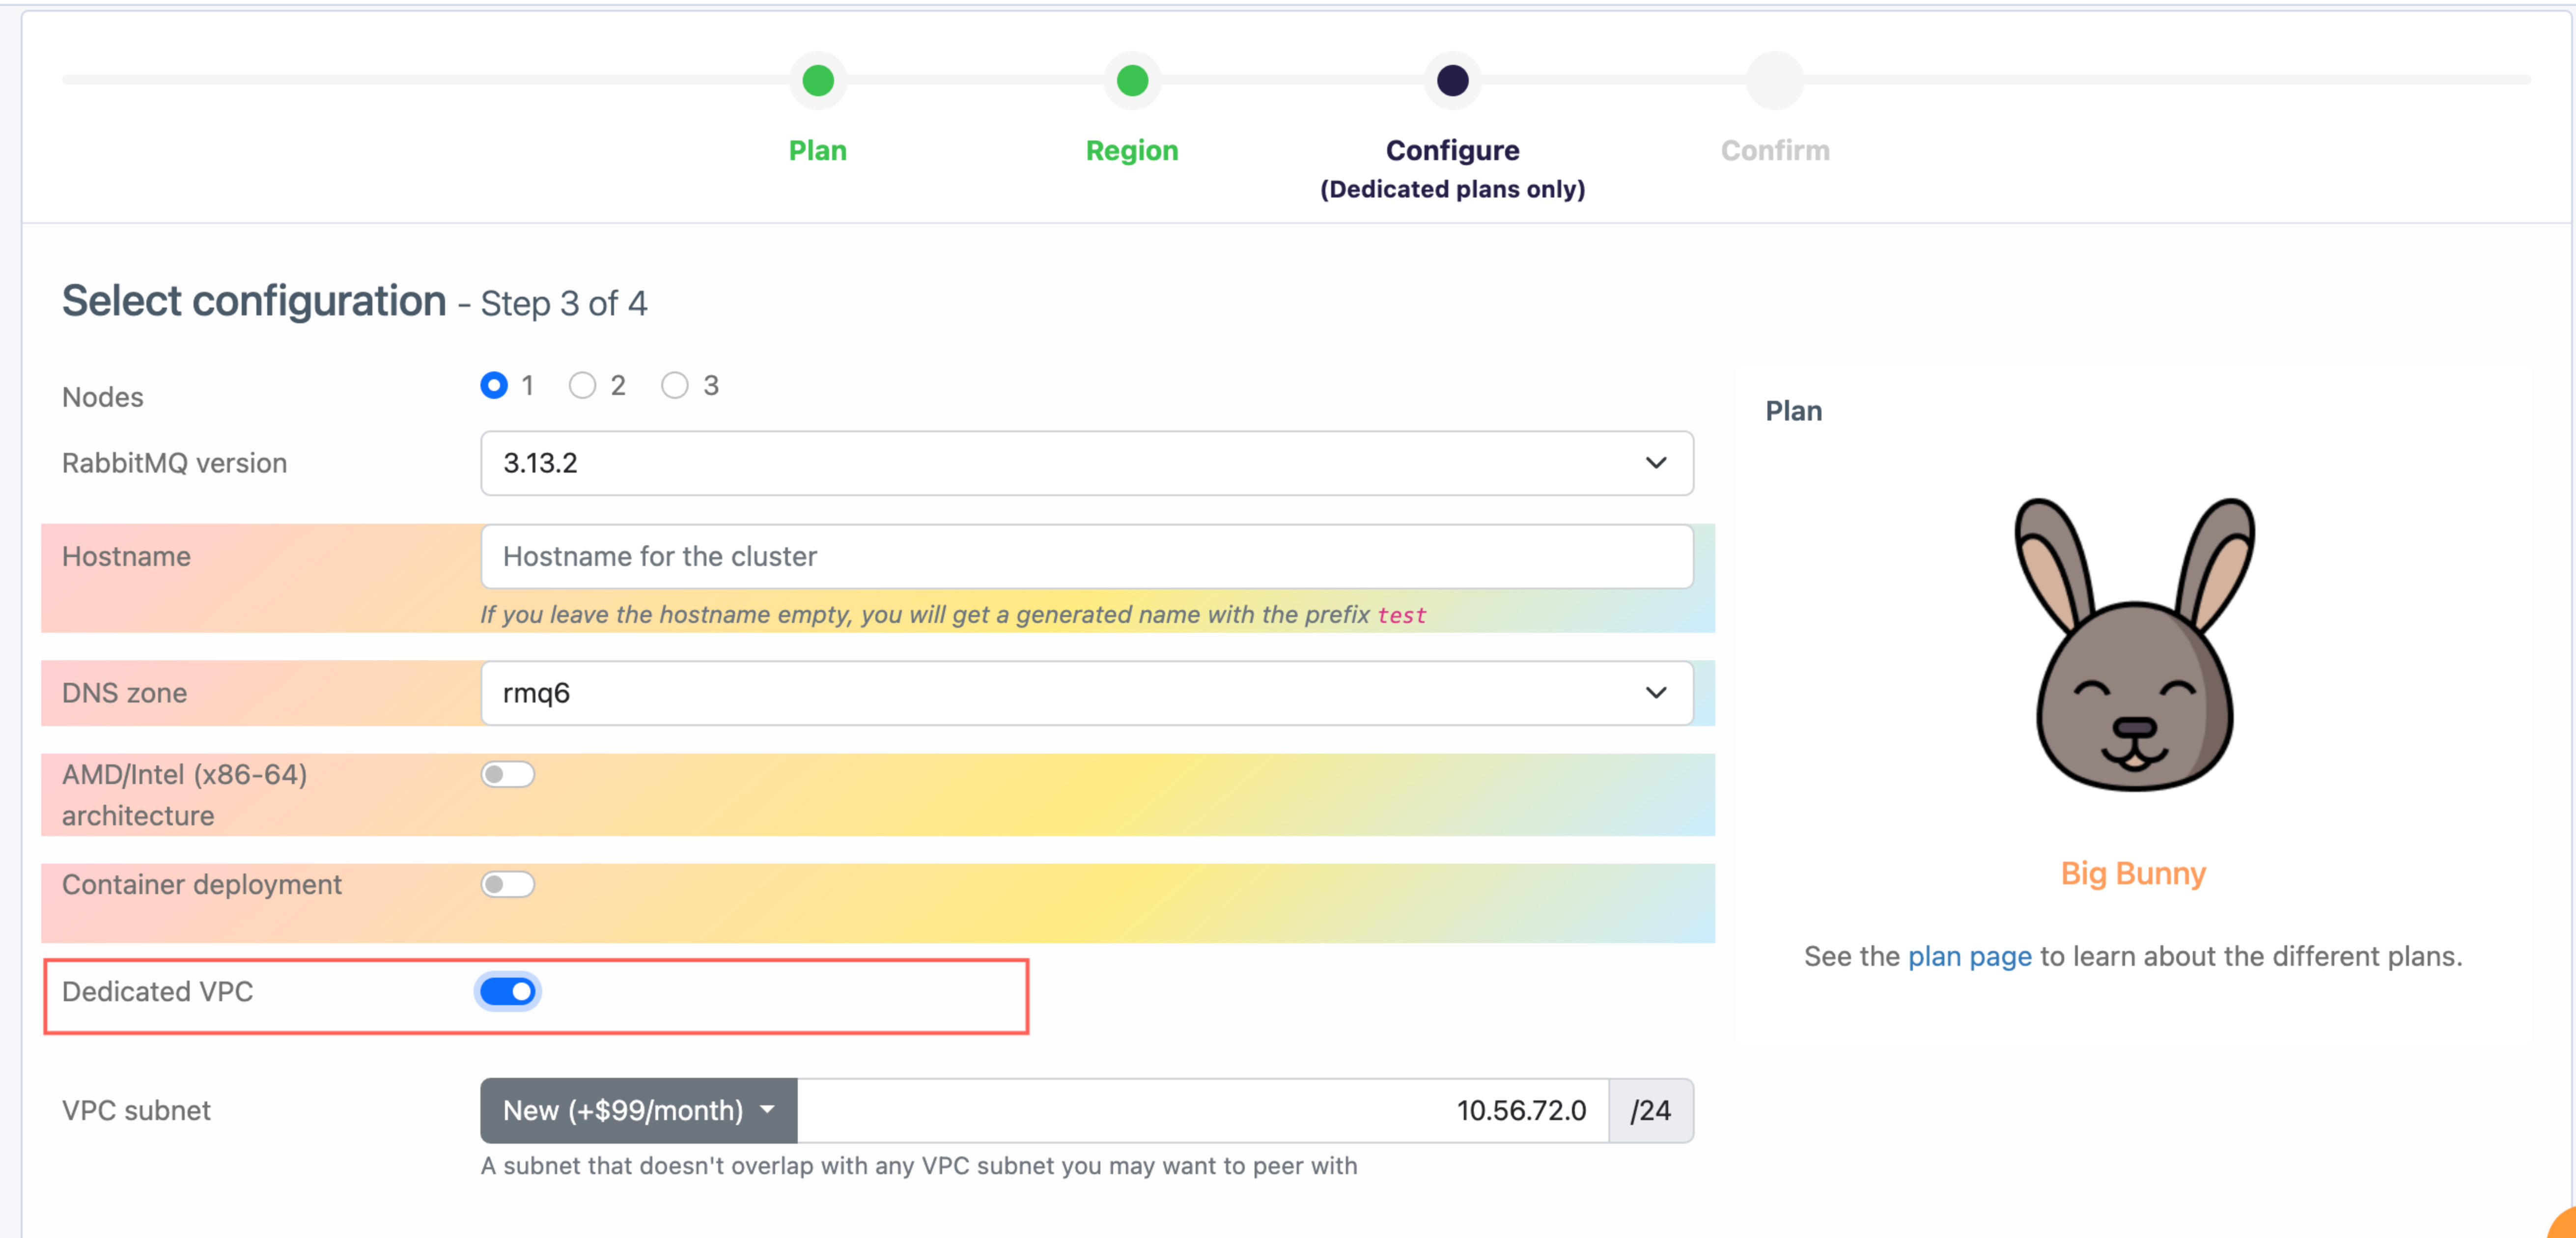
If you are migrating from a private broker on AmazonMQ, make sure to create your CloudAMQP instance in a dedicated VPC — For VPC peering purpose.
Step 3: Configure VPC peering
- If you are migrating from a private broker on AmazonMQ, first, create a VPC peering connection between upstream and downstream. Skip this step, if your AmazonMQ cluster is public.
Step 4: Export/Import definitions
We will show you two ways of doing this. Note that definitions can be exported for a specific virtual host or the entire cluster (all virtual host).
First approach: GUI
-
Go to the RabbitMQ console of your AmazonMQ cluster, the upstream → Choose the overview tab → Expand the Export definitions tab → Click the
Download broker definitionsbutton.
-
Next, go to the RabbitMQ console of your CloudAMQP cluster, the downstream → Choose the overview tab → Expand the Import definitions tab → Choose file to be uploaded, the file exported in the previous step → Click the
Upload broker definitionsbutton.
Second approach: CLI
-
Export definitions with curl via the management API:
sudo curl -u $user:$password -o /upstream_definitions.json https://b-f627e6bc-b7b1-4c73-b693-6de3512c67da.mq.us-east-2.amazonaws.com/api/definitions -
Next, upload the downloaded definitions with curl, again:
sudo curl -i -u $user:$password -H "Content-Type: application/json" -d @/upstream_definitions.json -XPOST https://test-peppy-plum-cougar.rmq6.cloudamqp.com/api/definitions
Step 5: Create federation policy
-
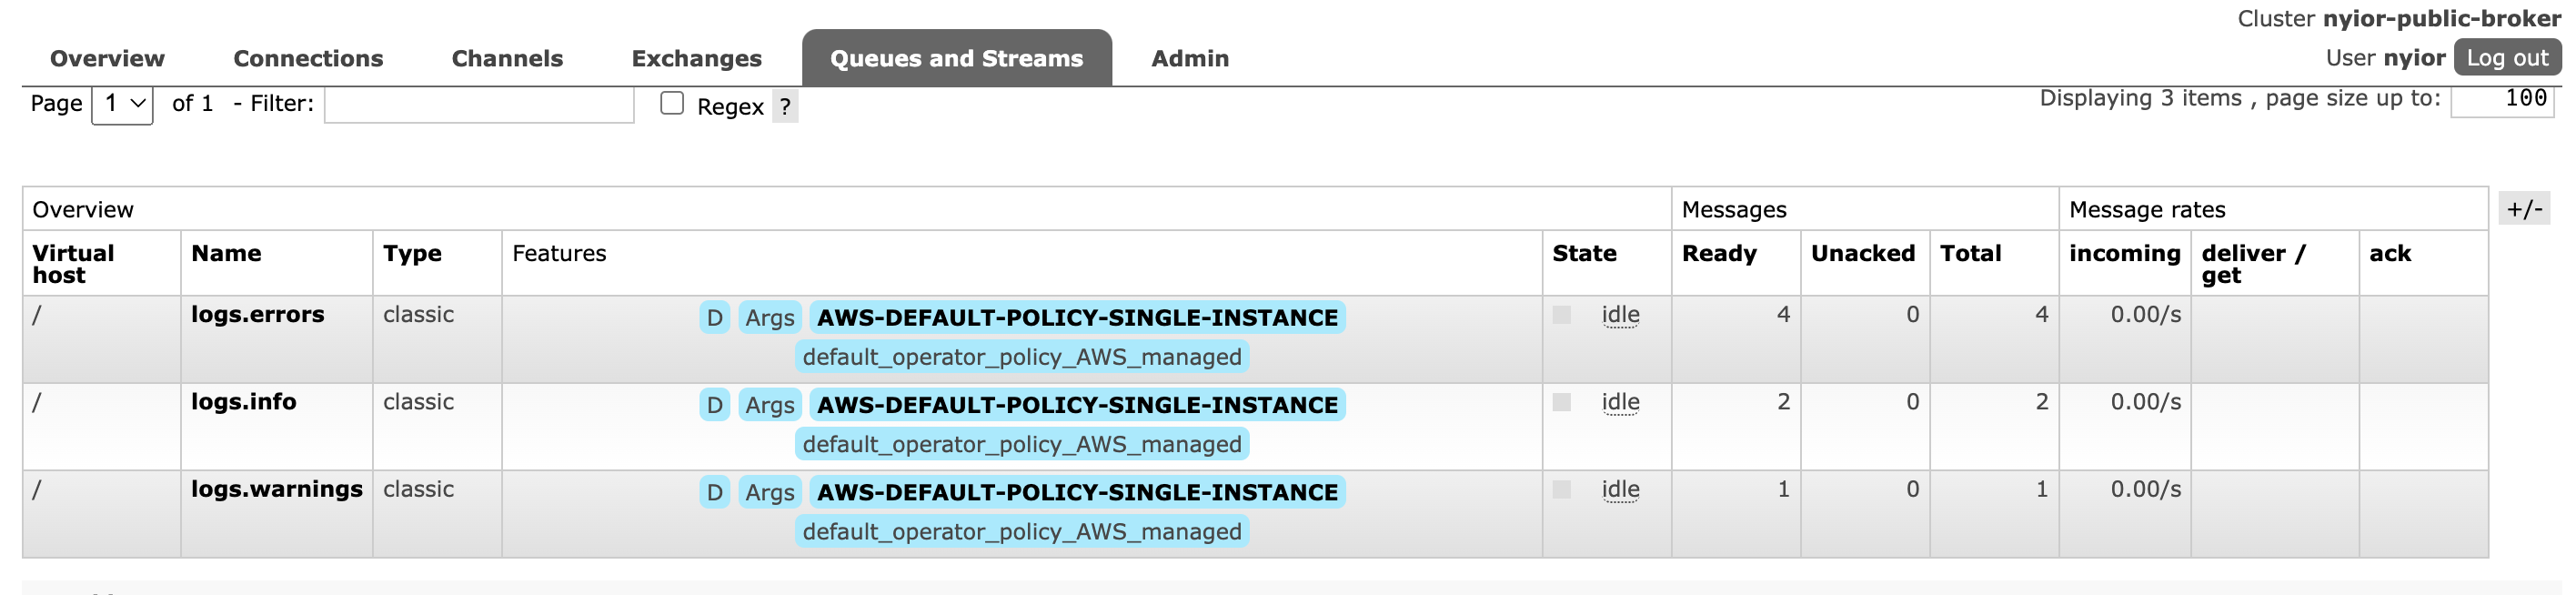
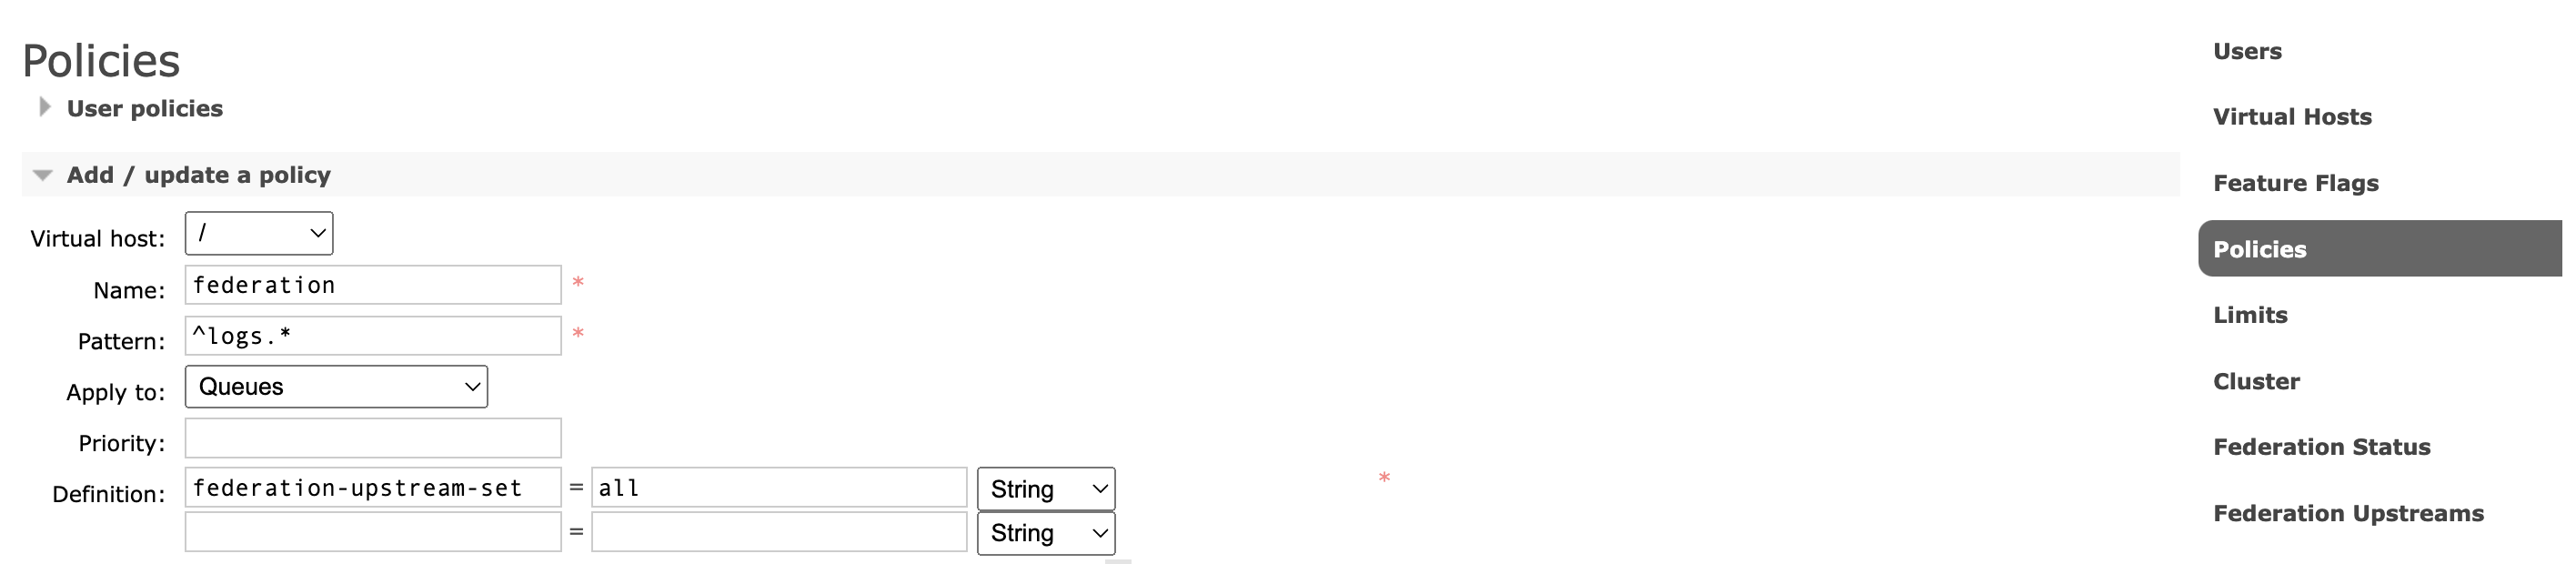
In your downstream cluster, create a federation policy either for all queues or selected queues — As an example, we will create a federation policy for the log queues defined in the upstream.
-
To do this, navigate to Admin → Policies and click Add / update a policy to create the policy — Do this in the downstream.
Step 6: Create federation upstream
-
From the management interface of your downstream cluster, go to the Admin → Federation Upstreams screen and press Add a new upstream. Fill in all information needed. The URI should be the URI of the upstream server.

-
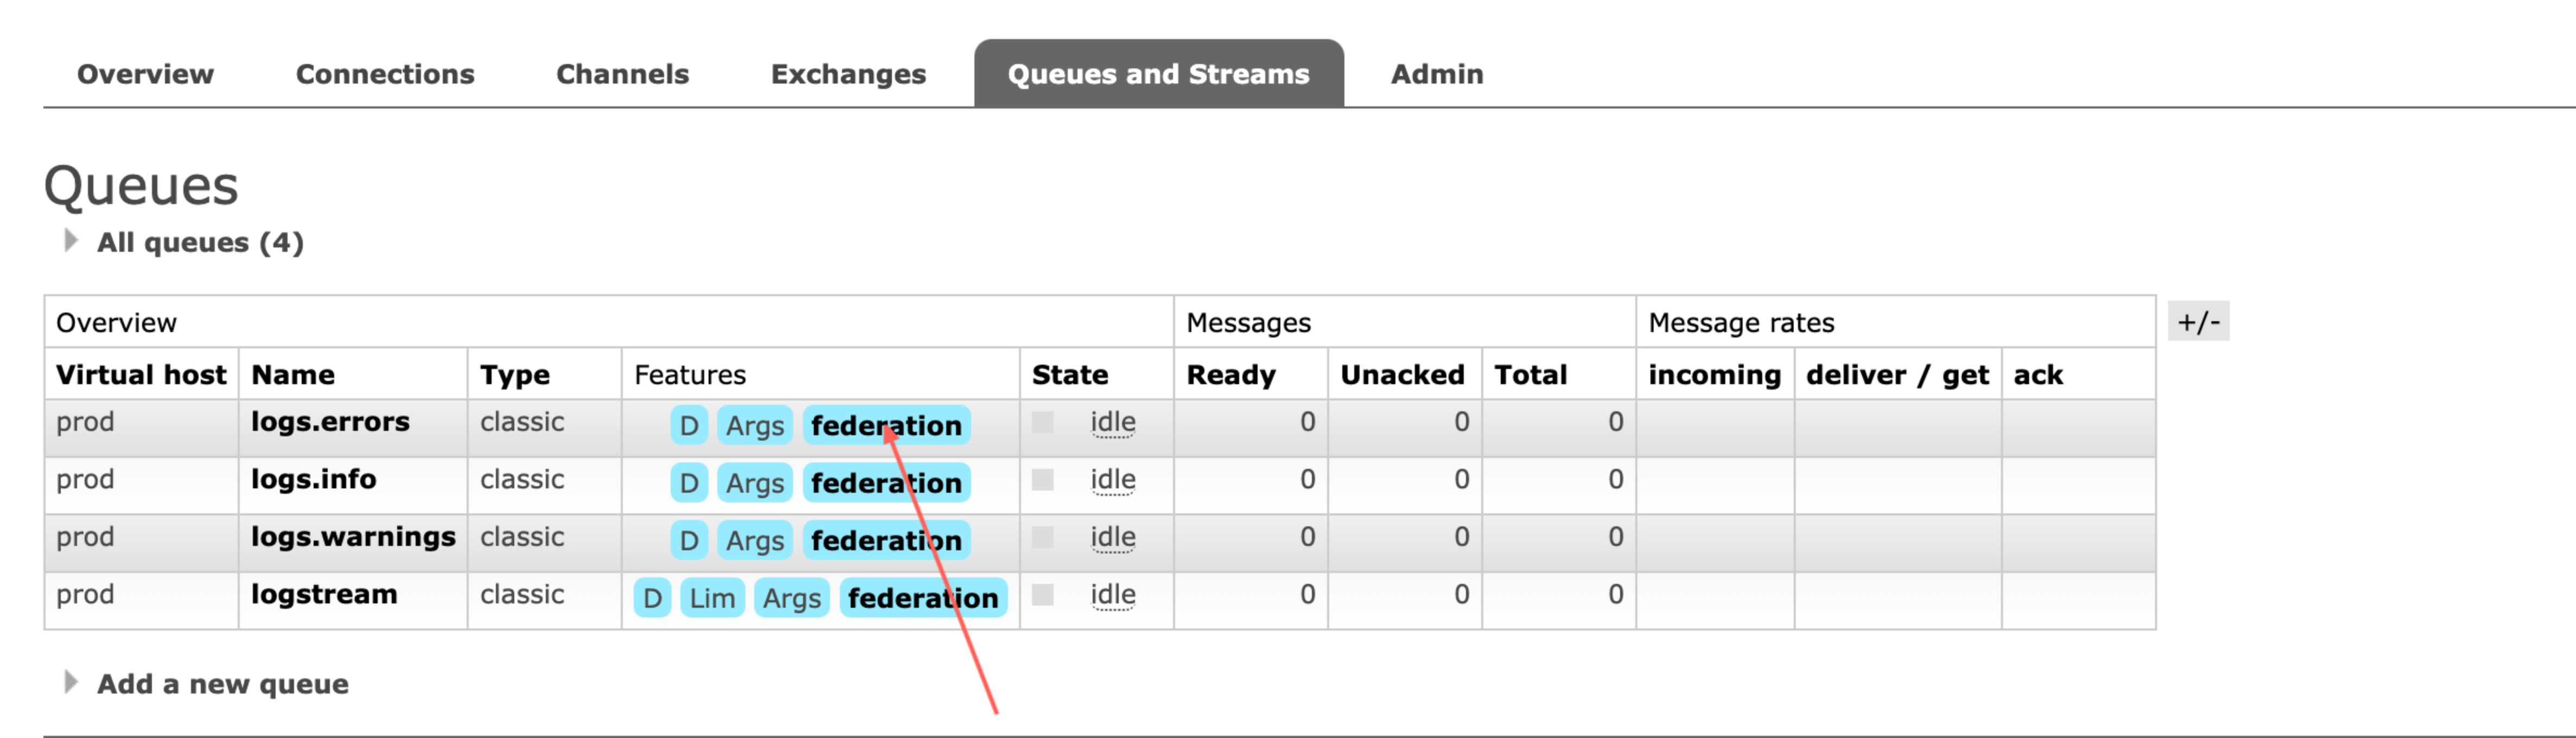
The queues in the downstream should be marked as federated if the policy is applied, like in the image below:
Step 7: Cleanup
Importing definitions also imports set of users and policies— for example, the
AWS-DEFAULT-POLICY-SINGLE-INSTANCE
automatically defined for all AmazonMQ clusters. You can get rid of these users
and policies if you don’t feel the need to keep them.
Step 8: Migrate consumers and publishers
-
Once you can see the federation policy applied on the downstream cluster, move the consumers from the upstream cluster to the downstream cluster. Once consumers are moved, messages will be federated from old to new cluster. Confirm that old cluster is drained.
-
Move publishes to the new clusteron CloudAMQP.
Step 9: Delete AmazonMQ cluster
Once done with all queues, you are ready to delete the federation policy and the Amazon MQ cluster.