VPC Connect on CloudAMQP
VPC Connect allows you to securely connect your applications to CloudAMQP instances through private network connections, eliminating traffic over the public internet. This feature is available on dedicated instances and supports:
Overview
VPC Connect creates a private network path between your Virtual Private Cloud (VPC) and your CloudAMQP cluster. Instead of connecting over the public internet, your applications communicate with CloudAMQP through a secure, private endpoint within your cloud provider’s network infrastructure.
Prerequisites
Before setting up VPC Connect, ensure your CloudAMQP instance meets these requirements:
-
Dedicated instance required: VPC Connect is only available on dedicated CloudAMQP instances
-
VPC features enabled: Your instance must have VPC features activated (see setup instructions below)
-
Regional alignment: Your CloudAMQP instance and target VPC must be in the same cloud region
Pricing
VPC Connect functionality is included with VPC-enabled instances at $99/month. There are no additional charges for the private connection itself.
Enabling VPC Features
To use VPC Connect, you first need to enable VPC features on your CloudAMQP instance:
-
Navigate to your CloudAMQP Console and view your instances list
-
Click the Edit button next to your target instance
-
Select
Enable VPC Featuresand confirm the change
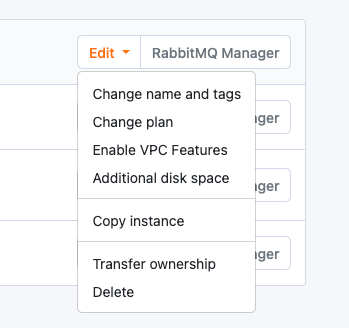
After enabling VPC features, you’ll see a new
VPC Connect
menu item under the Network section in your CloudAMQP console.
Per-node Prometheus Metrics
When connecting via VPC Connect (AWS PrivateLink, Azure Private Link, or GCP Private Service Connect), your
endpoint exposes a single DNS name that resolves to multiple node IPs. DNS resolution is typically
round-robin across these IPs, so the standard
/metrics
endpoint only reaches one node per request, making it difficult to scrape Prometheus metrics from all nodes individually.
To solve this, dedicated clusters expose per-node metrics endpoints:
-
/node1/metrics— metrics from node 1 -
/node2/metrics— metrics from node 2 -
/node3/metrics— metrics from node 3 -
(up to /node5/metrics)
These endpoints are authenticated the same way as the regular
/metrics
endpoint and are available on both RabbitMQ and LavinMQ clusters.
AWS PrivateLink Setup
Activation
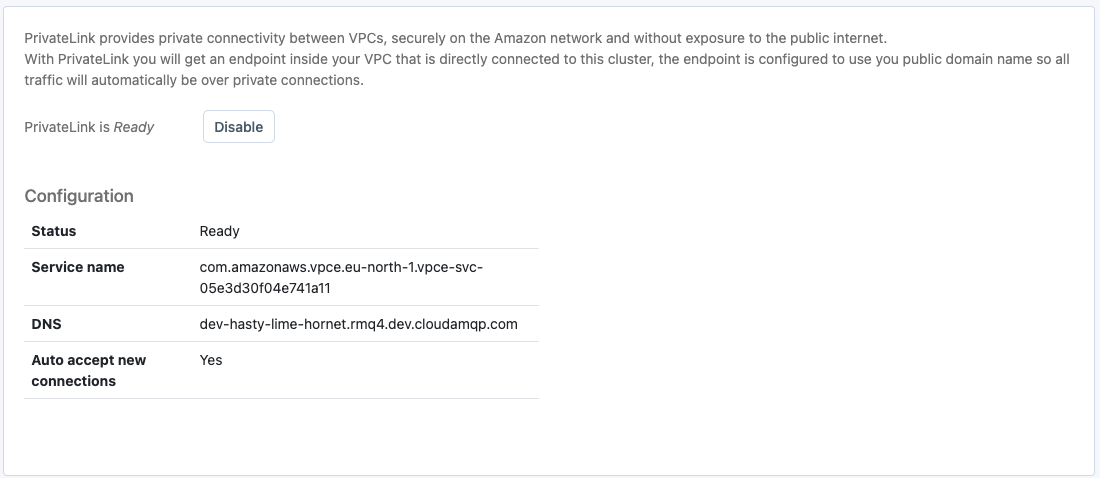
To enable AWS PrivateLink for your CloudAMQP instance:
-
Navigate to the VPC Connect section in your CloudAMQP console
-
Click “Enable” to start the PrivateLink activation process
-
Wait 1-3 minutes for the activation to complete
Note: If you don’t see all configuration fields immediately, wait about one minute and refresh the page. The service needs time to fully activate.
Once active, PrivateLink opens the following ports on your CloudAMQP instance:
443, 5671, 5672, 1883, 8883, 61613, 61614, 5551, 5552
Additional ports can be opened upon request through support.
Access Control (Allowlist)
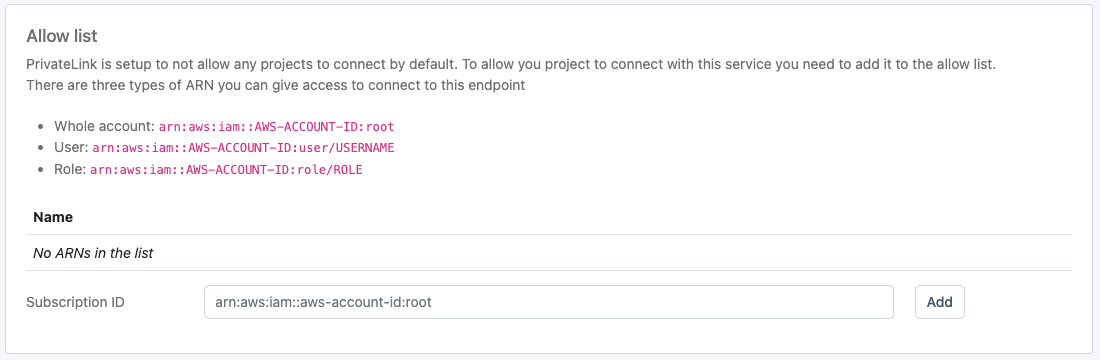
Configure which AWS accounts can access your PrivateLink service by adding ARN principals to the allowlist. You can specify:
-
AWS account IDs
-
Specific IAM users
-
IAM roles
Creating the VPC Endpoint
After PrivateLink is activated in CloudAMQP, create a VPC endpoint in your AWS account:
Step 1: Create the Endpoint
-
Open the AWS VPC console and navigate to Endpoints
-
Click “Create Endpoint”
-
Select “Find service by name”
-
Paste the service name from your CloudAMQP PrivateLink configuration
-
Click “Verify” to confirm the service exists
-
Select your target VPC
Step 2: Configure Subnets
Important: Do not select all available subnets. Only choose subnets that match the availability zone IDs where your CloudAMQP servers are located. You can find these availability zones in the PrivateLink tab of your CloudAMQP console.
Step 3: DNS Configuration
If your VPC has DNS support enabled, check the box to “Enable DNS name for the endpoint.” This allows you to use the CloudAMQP hostname directly.
If DNS support is not enabled, you’ll need to either:
-
Use the AWS-provided DNS name for connections, or
-
Enable DNS support for your VPC (recommended)
Enabling DNS Support for Your VPC
To use CloudAMQP hostnames with PrivateLink, configure DNS support:
-
Enable DNS resolution (enableDnsSupport) on your VPC
-
Enable DNS hostnames (enableDnsHostnames) on your VPC
-
Configure your EC2 instances to use Amazon DNS servers via VPC DHCP Options
-
If using VPC Peering, enable DNS resolution support
Complete the Setup
Click “Create endpoint” to finalize the configuration. Your applications can now connect to CloudAMQP through the private endpoint.
Regional Limitation: AWS PrivateLink connections must be within the same region. Ensure your CloudAMQP instance and VPC are in the same AWS region.
For more information, visit: AWS PrivateLink Documentation
Azure Private Link Setup
Activation
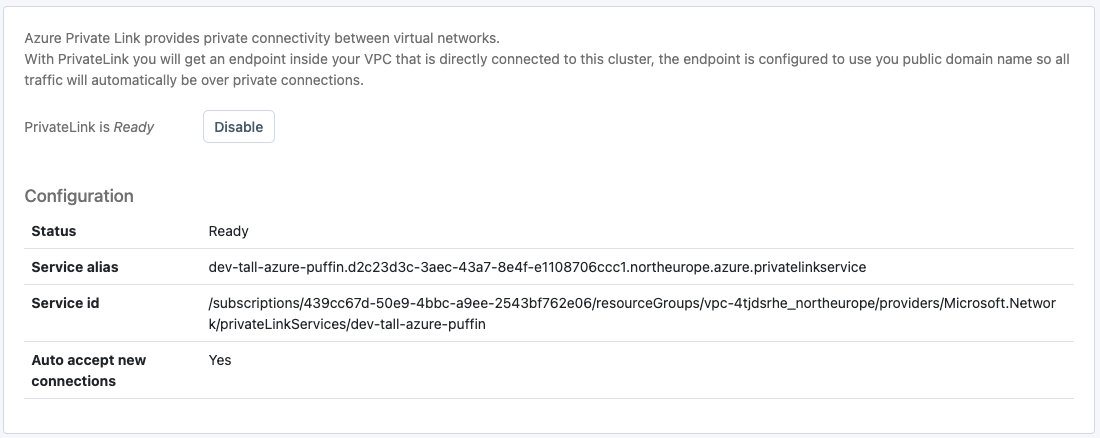
To enable Azure Private Link for your CloudAMQP instance:
-
Navigate to the VPC Connect section in your CloudAMQP console
-
Click “Enable” to start the Private Link activation process
-
Wait 1-3 minutes for the activation to complete
Note: If you don’t see all configuration fields immediately, wait about one minute and refresh the page. The service needs time to fully activate.
Azure Private Link opens ALL ports that are allowed by your CloudAMQP firewall configuration, giving you maximum flexibility.
Setup time may vary for clusters created before Jan 31, 2022, which may require brief downtime for network interface reconfiguration.
Allowlist
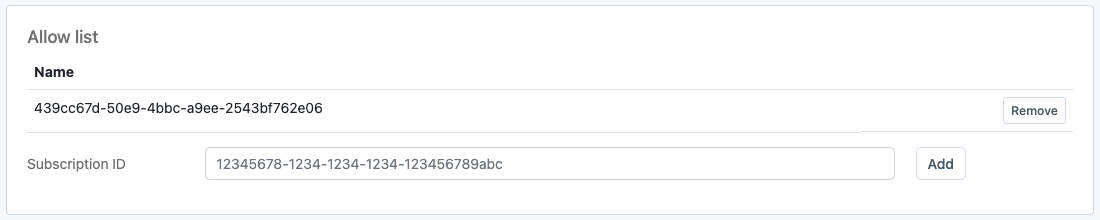
Once everything is configured and the PrivateLink Service is up and running, it’s time to specify who should have access to connect to it.
In Azure PrivateLink, access is restricted to subscription IDs. You can list multiple IDs, and once you have added a subscription ID to the allow list, you can create a PrivateLink resource in that subscription and connect. All PrivateLink connections are listed in the UI.
Creating the Private Endpoint
DNS Configuration (Recommended)
For proper hostname resolution, set up a Private DNS Zone:
-
Create an Azure Private DNS Zone
-
Create an A record pointing to your Private Endpoint’s IP address
-
Use your cluster’s public hostname (e.g., your-cluster-name.rmq5.cloudamqp.com) as the record name
-
This enables TLS connections and maintains consistency with your existing configuration
Testing Your Connection
Verify your Private Link setup using network troubleshooting tools:
-
Use
digto verify DNS resolution -
Test connectivity with
netcatortelnet -
Confirm connection to the cluster using the Private Endpoint’s internal IP
Important Limitations
Note: Azure Private Link uses a service endpoint model. This means:
-
Your applications can connect TO CloudAMQP through the private link
-
CloudAMQP CANNOT initiate connections back to your internal network
-
Features like shovels to internal endpoints are not supported
-
For bidirectional connectivity, consider VPC Peering instead
For more information, see: Azure Private Link Documentation
GCP Private Service Connect Setup
Activation
To enable GCP Private Service Connect:
-
Navigate to VPC Connect in your CloudAMQP console
-
Click “Enable” to start Private Service Connect activation
-
Wait 1-3 minutes for the service to become fully active
Note: If configuration fields don’t appear immediately, wait about one minute and refresh the page.
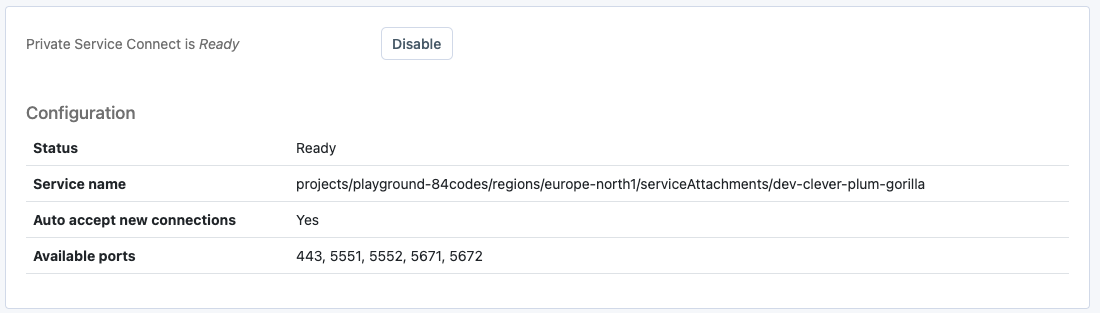
GCP Private Service Connect opens ALL ports that are allowed by your CloudAMQP firewall configuration, giving you maximum flexibility.
Access Control (Allowlist)
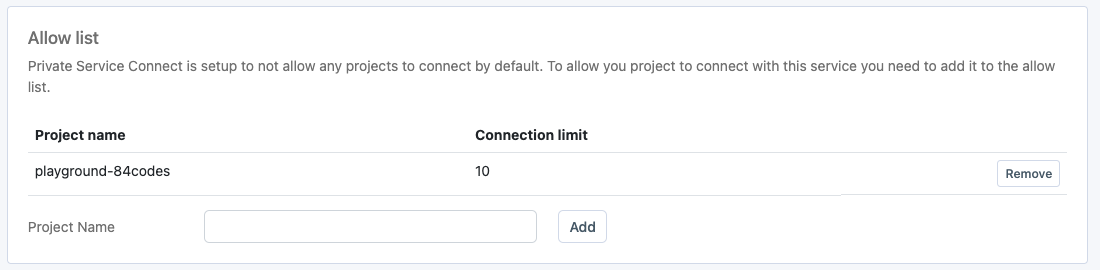
By default, Private Service Connect denies all connection attempts. Grant access by:
-
Adding Google Cloud project IDs to the allowlist
-
Specifying which projects can create connection endpoints
-
Managing access through the CloudAMQP console
Enter the exact name of each Google Cloud project that should be permitted to connect to your CloudAMQP instance.
Automatic Firewall Configuration
When you enable VPC Connect, CloudAMQP automatically:
-
Creates a Private Service Connect network in GCP
-
Adds the network’s CIDR block to your firewall allowlist
-
Configures the necessary routing rules
Important: Do not remove the automatically created firewall rule. Removing it will break VPC connectivity.
Creating the Connection Endpoint
After enabling Private Service Connect in CloudAMQP, create a connection endpoint in your Google Cloud console:
Step-by-Step Setup
-
Navigate to “Network Services” → “Private Service Connect” in Google Cloud Console
-
Click “Connect Endpoint”
-
Select “Published service” as the connection type
-
Enter the service name from your CloudAMQP VPC Connect configuration page
-
Complete the endpoint creation following Google’s setup wizard
Getting the Connection IP
Once your endpoint is created:
-
Click on the newly created endpoint to view its details
-
Note the assigned IP address - this is your connection endpoint
-
Configure your applications to use this IP address when connecting to CloudAMQP
Your applications will connect to CloudAMQP using this private IP address instead of the public hostname, ensuring all traffic stays within Google Cloud’s private network.
For comprehensive setup guidance, refer to: Google Cloud Private Service Connect Documentation