Overview - CloudAMQP Console
The CloudAMQP Console provides tools and features to simplify managing RabbitMQ and LavinMQ instances. Monitor server metrics, set alarms, enable or disable plugins, view connection details, handle upgrades, and check cluster health, all from one place.
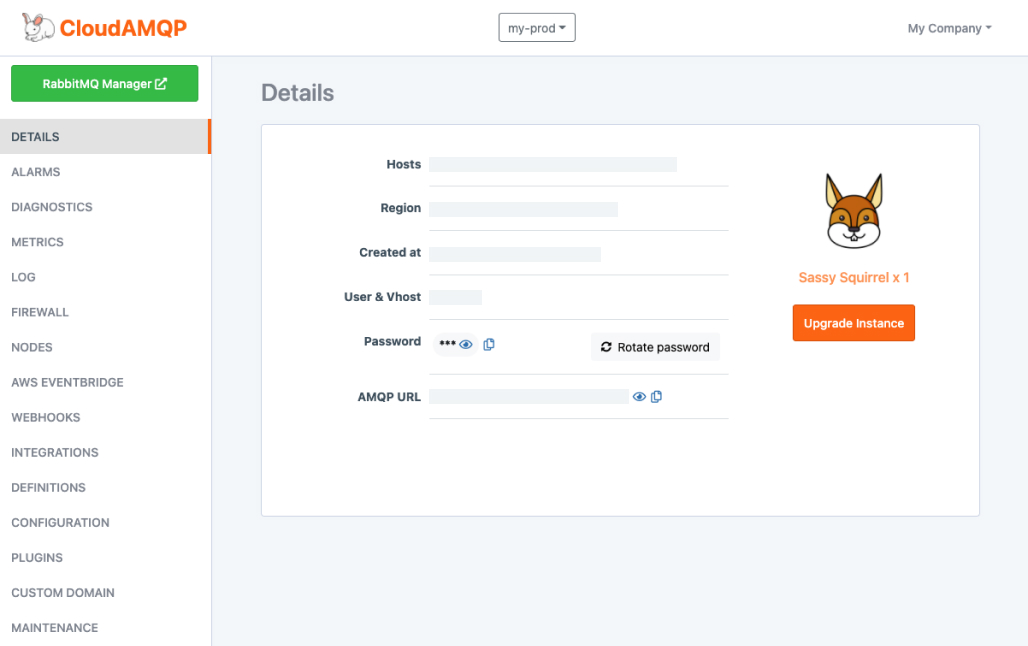
| Host |
The hostname of your instance. If you have a multi-node cluster, you will see the hostname of all hosts. The load-balanced host is a DNS load balancer in front of the cluster, and it will round robin to the different nodes automatically. If one node in a cluster goes down, it will be removed from the rotation, so the other nodes will still handle the traffic until the node is back. |
| Region | Cloud and data center region. |
| Created at | The date and time the instance was created. |
| User & Vhost | Default user and vhost. |
| Password | Password for default user. |
| AMQP URL | The connections URL to connect clients |
| MQTT Details | Hostname, ports, username, and password used to connect using MQTT. |
| API Access | API Key to use with the CloudAMQP API, CloudAMQP API docs |
There are also a couple of functions in this view:
| View password, AMQP URL and API Key |
 Shows obscured data when clicked.
|
| Copy password, AMQP URL and API Key |
 Copies the data to your clipboard when clicked.
|
| Rotate password |
 Creates a new password for the default user when clicked.
Current connections will not be affected, but new connections using the default user will need to have the password updated. If you are using CloudAMQP via Heroku your app will be restarted automatically with updated environment variables (CloudAMQP specific). |
| Rotate API Key |
 Creates a new API key when clicked.
|
| Change plan or number of nodes |

This button will take you to the upgrade process, where you can select the new plan and number of nodes you want to change to. |