Google Workspace - SAML login on CloudAMQP
Set up SAML on Google Workspace.
-
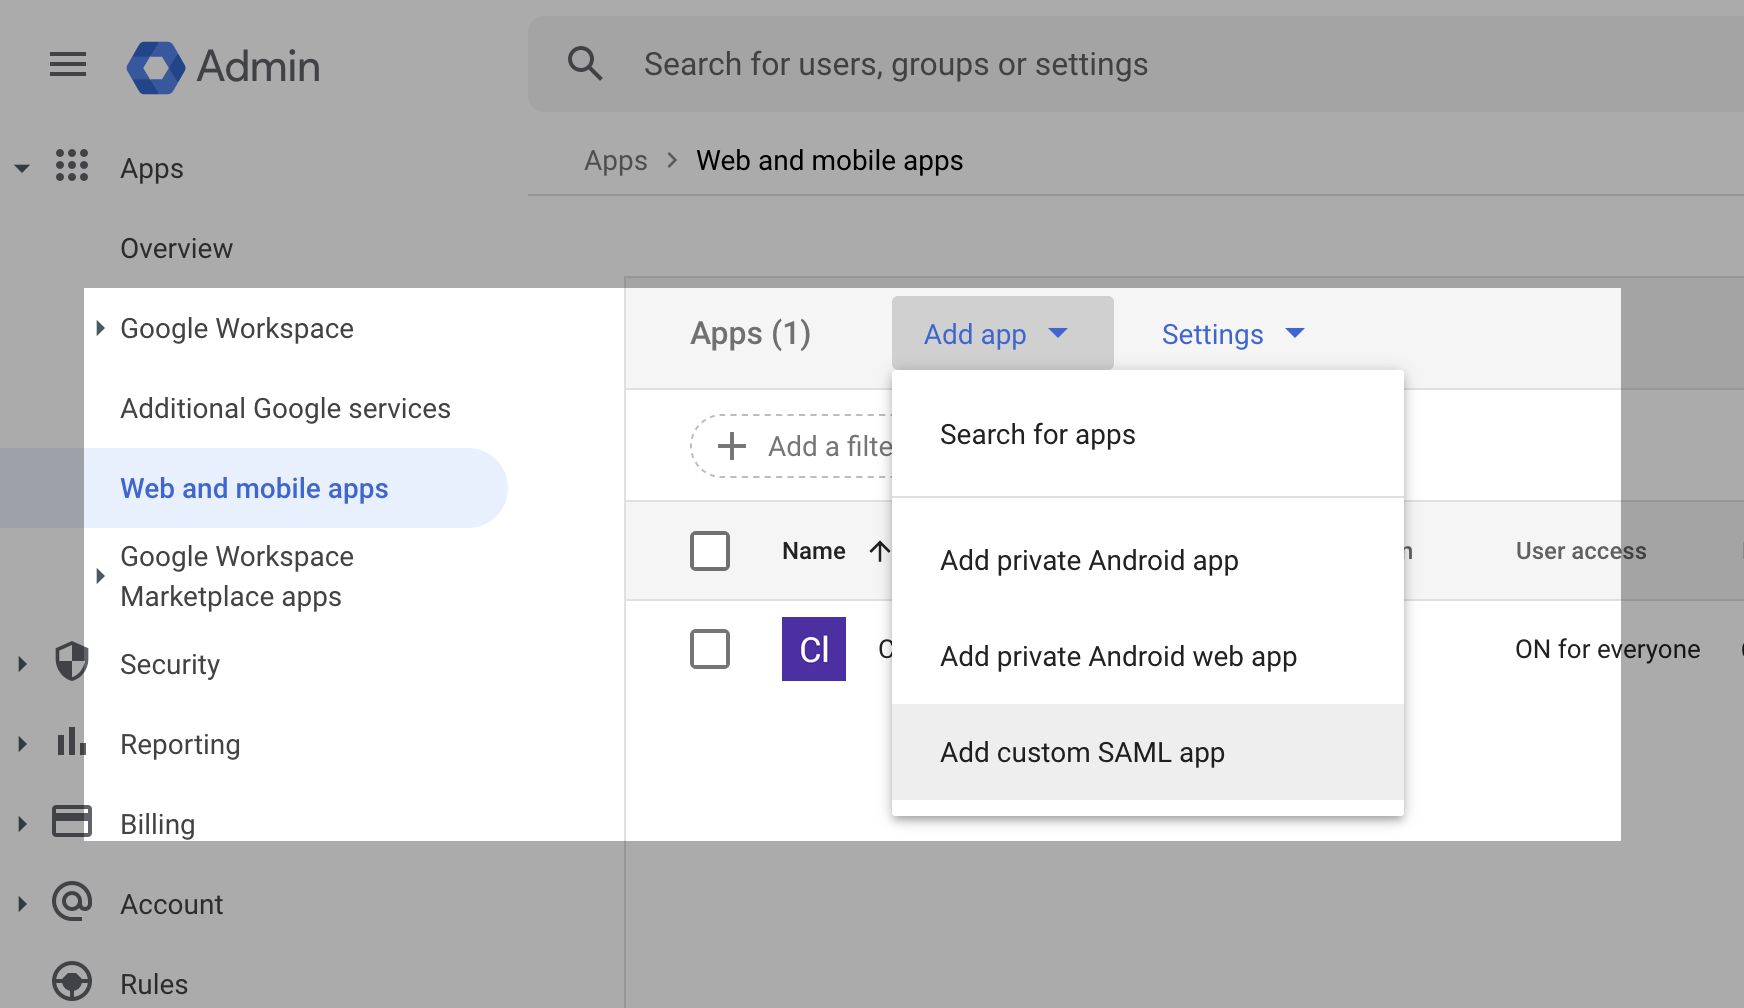
Using a Super Administrator account, Navigate to Apps > Web and Mobile Apps.
-
Select ‘Add new App’ - Add Custom SAML app.
-
Give your new app a name and press ‘Continue’.
-
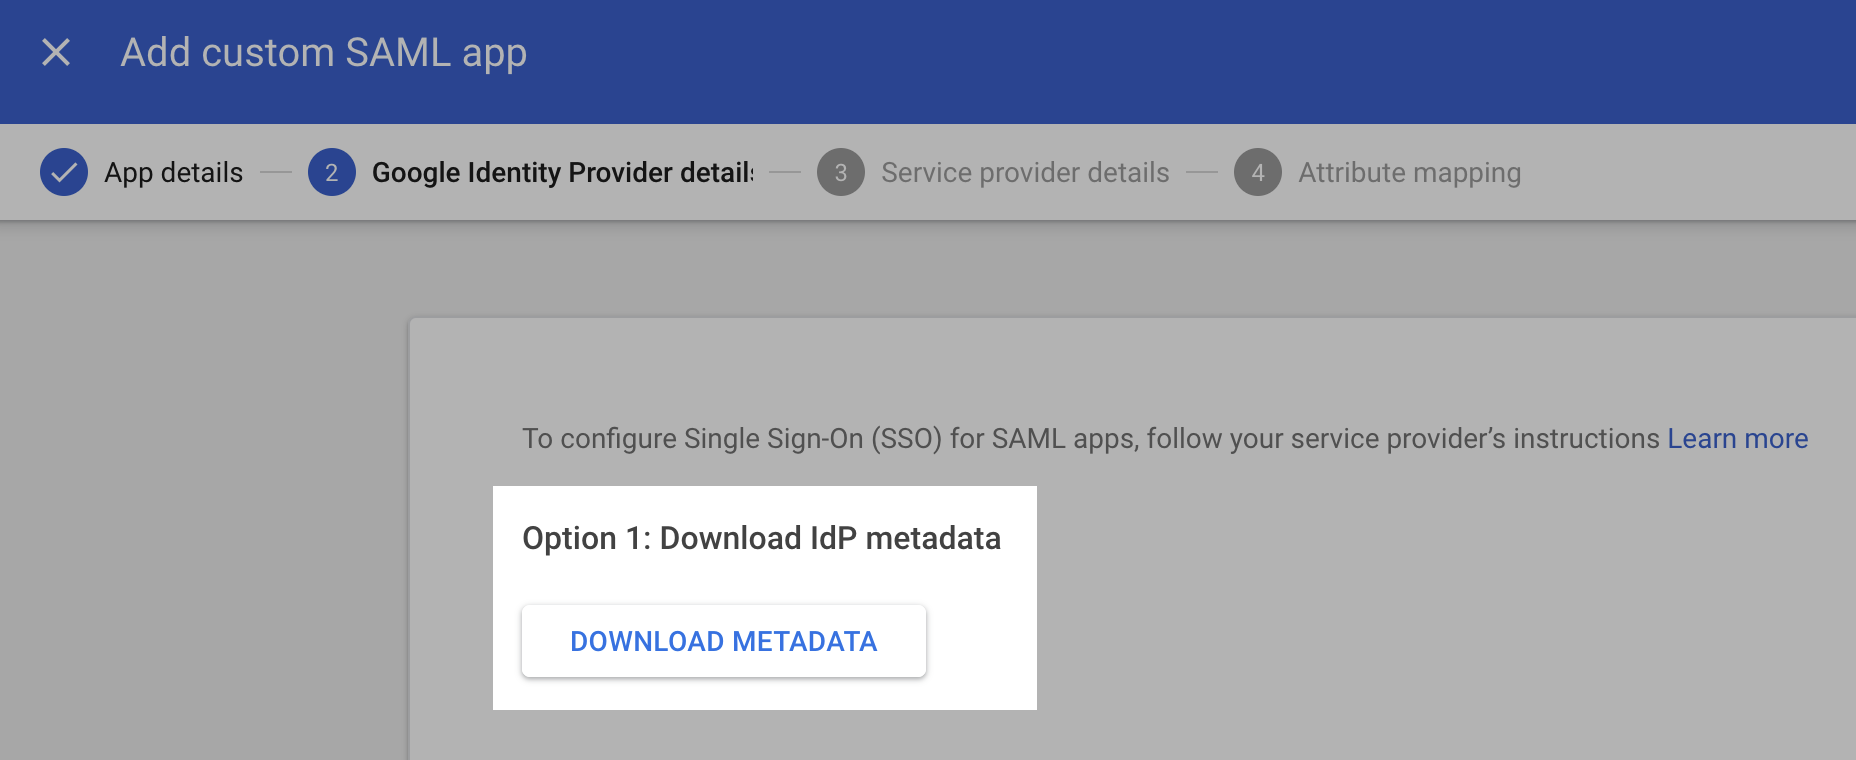
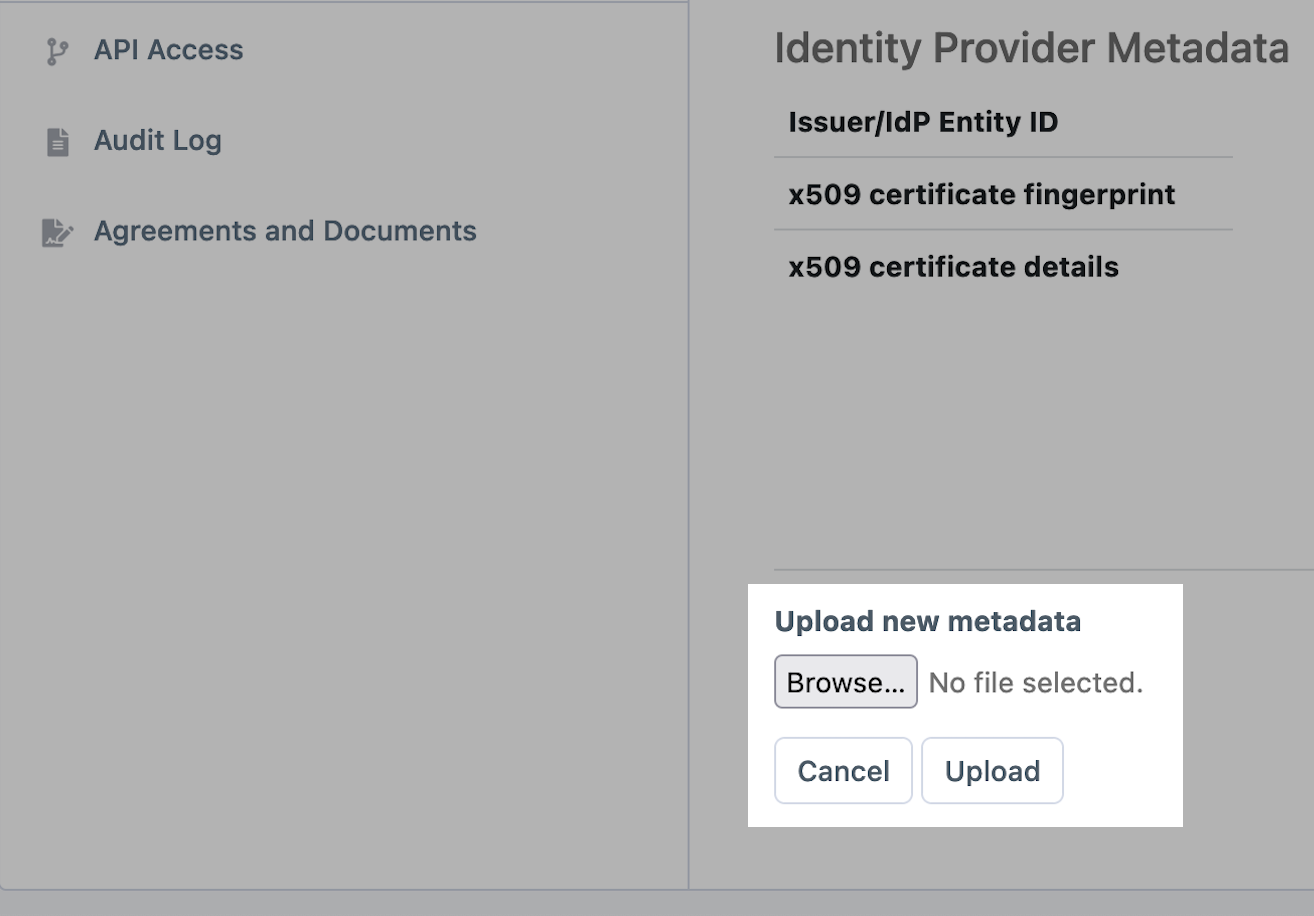
On the next screen, download IdP metadata. Once downloaded, upload this file to your CloudAMQP portal. In CloudAMQP, Navigate to Team Settings > Team > SAML Configuration and upload the IdP metadata file.
-
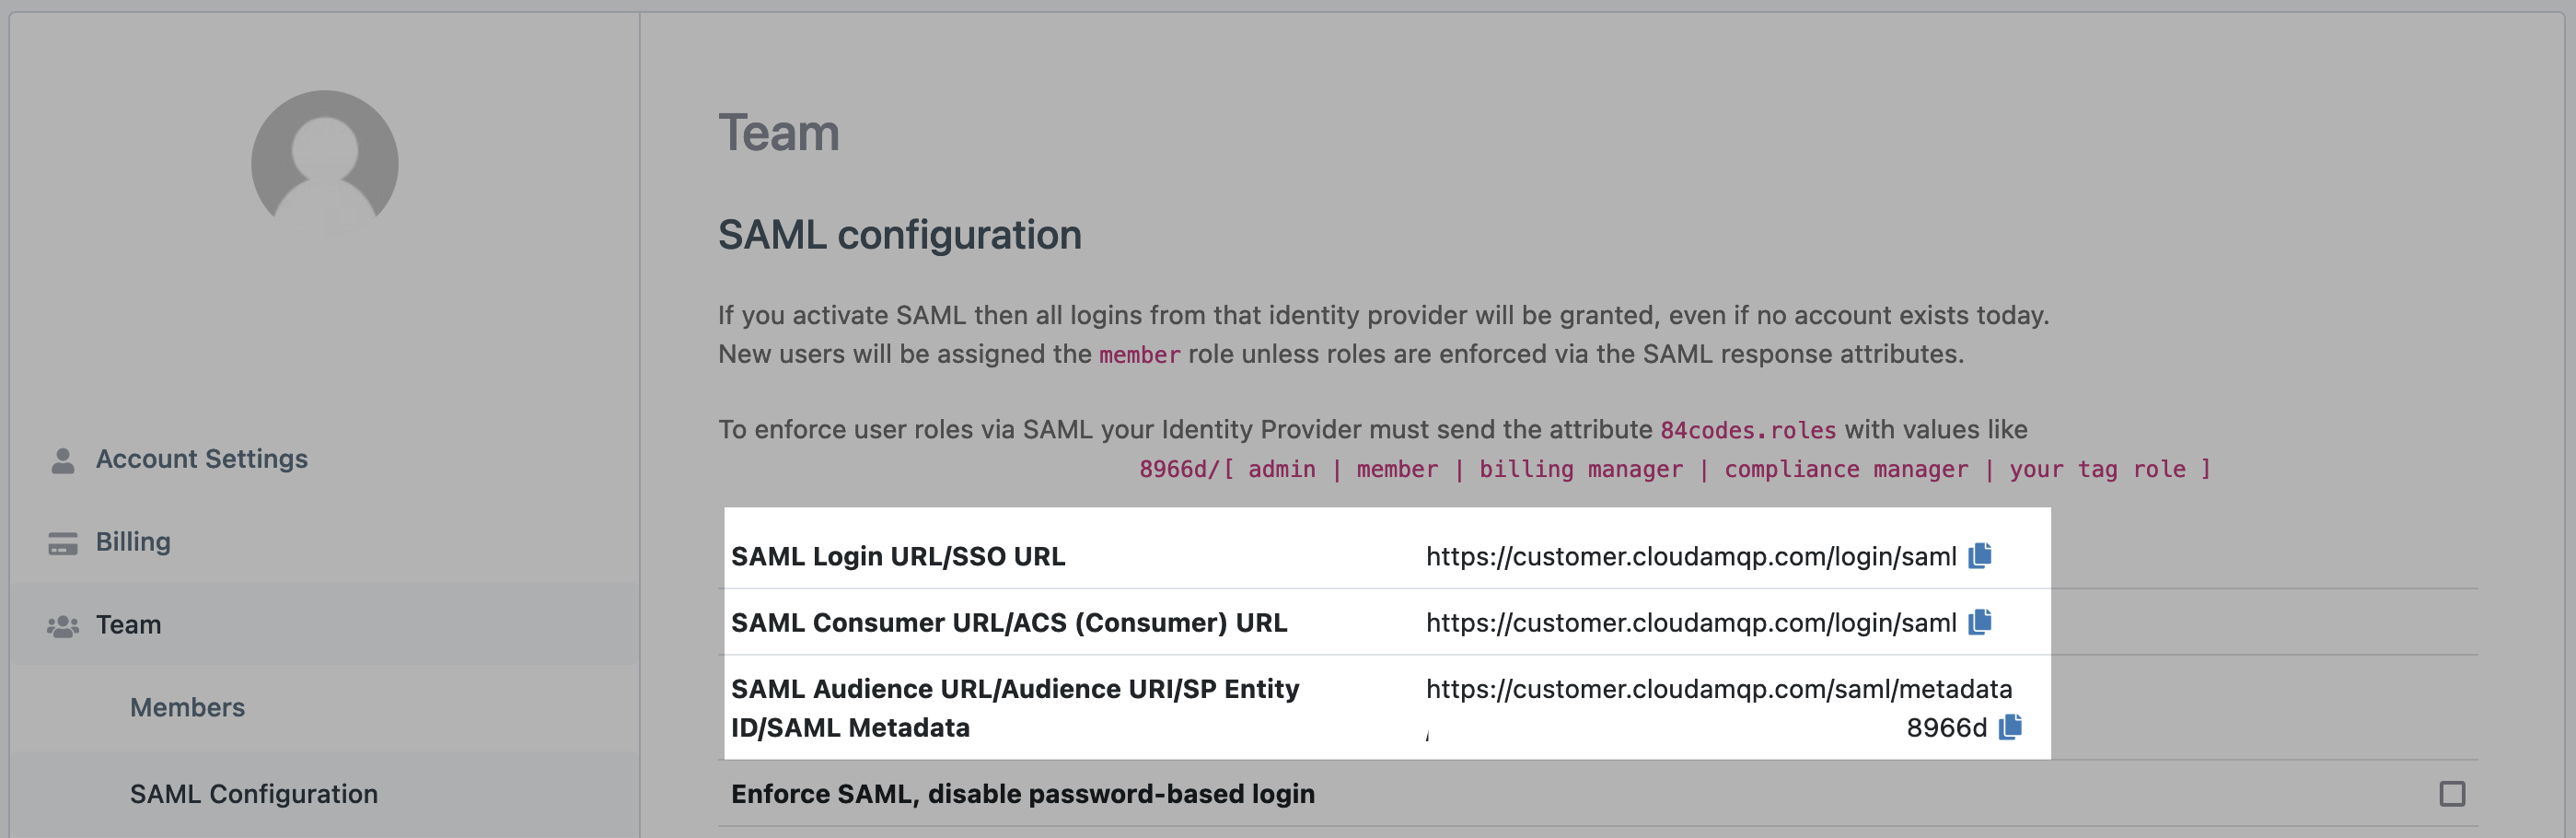
On the next screen in your Google Workspace setup, paste the SAML Consumer URL/ACS (Consumer) URL from your CloudAMQP console to the ACS URL field. For EntityID, paste the SAML Audience URL/Audience URI/SP Entity ID/SAML Metadata value. Select EMAIL as Name ID, and leave the rest as-is.
-
Press Finish. Now assign the app to a user and they will be able to sign in. The first login will have to be performed from the Google Workspace app dashboard (9 points menu).
-
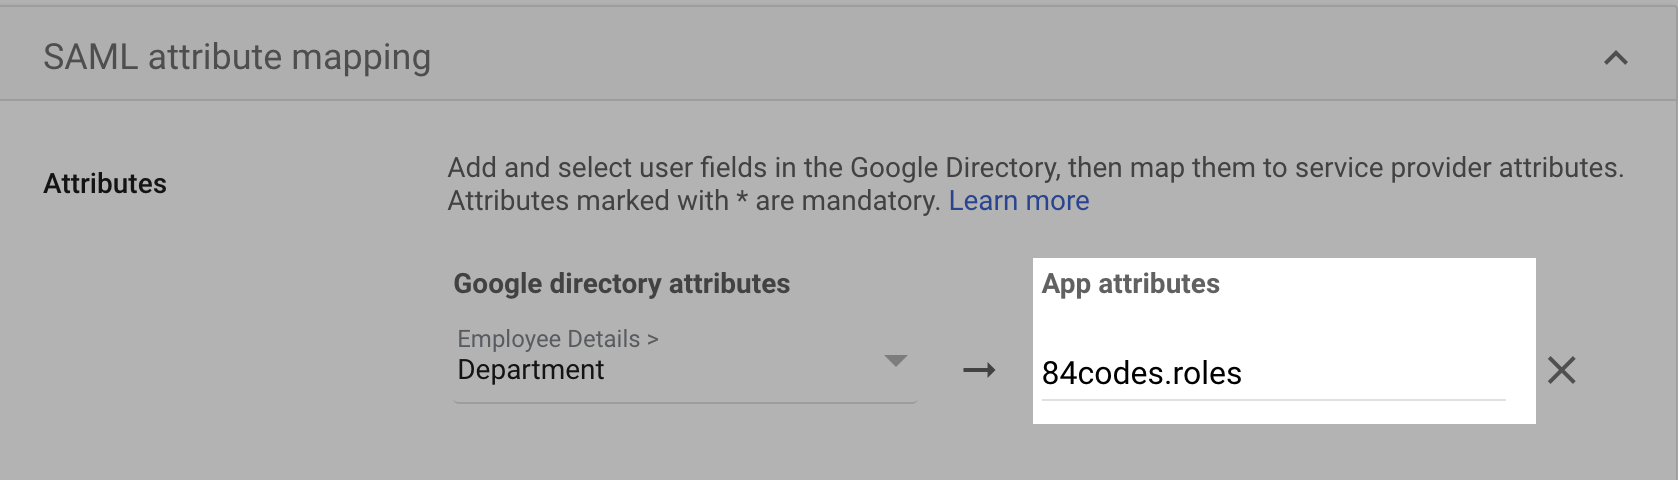
If you wish to provision roles or tags to the users, you can create a custom attribute and bind it to 84codes.roles. Pass the Entity ID followed by role, eg. xxxx-xxxx-xxxx-xxxx-xxxx/monitor. You can find your Entity ID on the CloudAMQP SAML Configuration page.
If you need assistance or have any questions you can get in touch with support through support@cloudamqp.com