Okta - SAML login on CloudAMQP
-
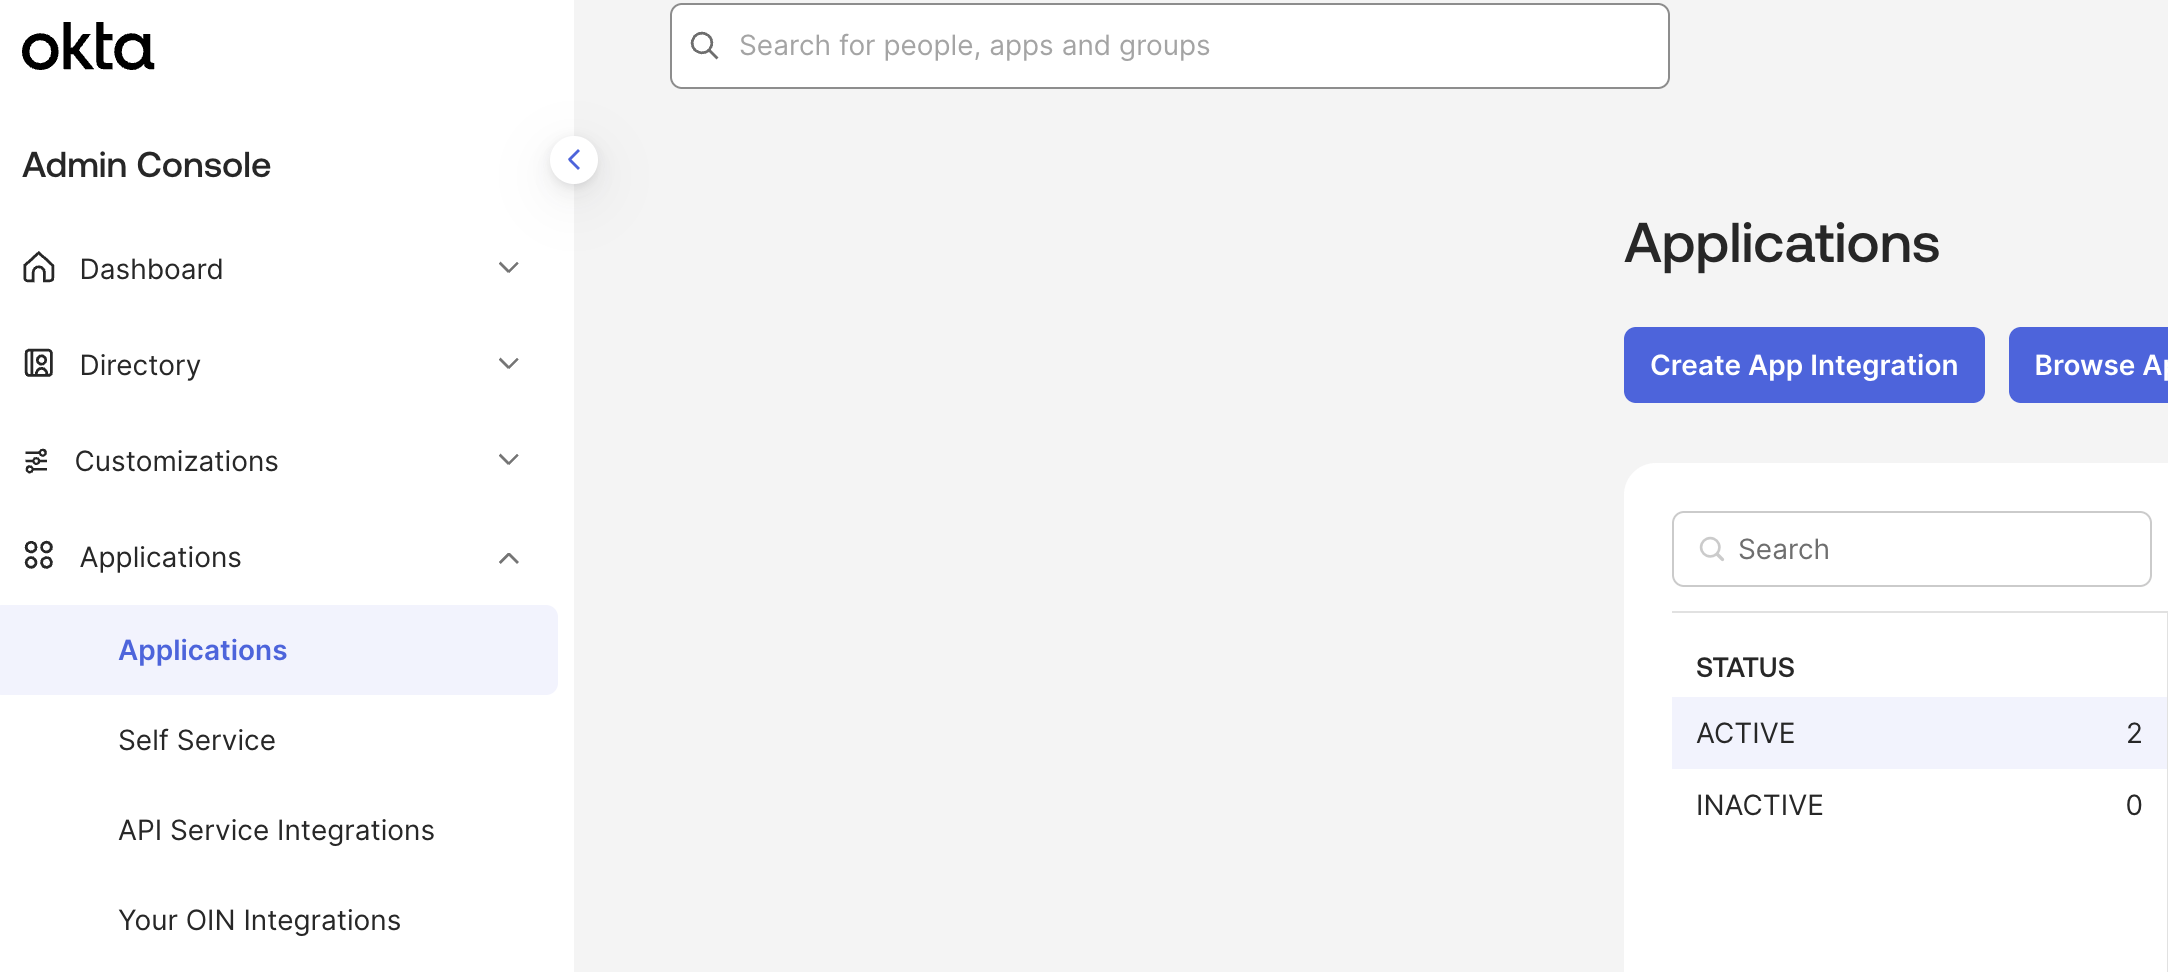
Navigate to the admin portal, in the Applications view, click Create App Integration
-
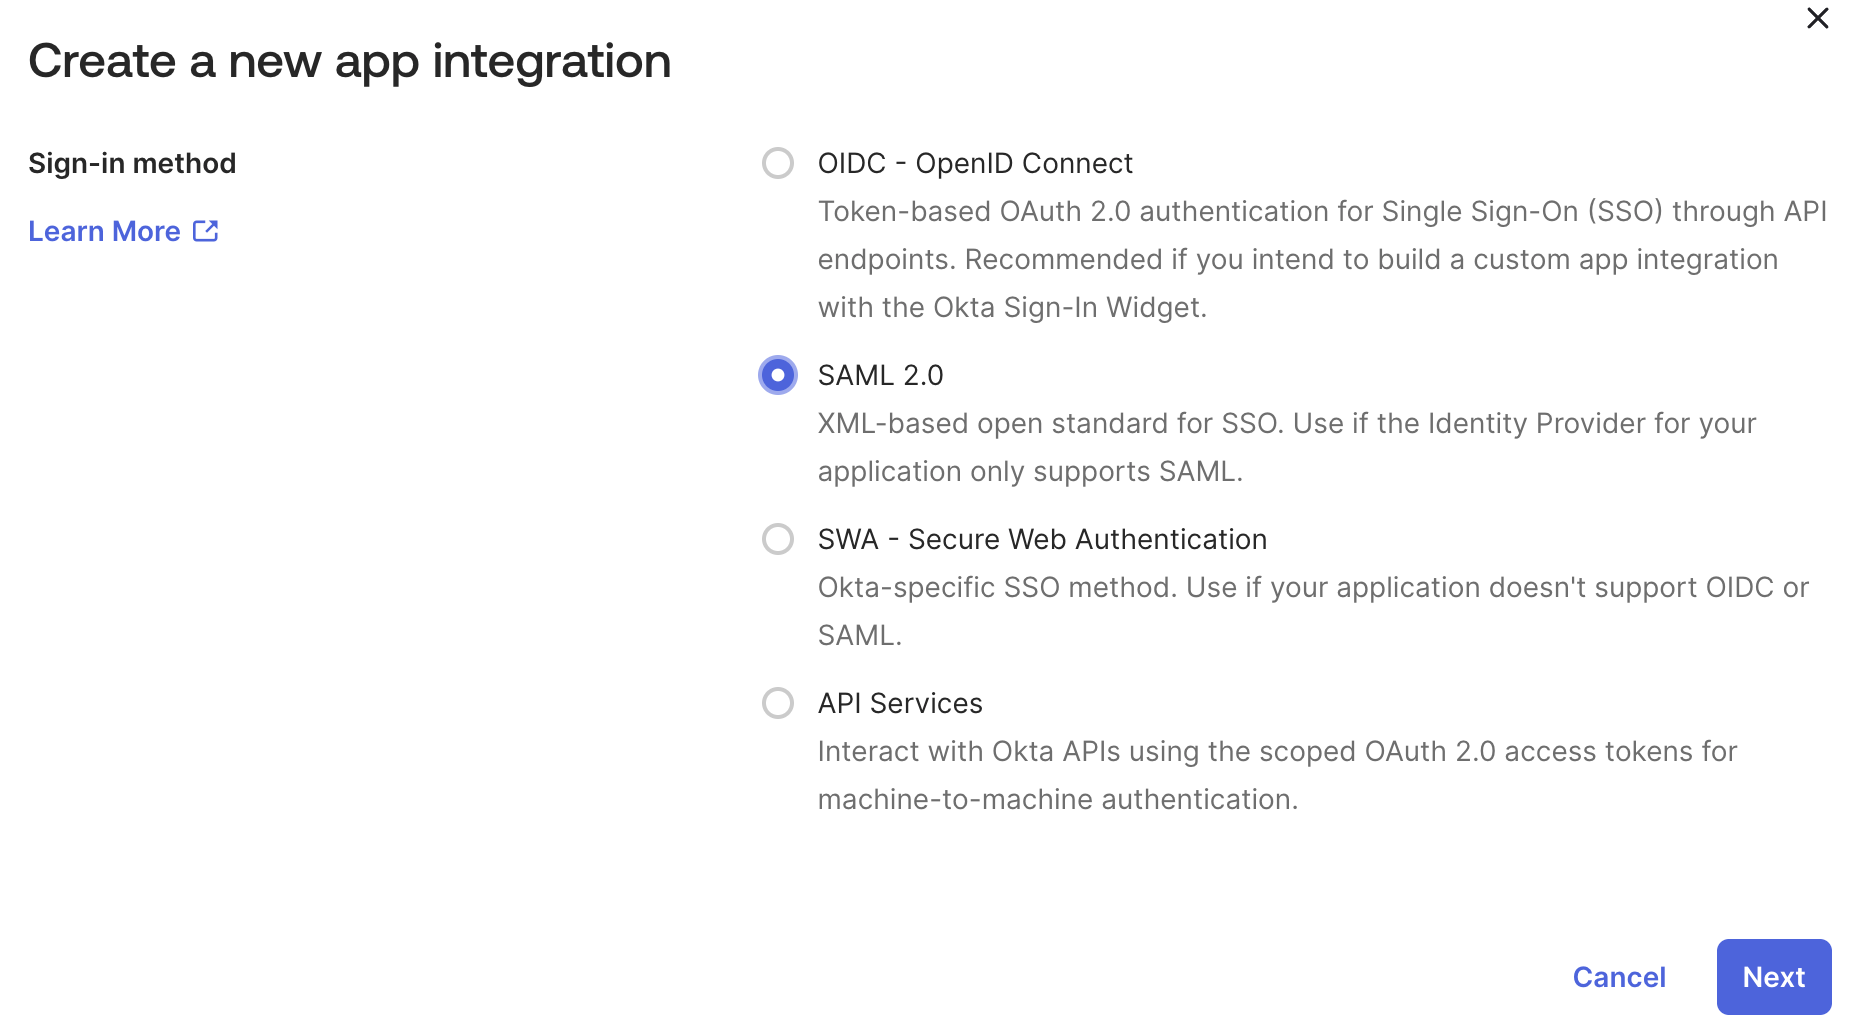
In the dialog that opens, select the SAML 2.0 option, then click next
-
In Step 1 General Settings, enter
CloudAMQP, as an example, in the App name field, then click the green Next button.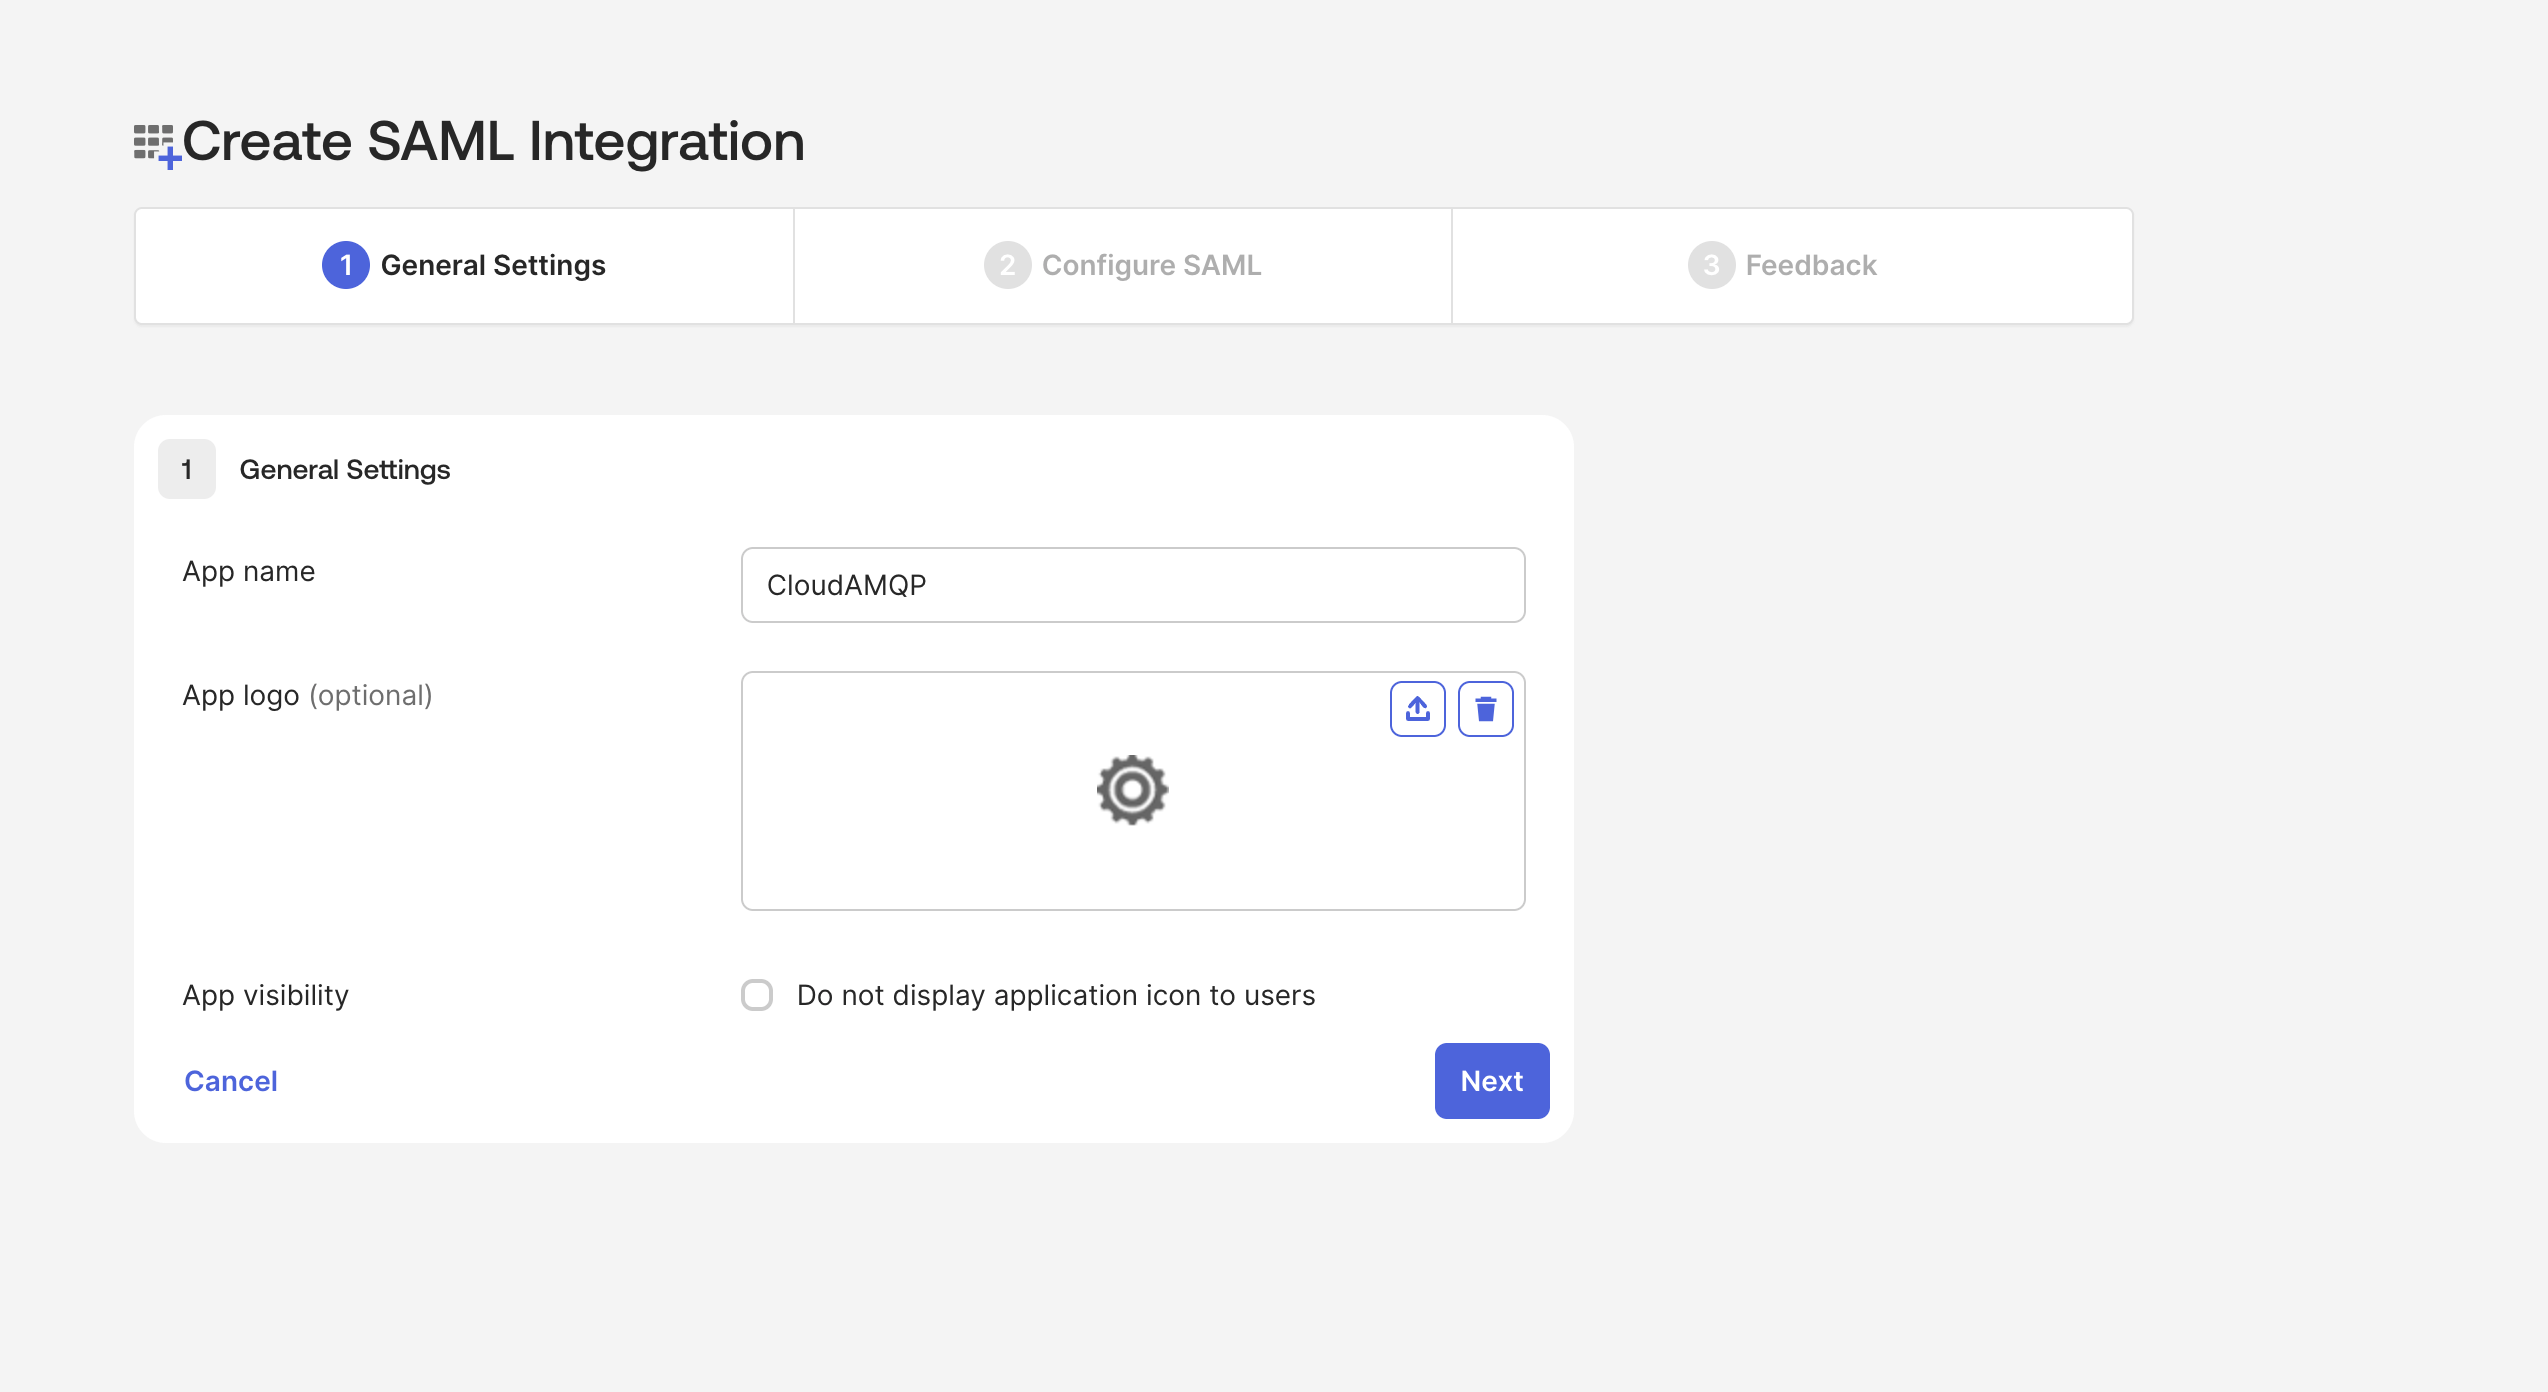
- In Step 2A SAML Setting do the following.
- In the Single sign on URL field, enter
https://customer.cloudamqp.com/login/samland check the box Use this for Recipient URL and Destination URL - For Audience URI (SP Entity ID), go to https://customer.cloudamqp.com/team/saml and copy your SAML Audience URL/Audience URI/SP Entity ID/SAML Metadata to this field.
- In the field Name ID format pick EmailAddress from the drop down list
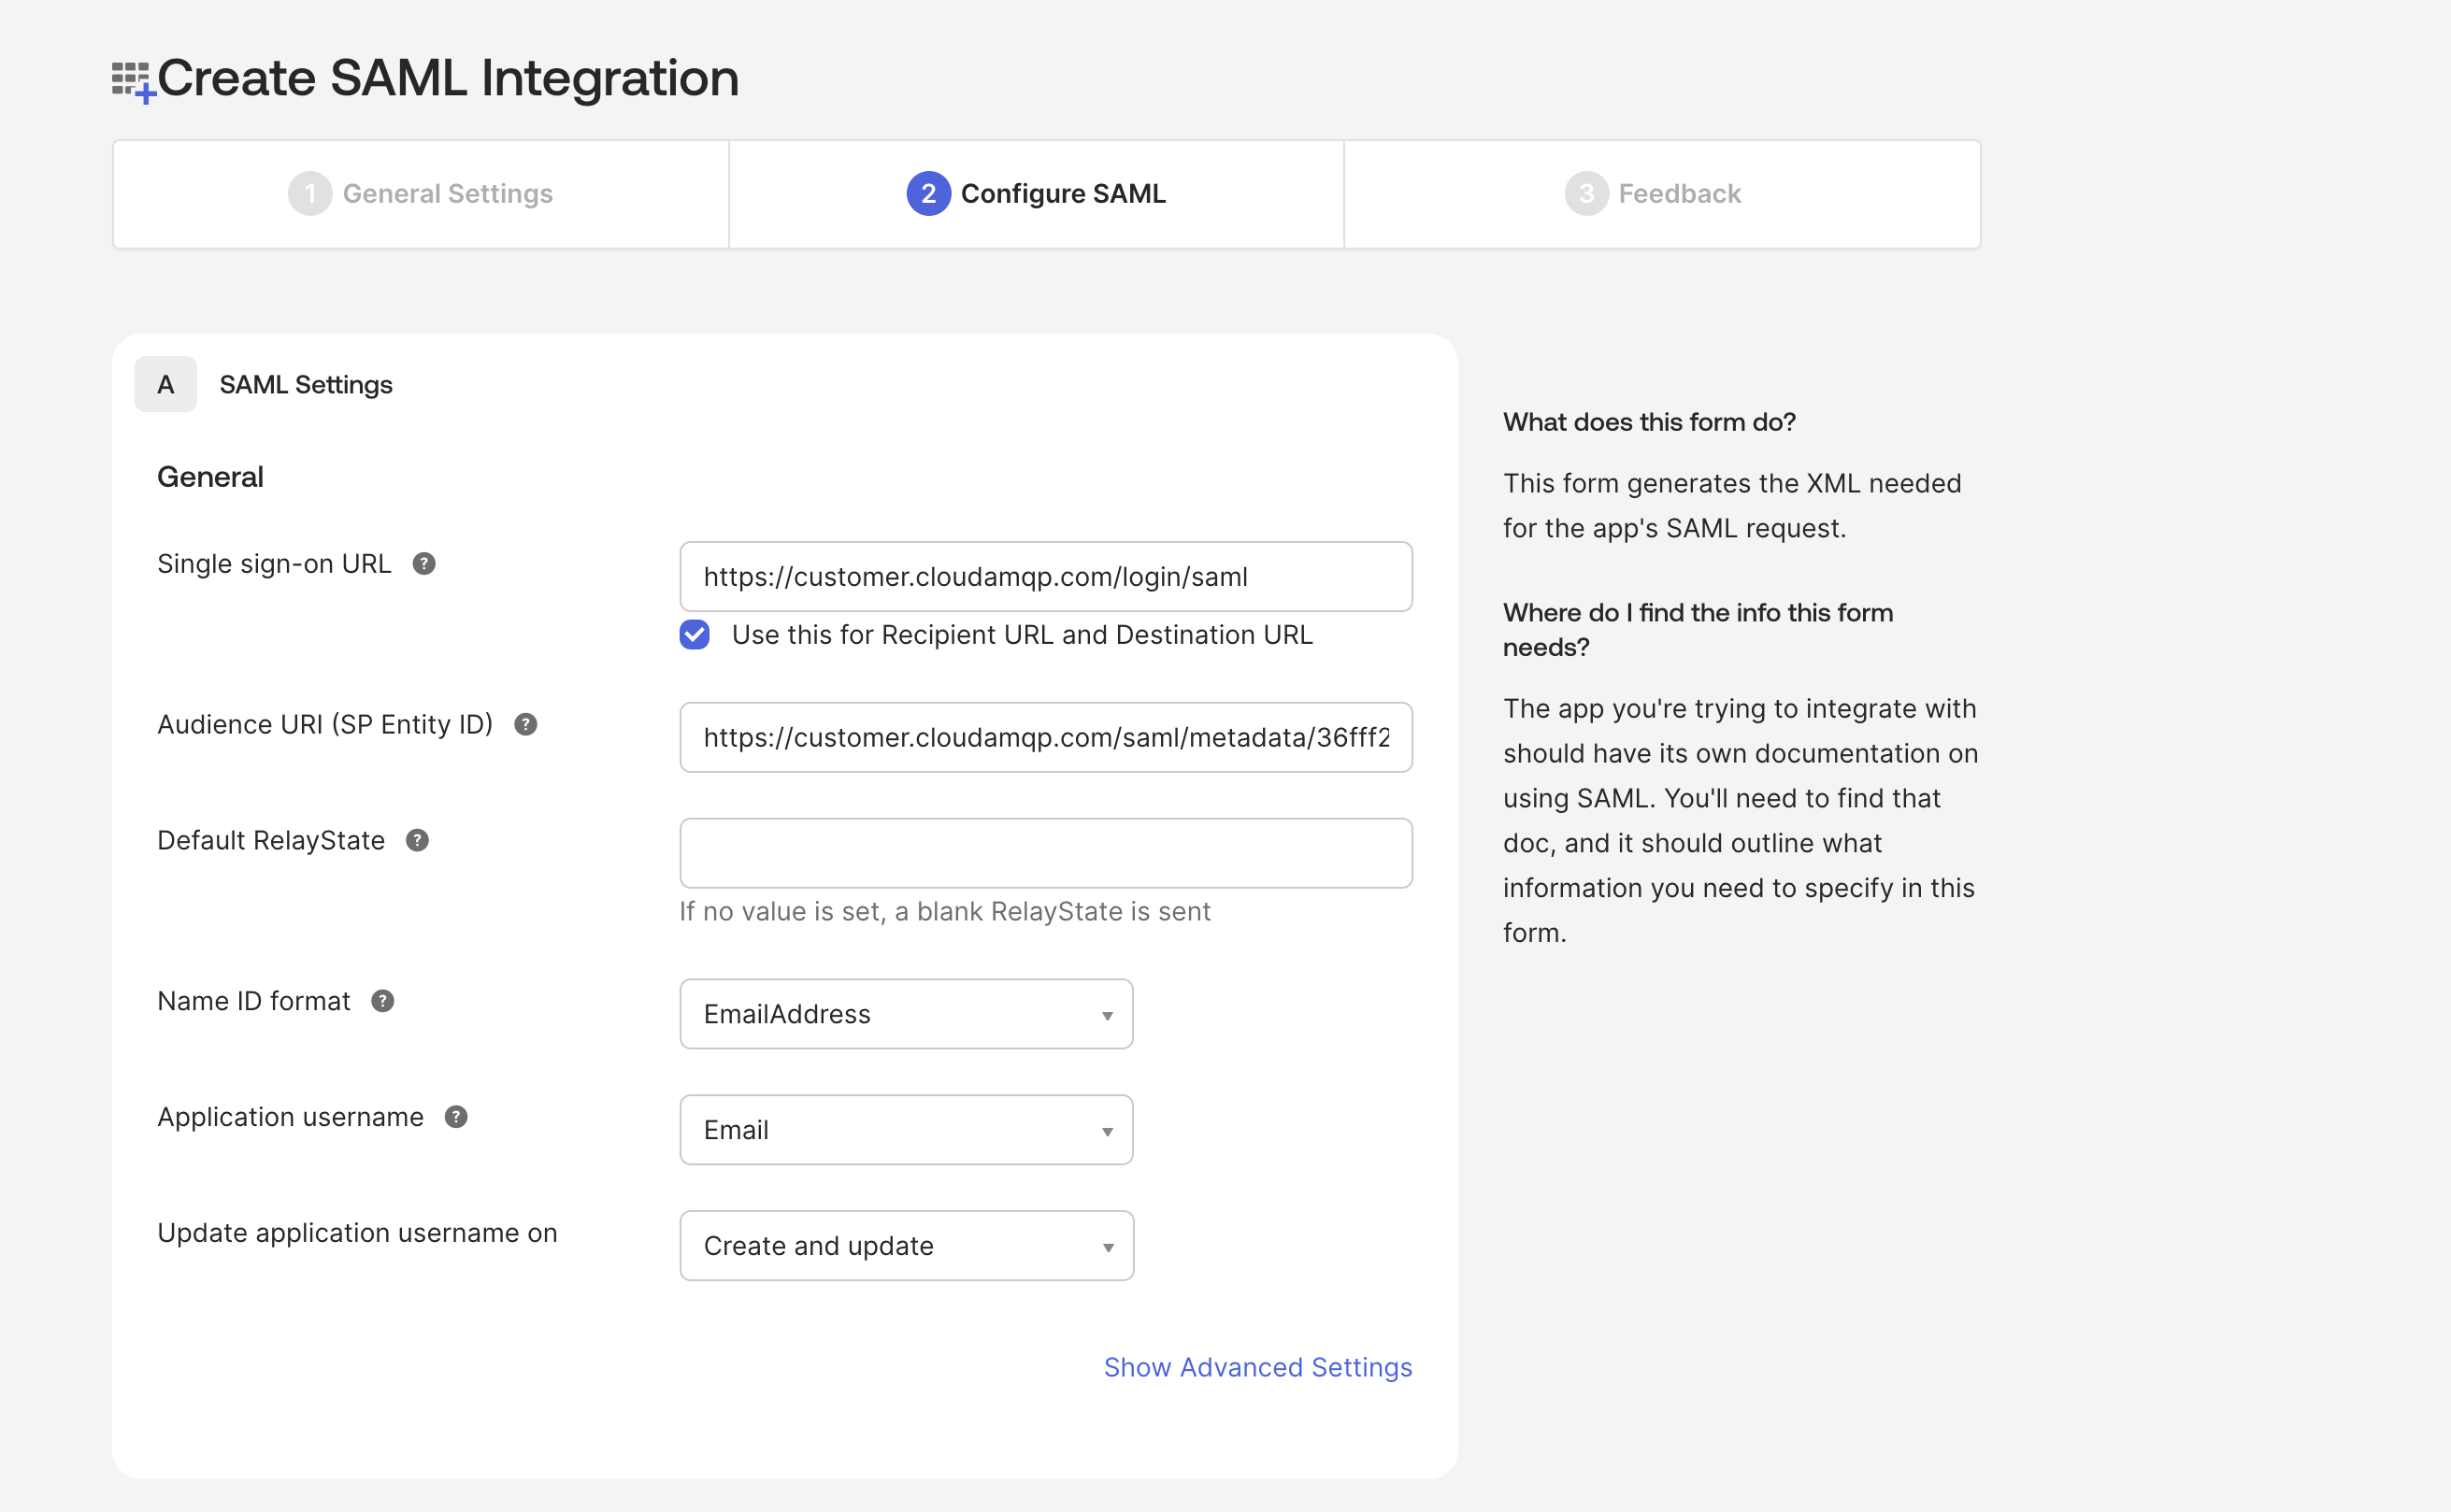
- In the Single sign on URL field, enter
-
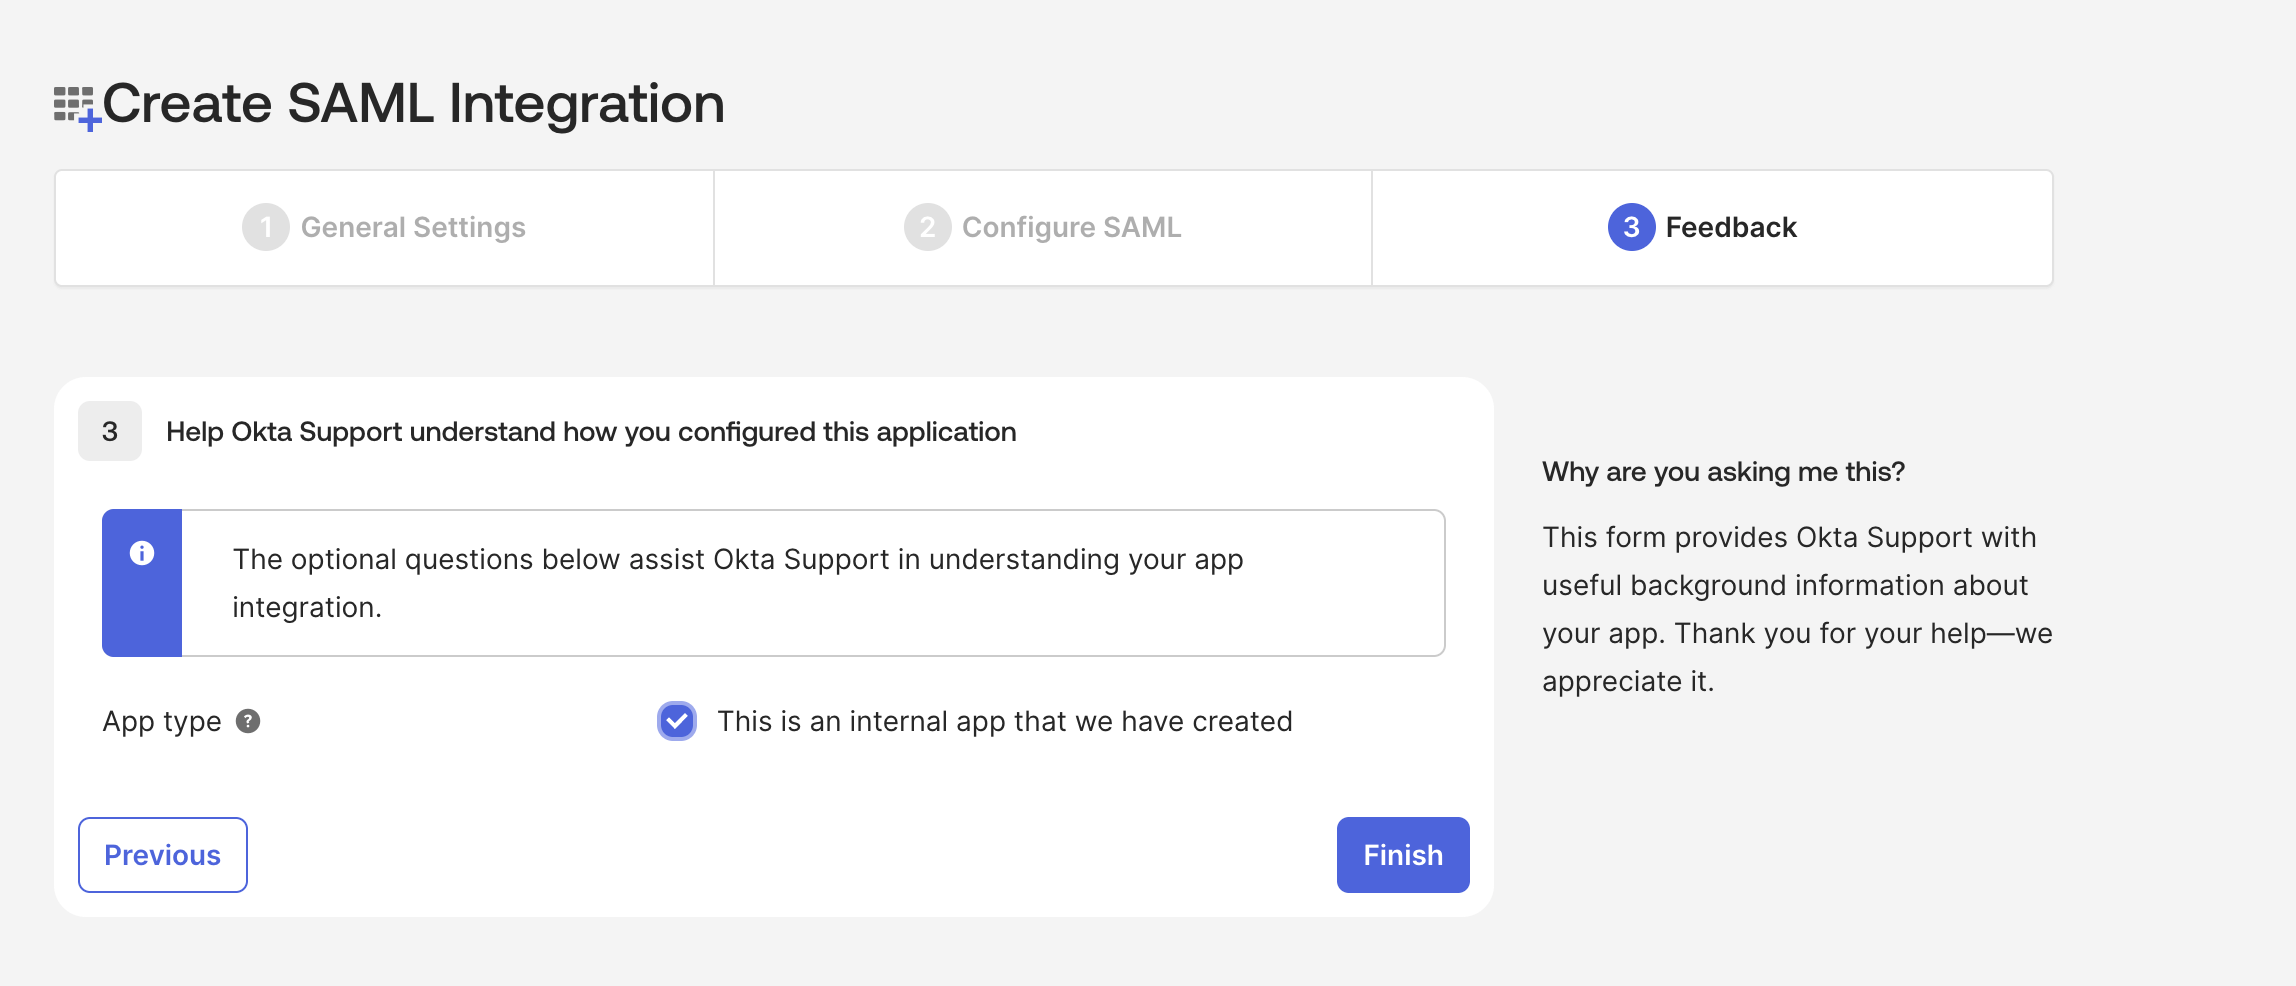
In the step Feedback select I’m an Okta customer adding an internal app, and This is an internal app that we have created, then click Finish
-
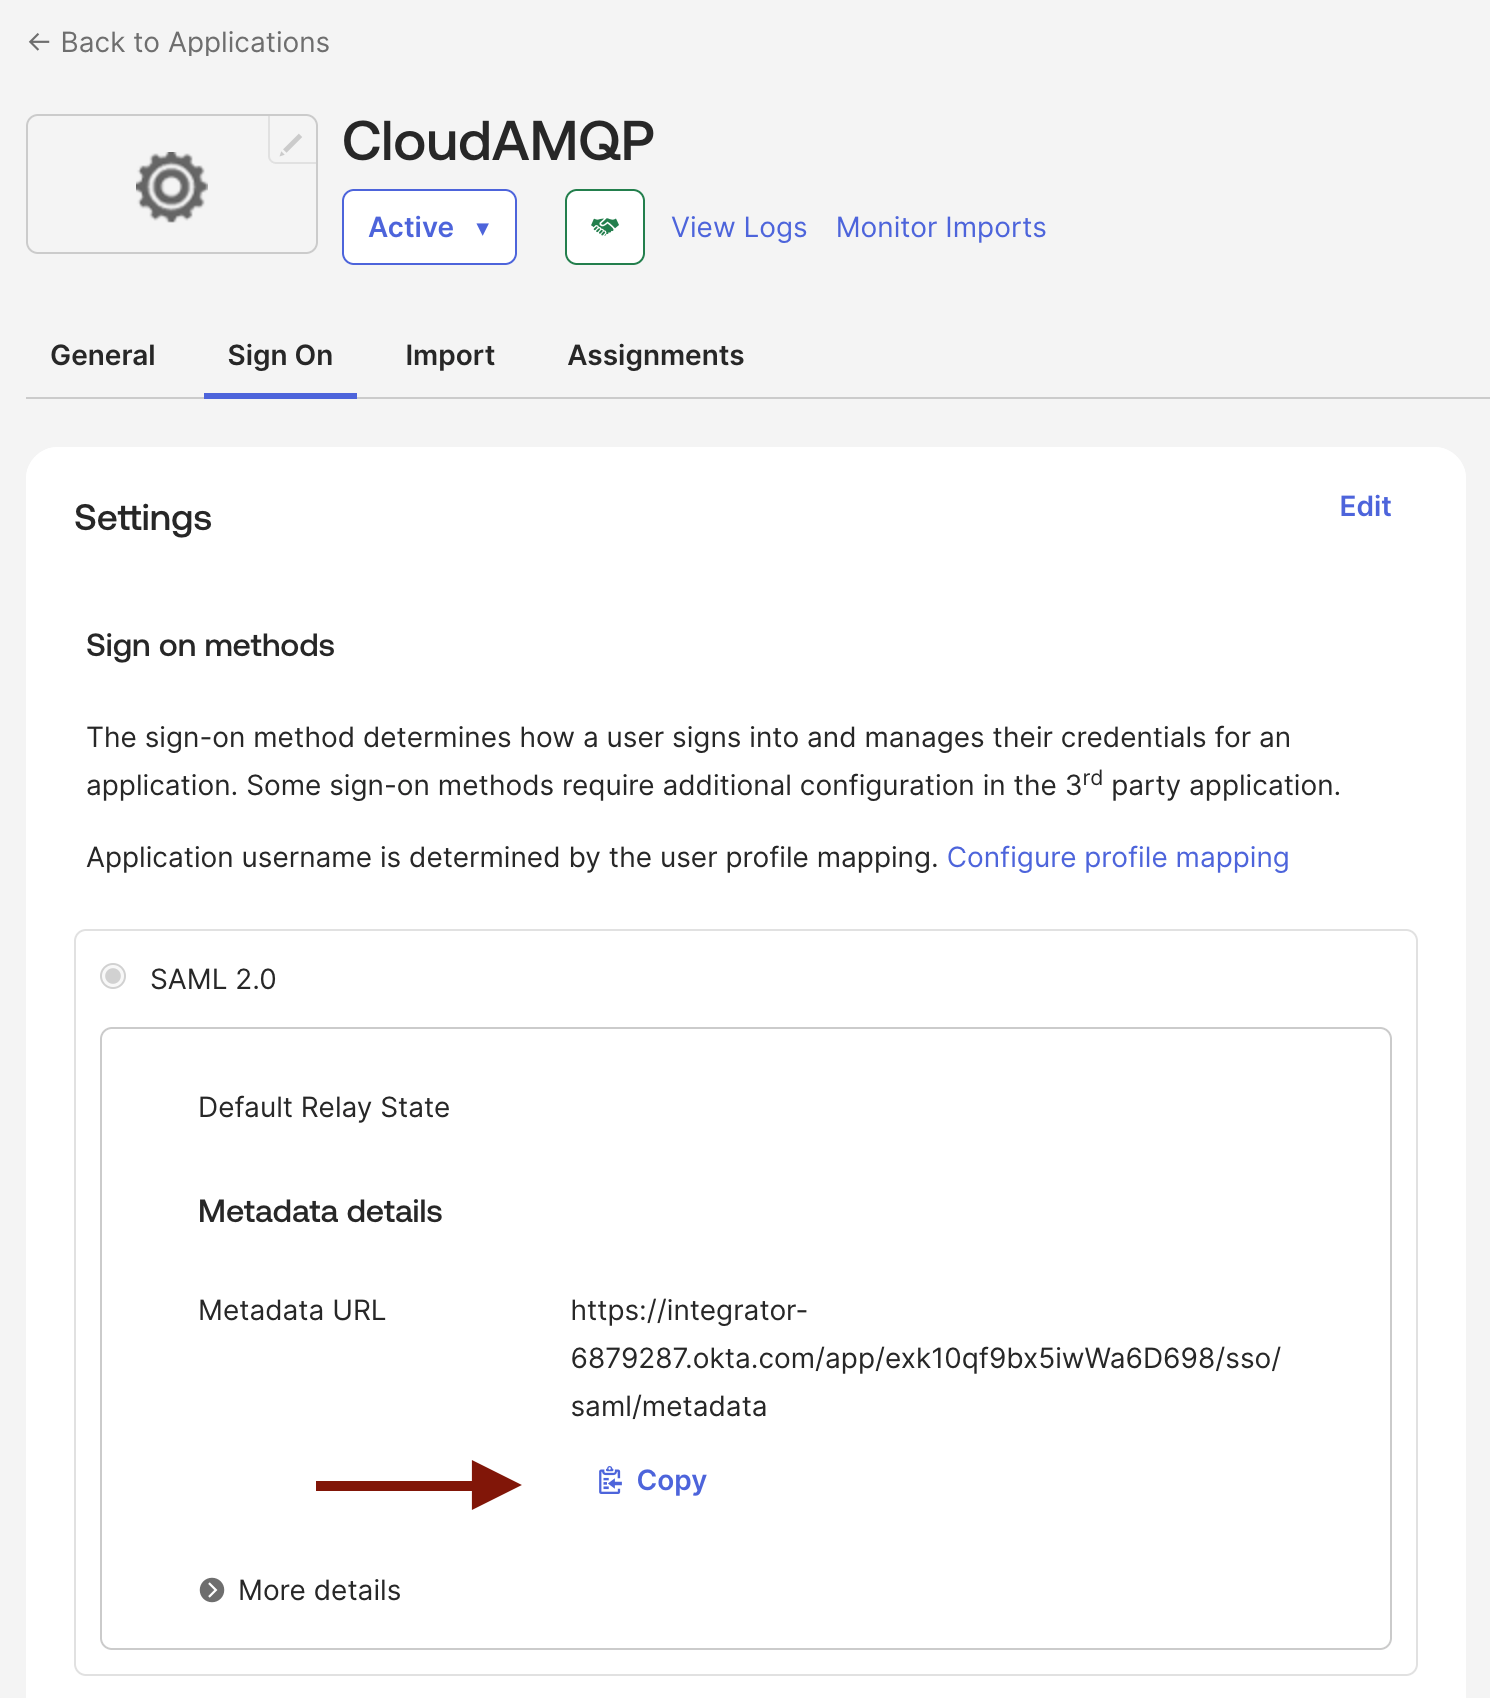
The IdP Metadata now has to be uploaded to https://customer.cloudamqp.com/team/saml.
Download the file from Okta, under the menu option Applications, click on your recently created application, and the tab Sign On From here you can download the file that you have to upload to CloudAMQP by clicking Copy and paste the link in browser, then right click - save as - and name it metadata.xml.
-
In order to assign users with roles and tags, scroll down to Attribute Statements under Sign On. Expand the legacy configuration, and under “Profile attribute statements”, assign
84codes.rolestoappuser.roles.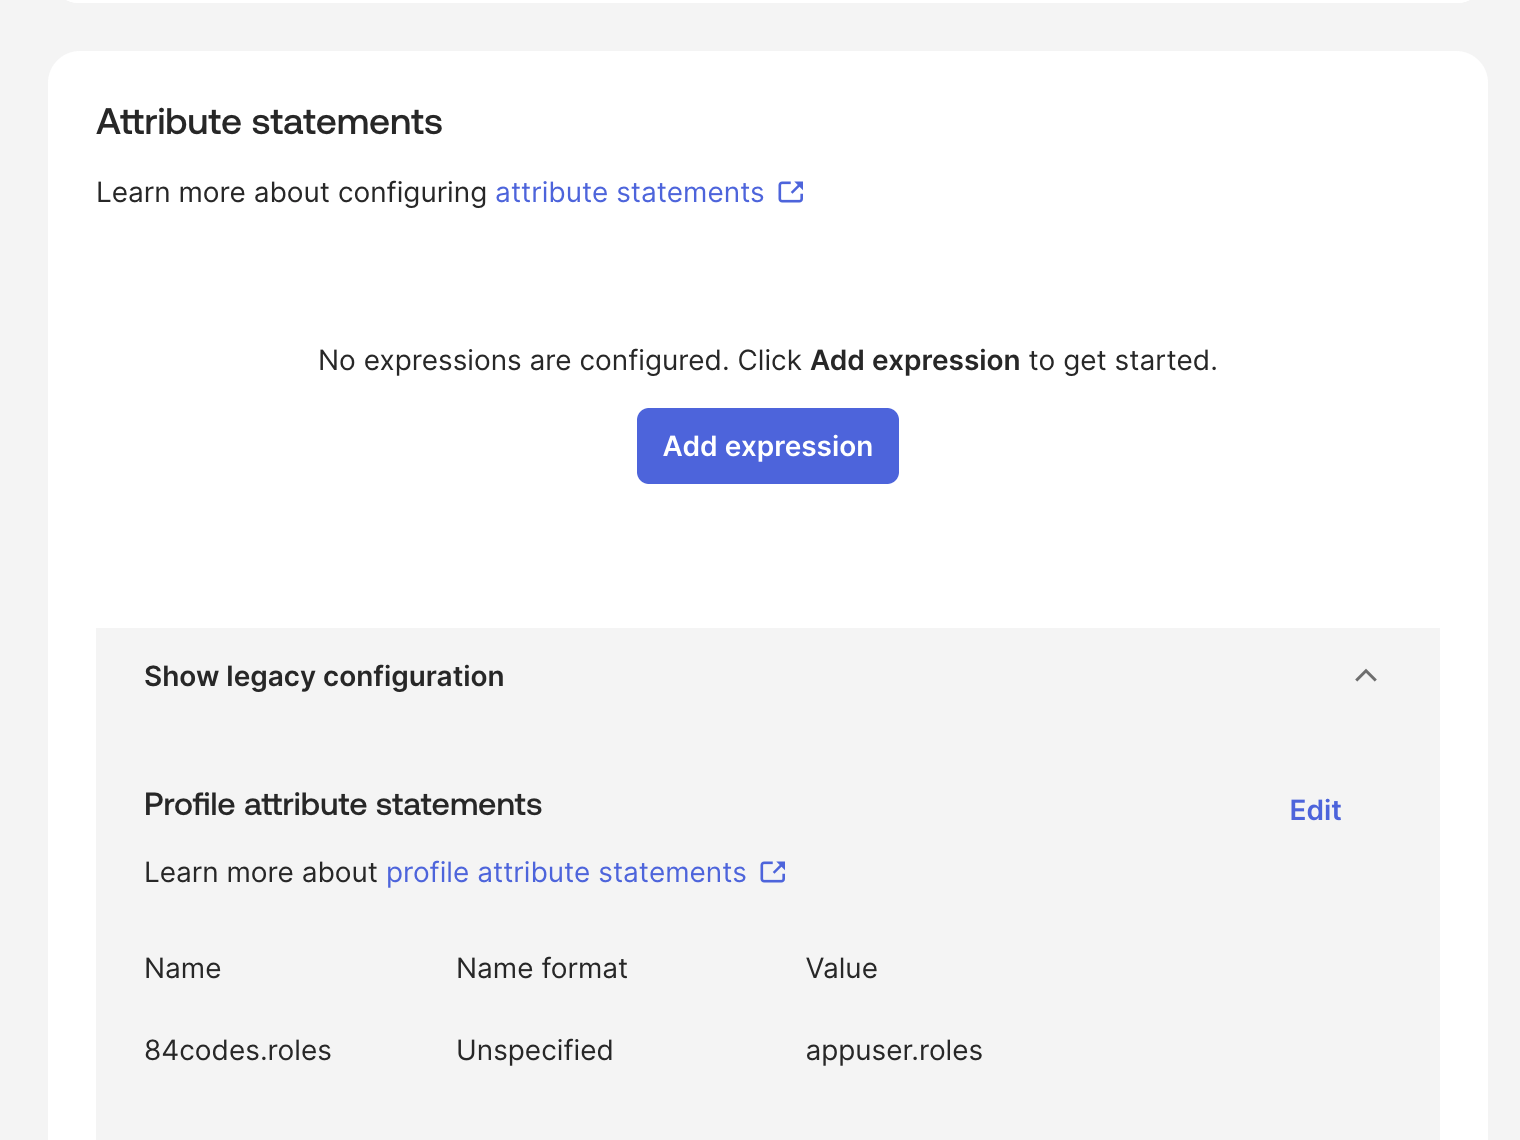
-
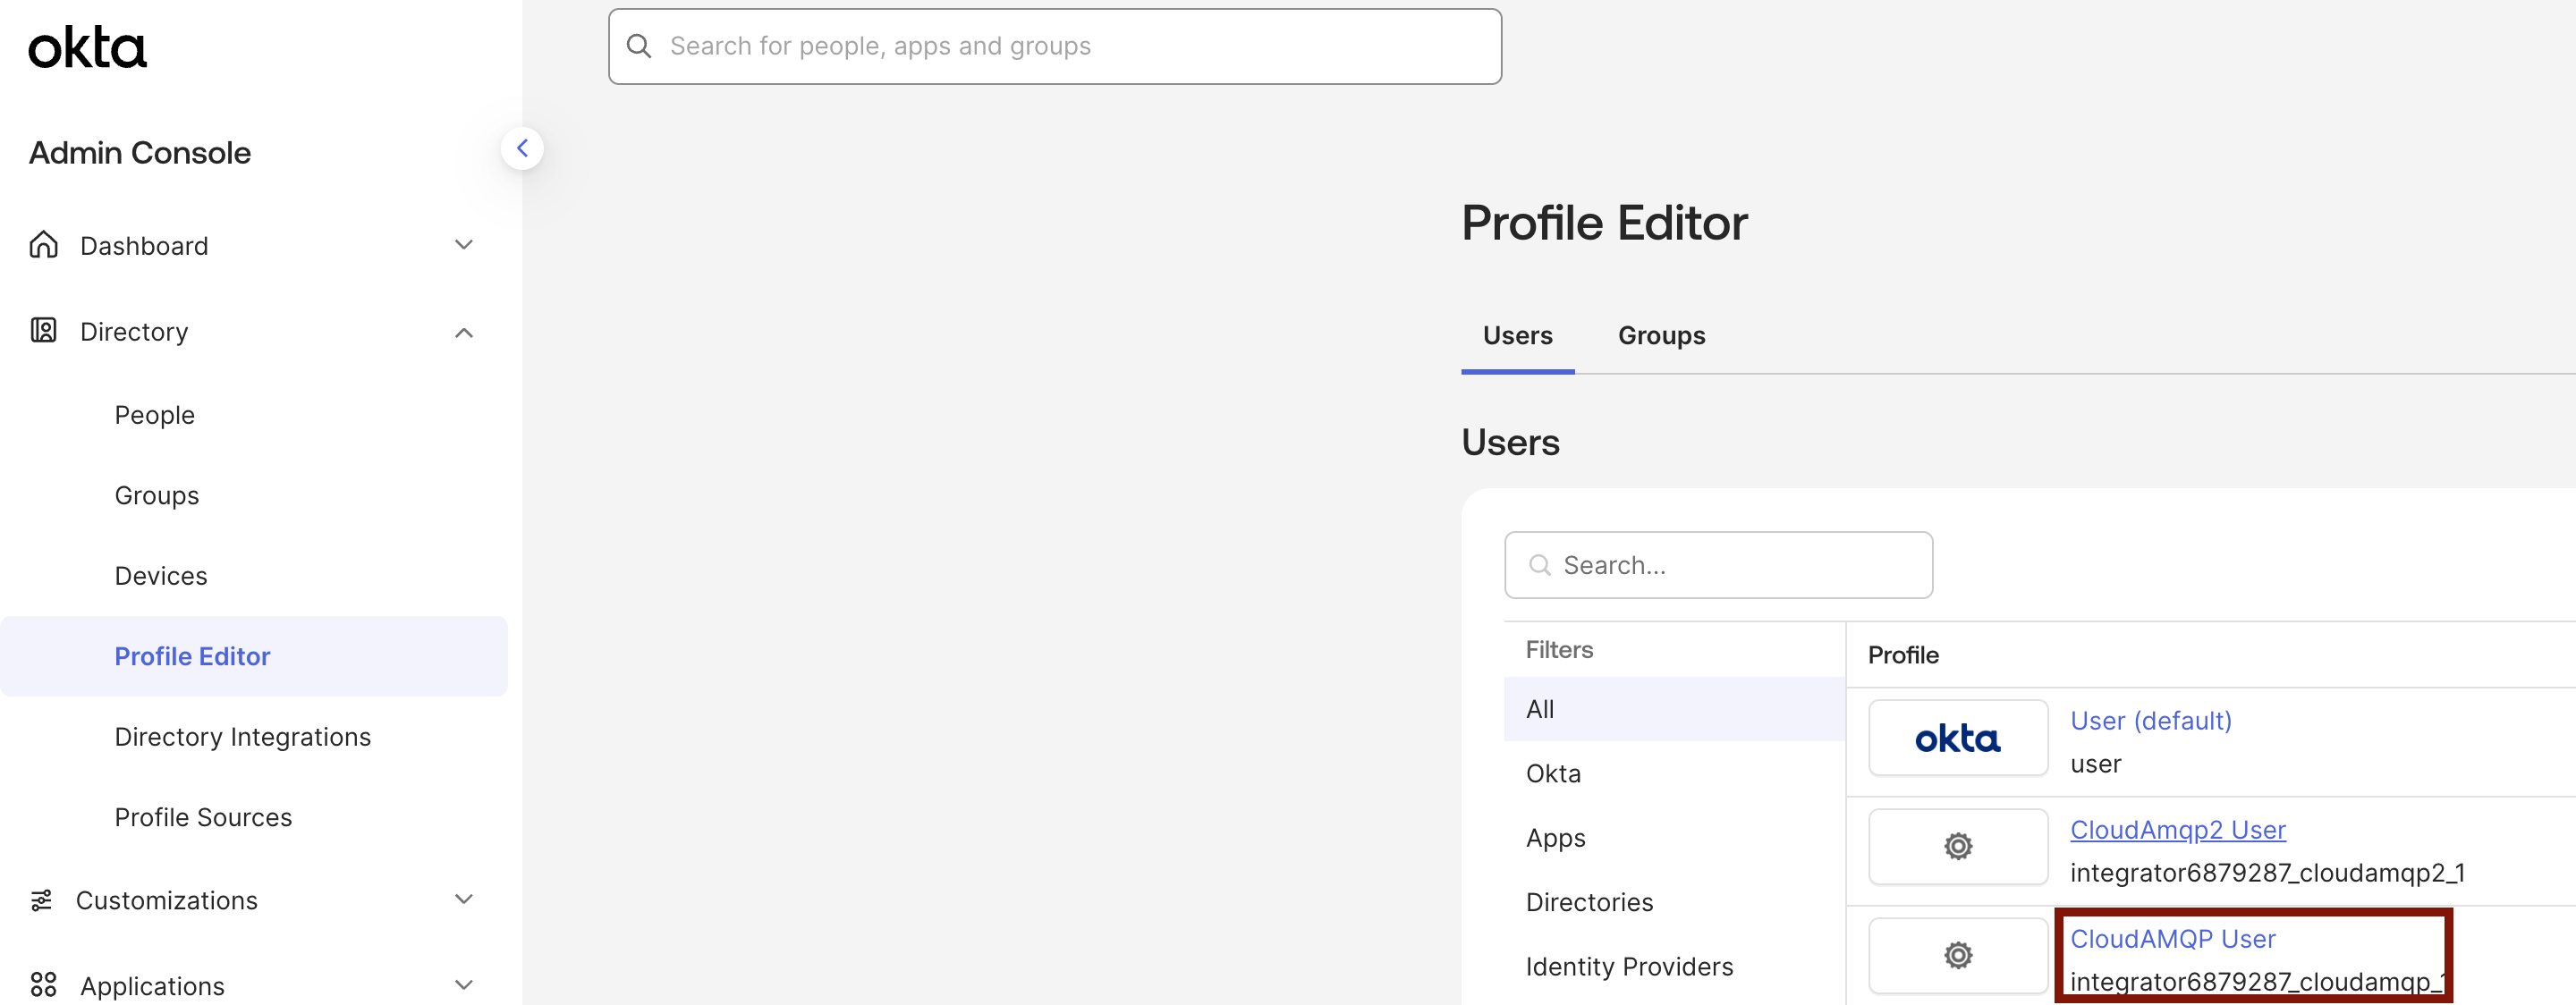
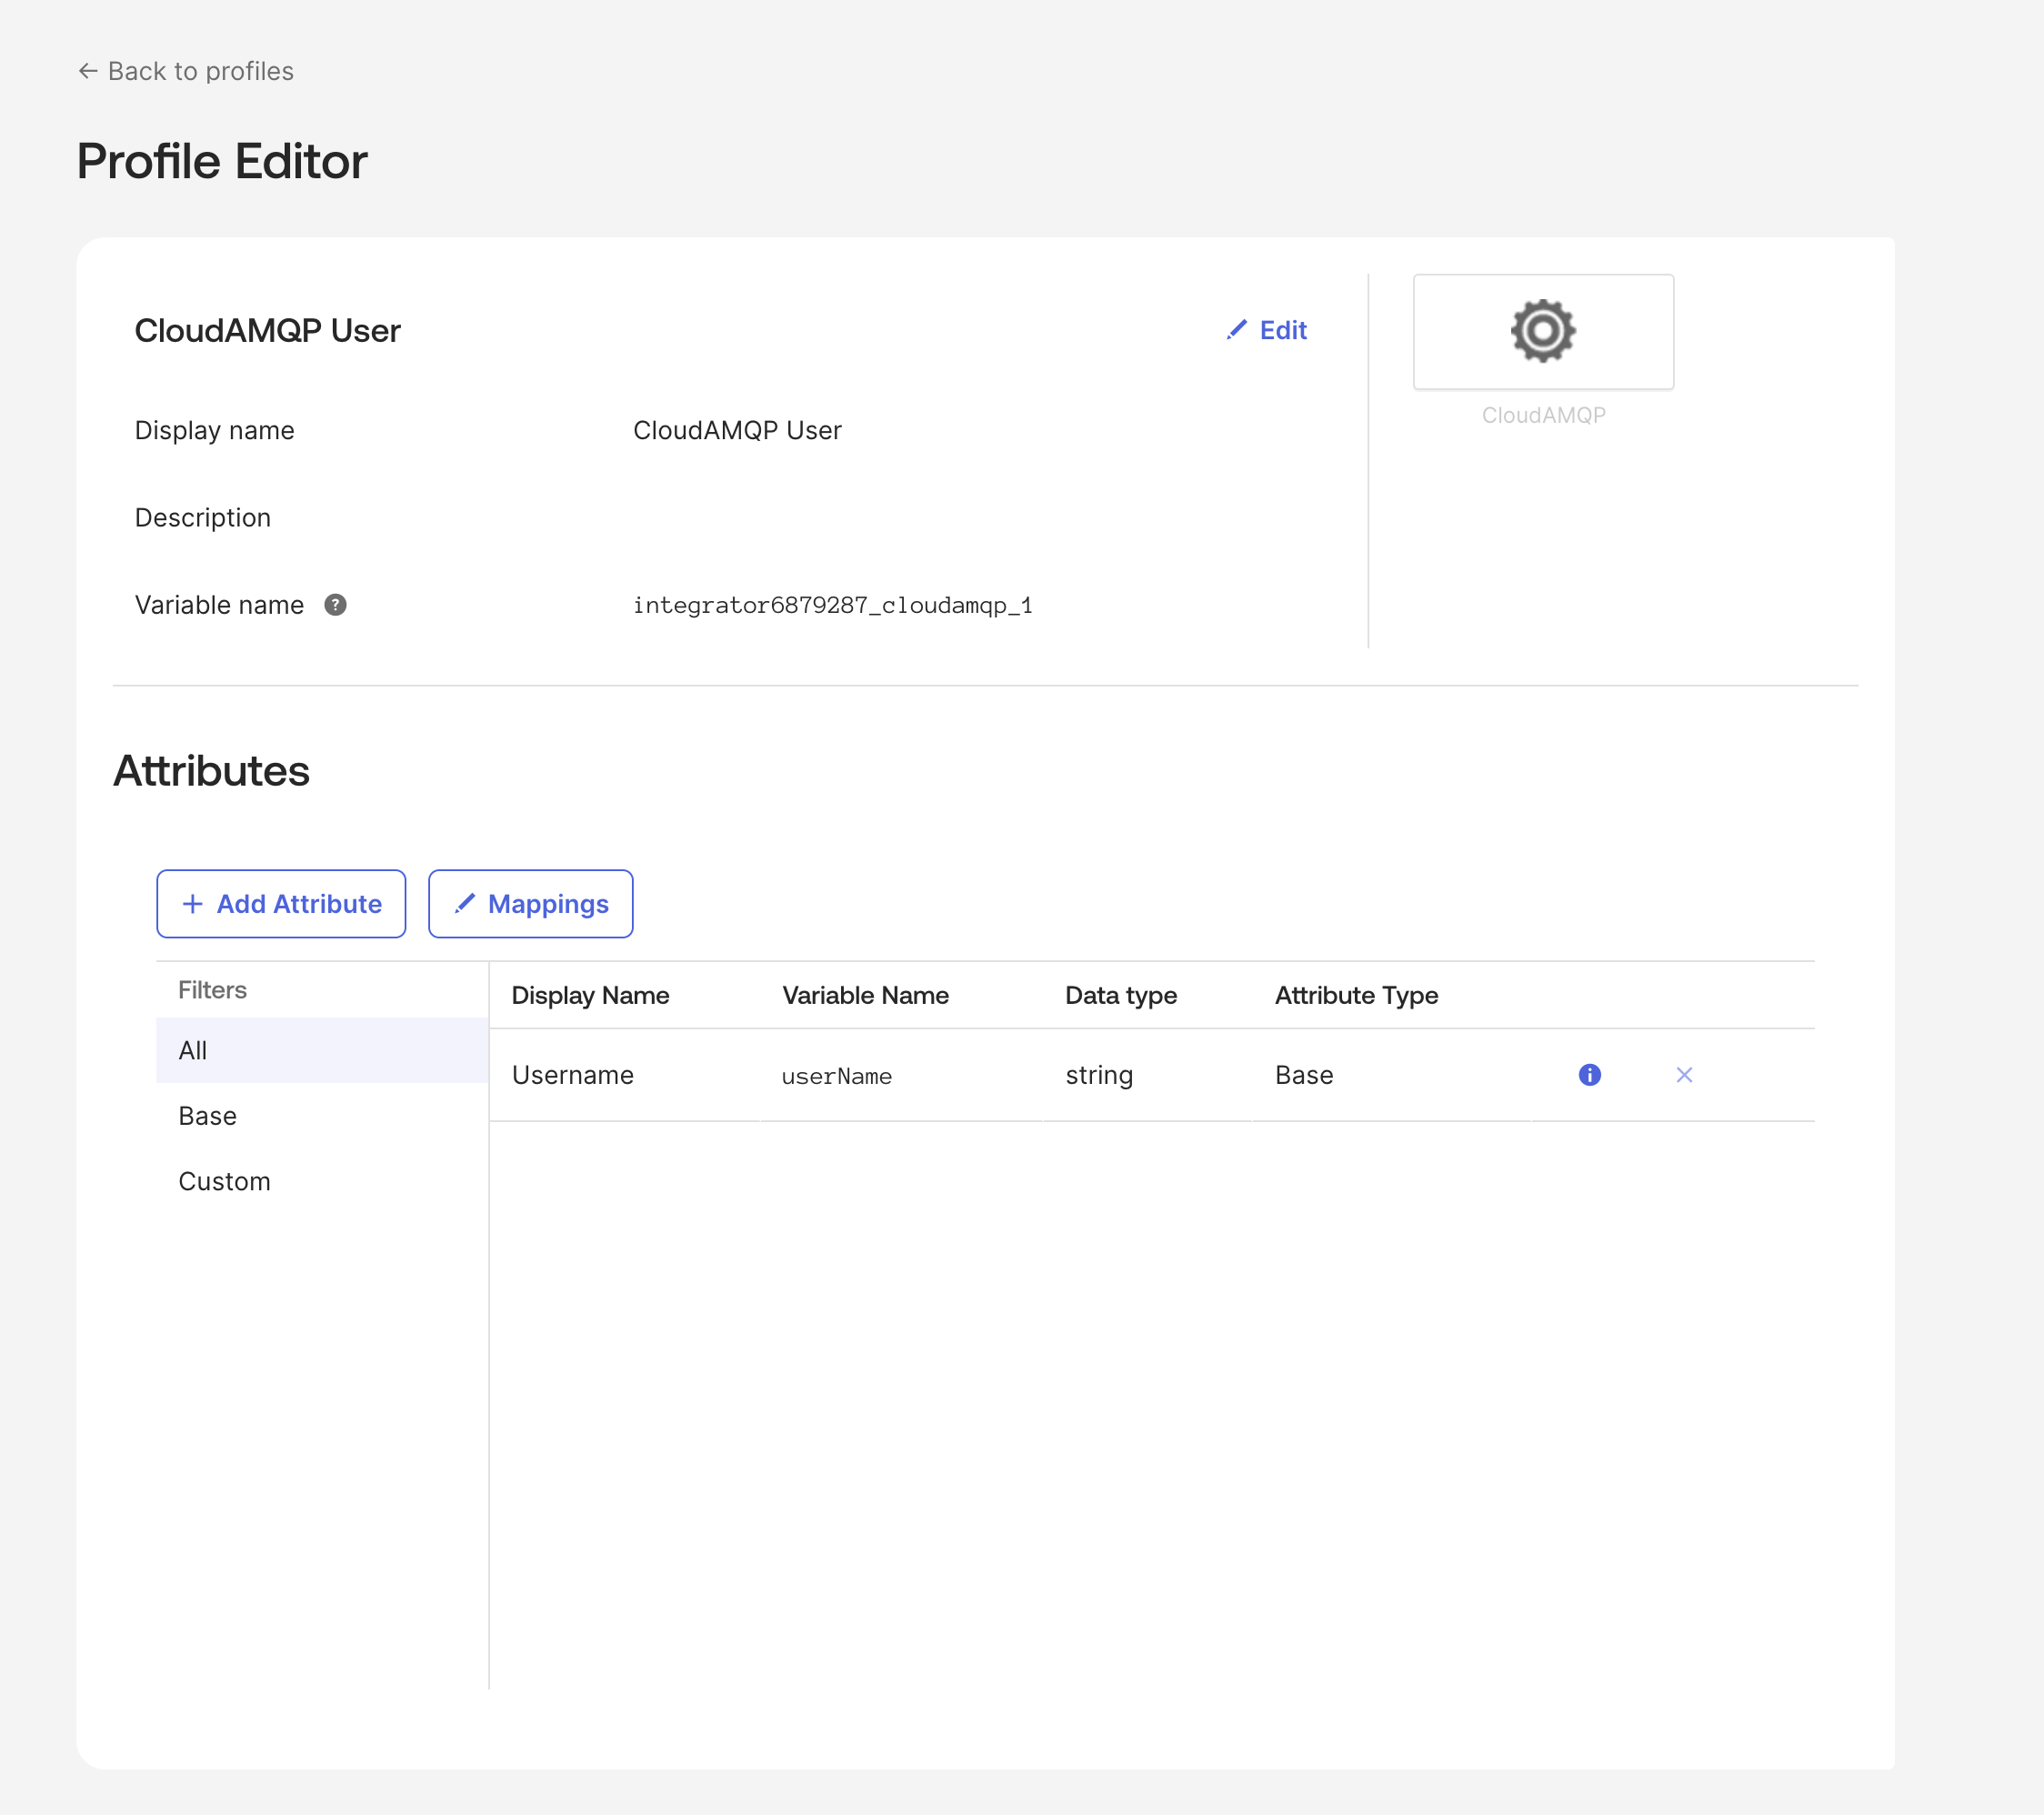
Go to the menu option Directory -> Profile Editor and click on the app you just created.
-
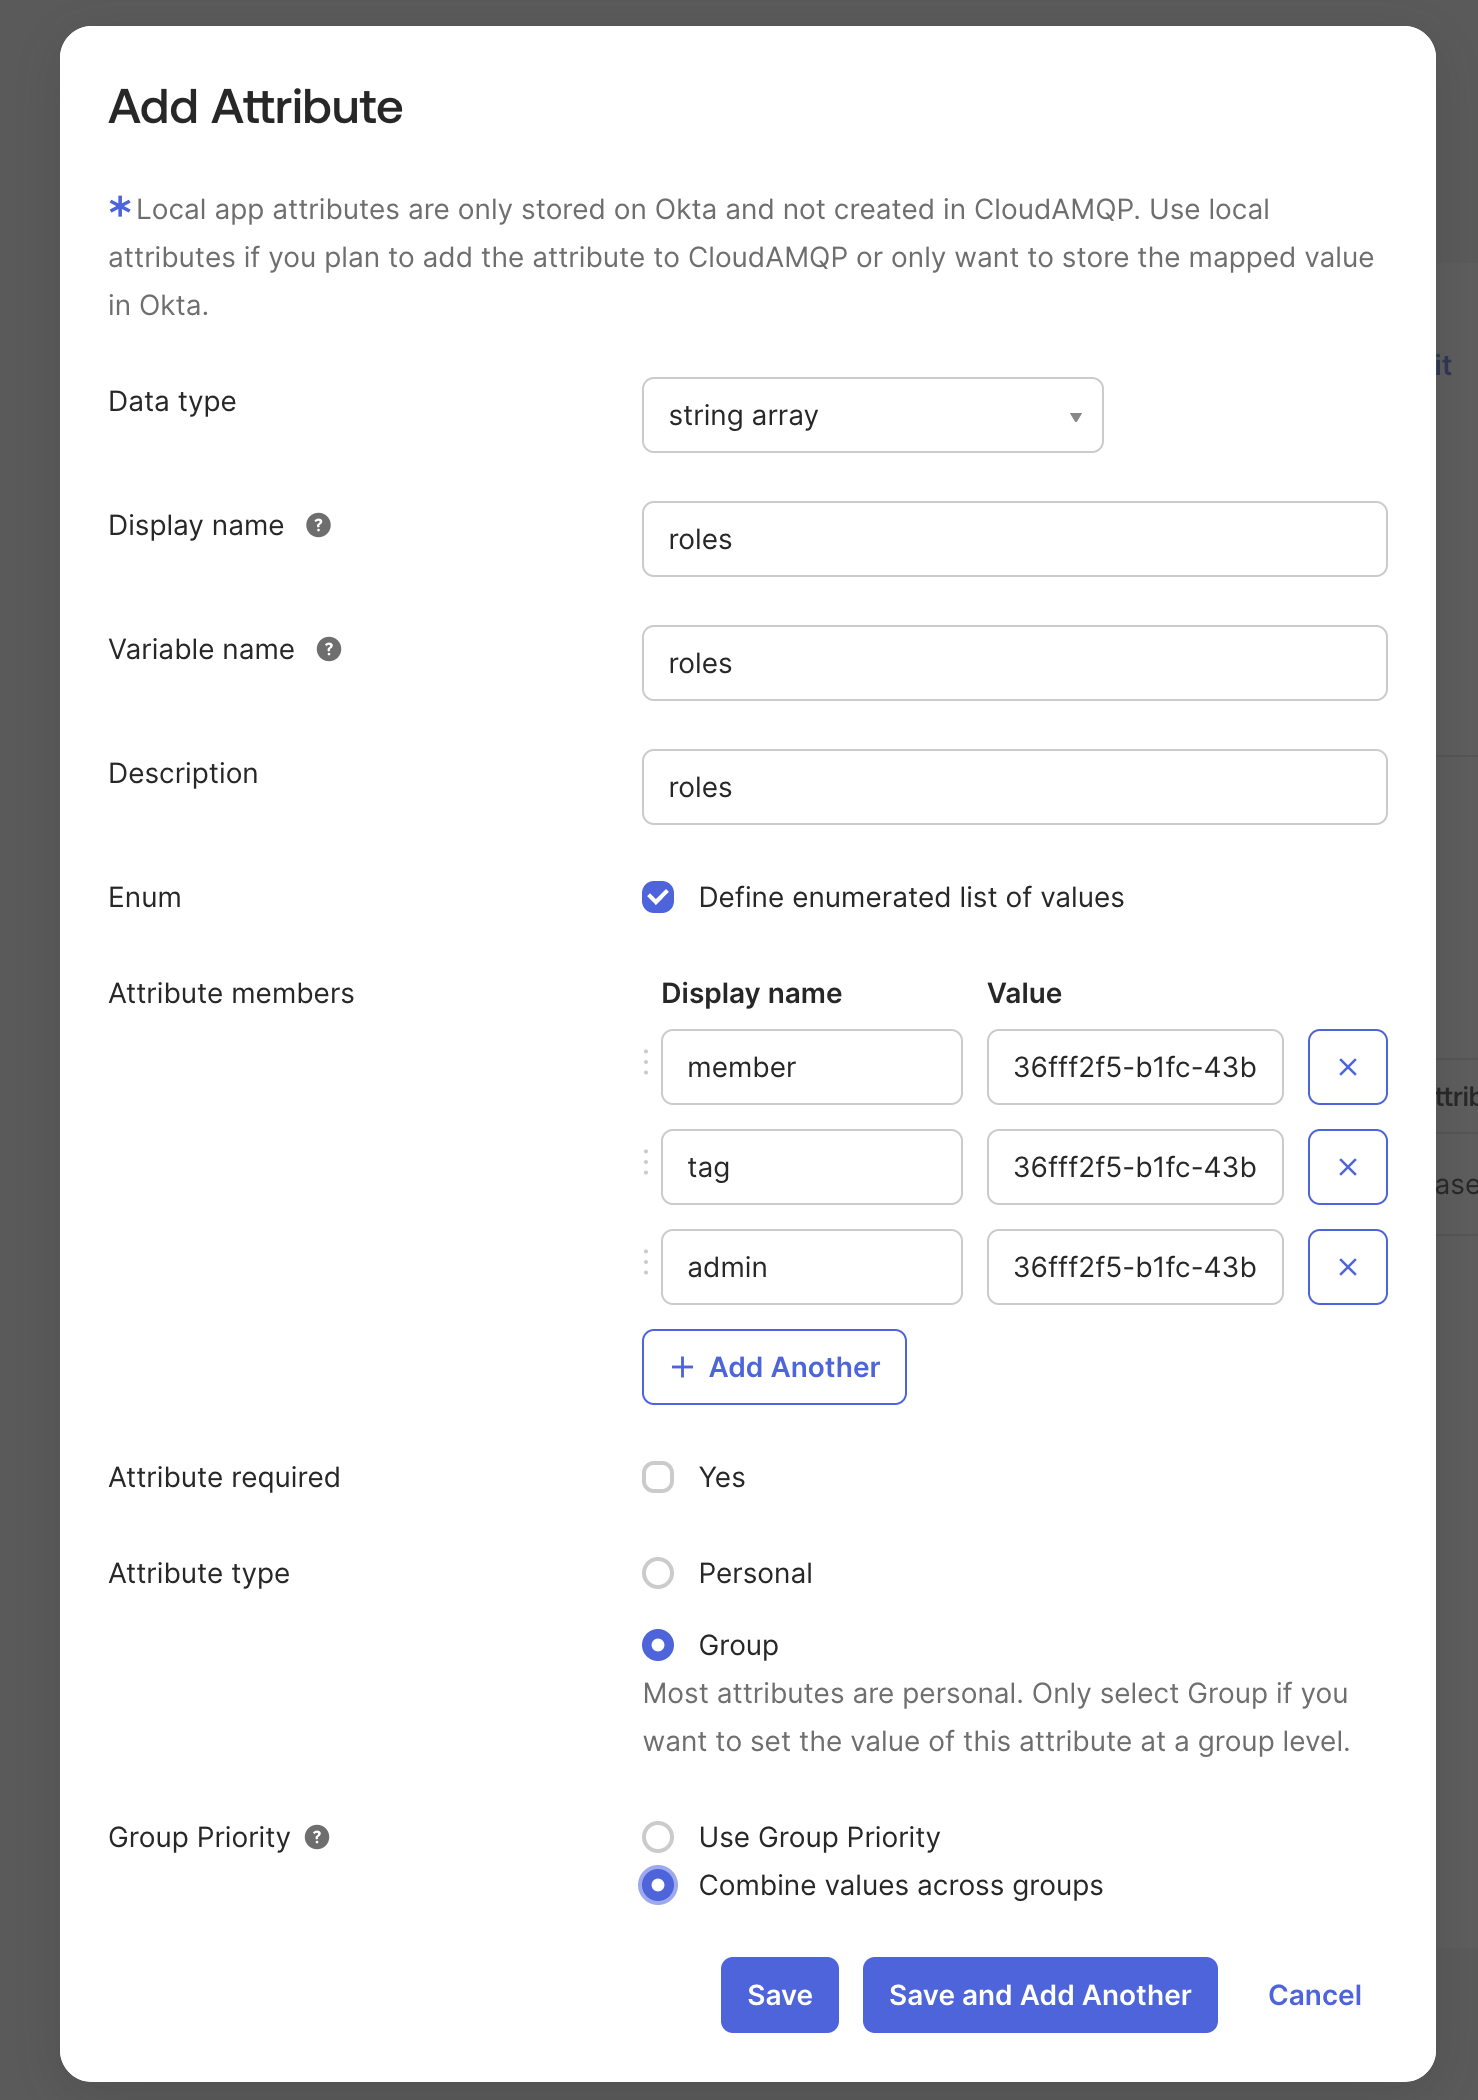
Click the Add Attribute button.
-
Enter the information as requested, making sure the variable name is
roles, as it is used in the previous step (appname.roles). Under Attribute Members, enter the roles you wish to be able to chose from. The Value field contains the teams’ unique code followed by / and the role name or tag. The exact values to use are listed as examples in your CloudAMQP settings at: https://customer.cloudamqp.com/team/saml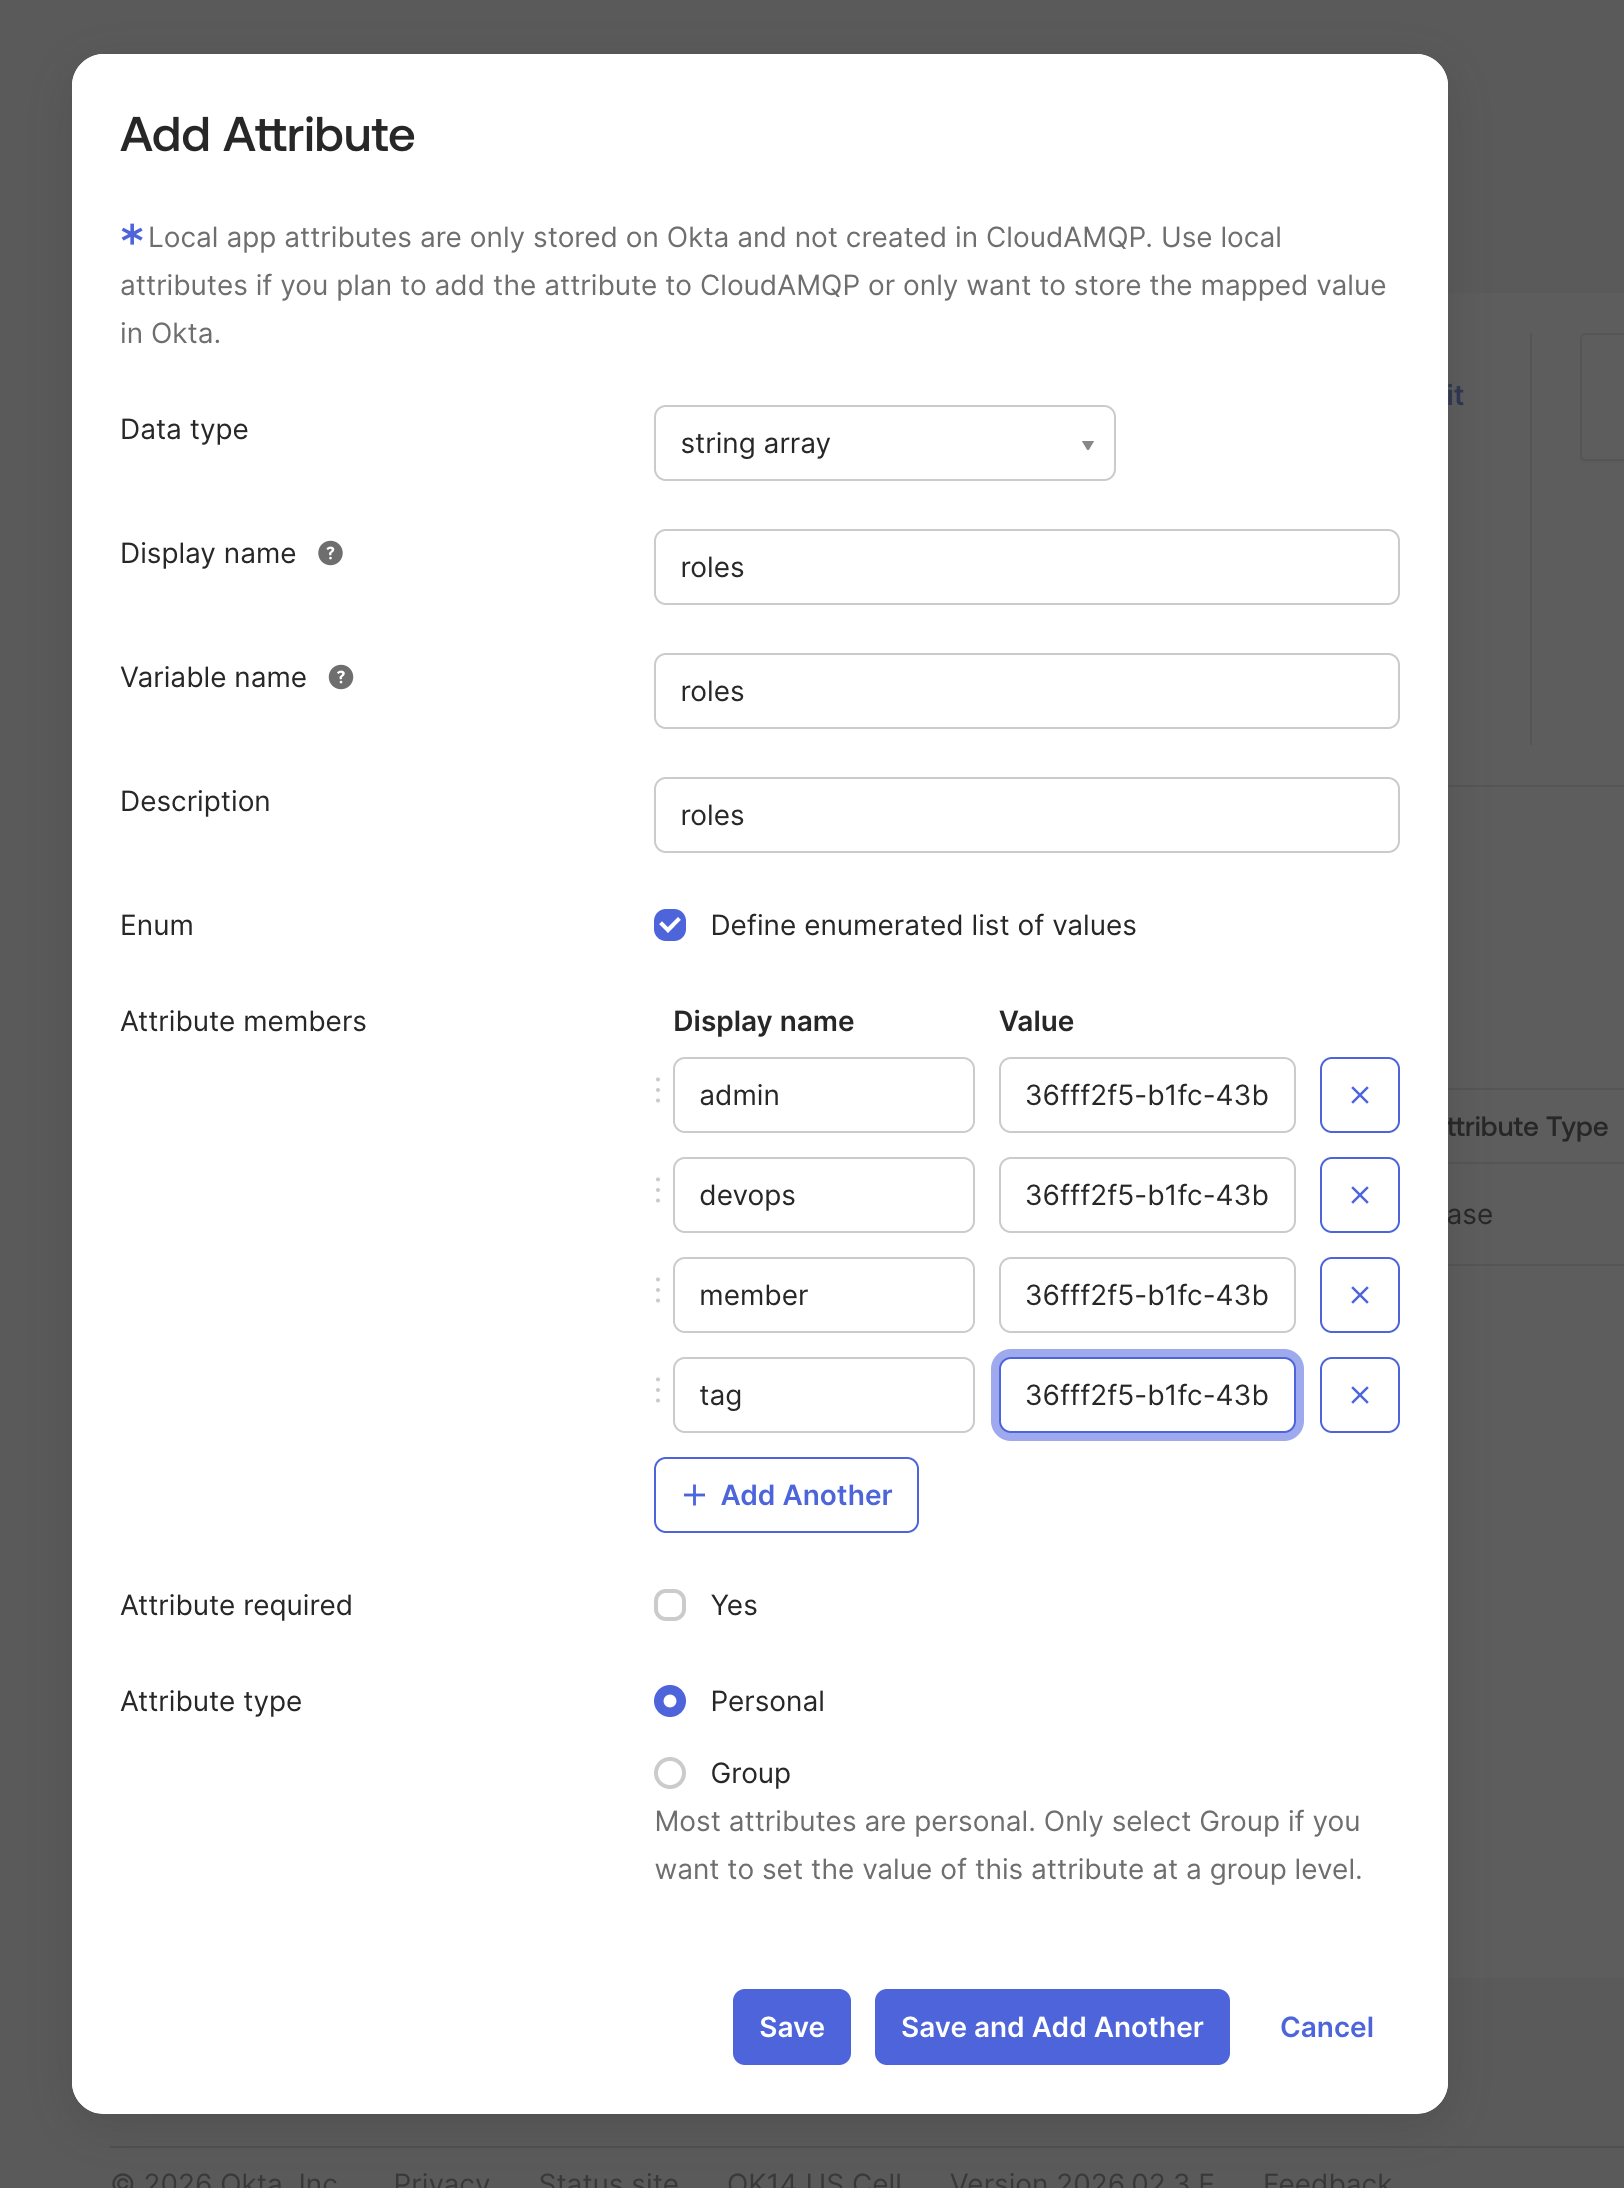
-
Click Save
-
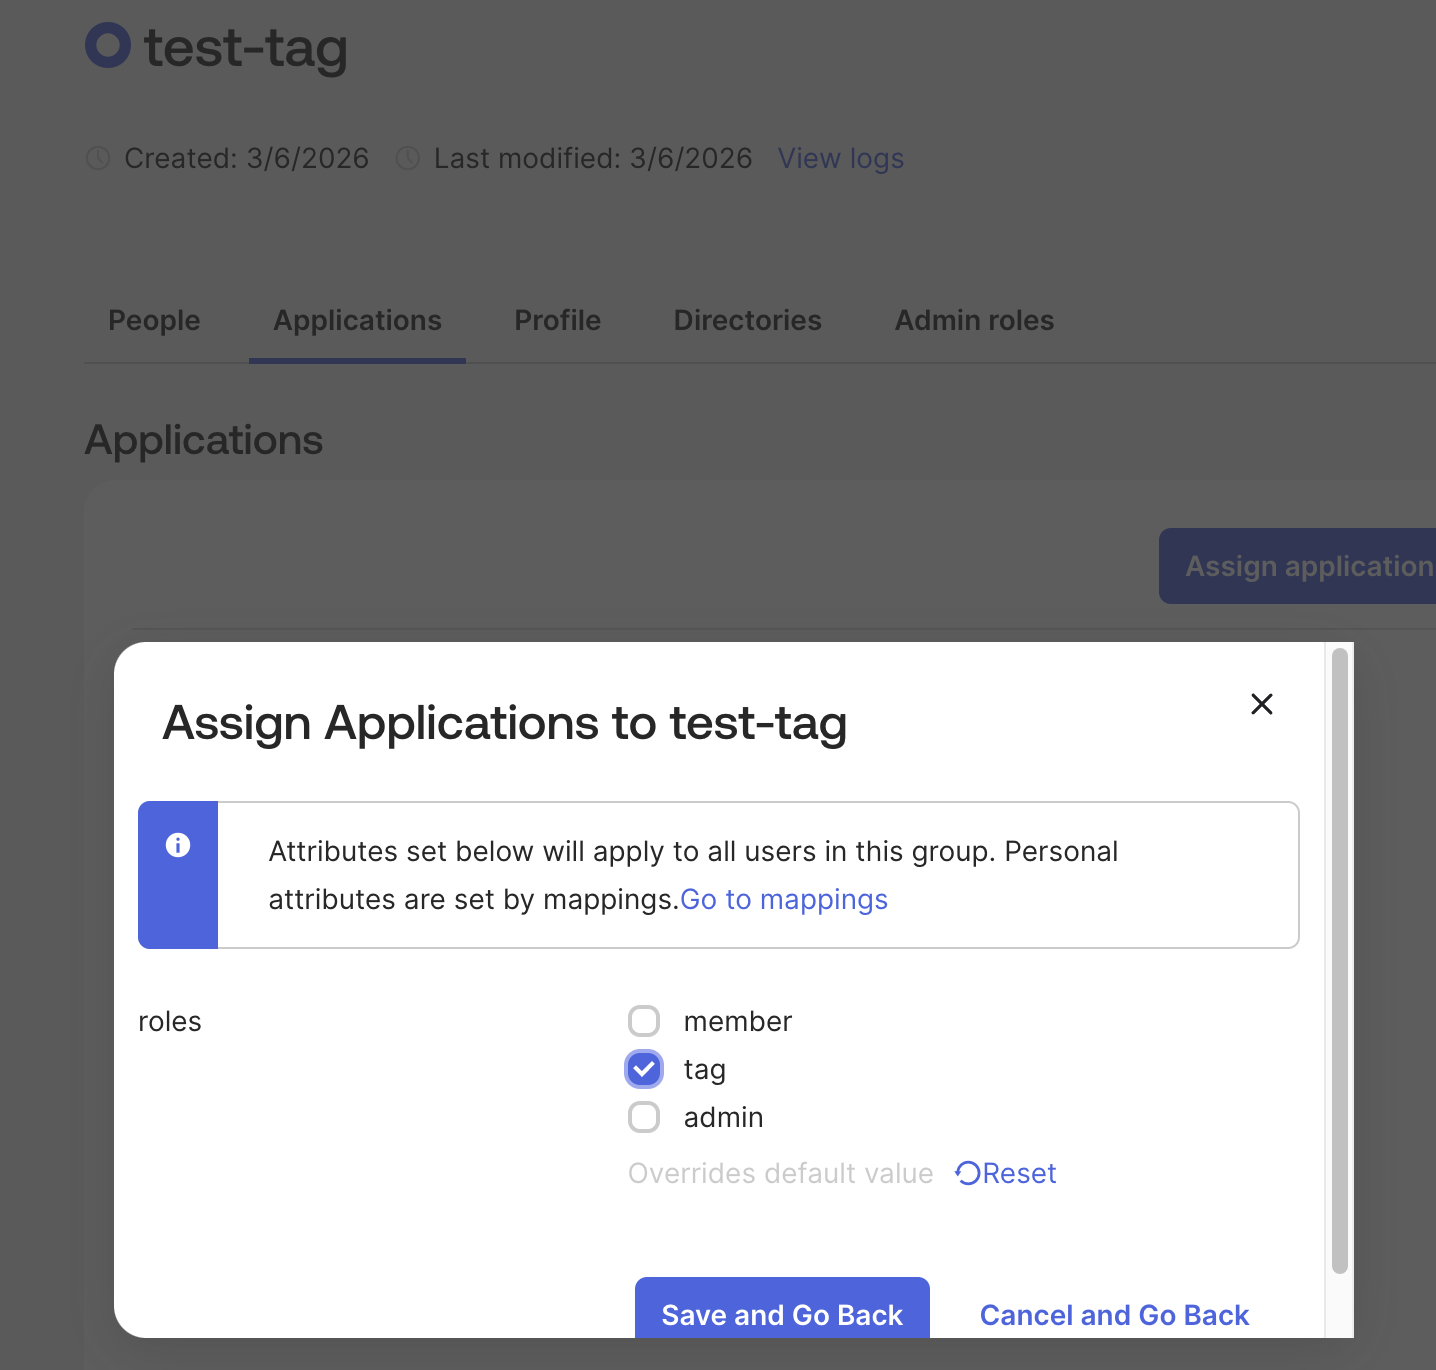
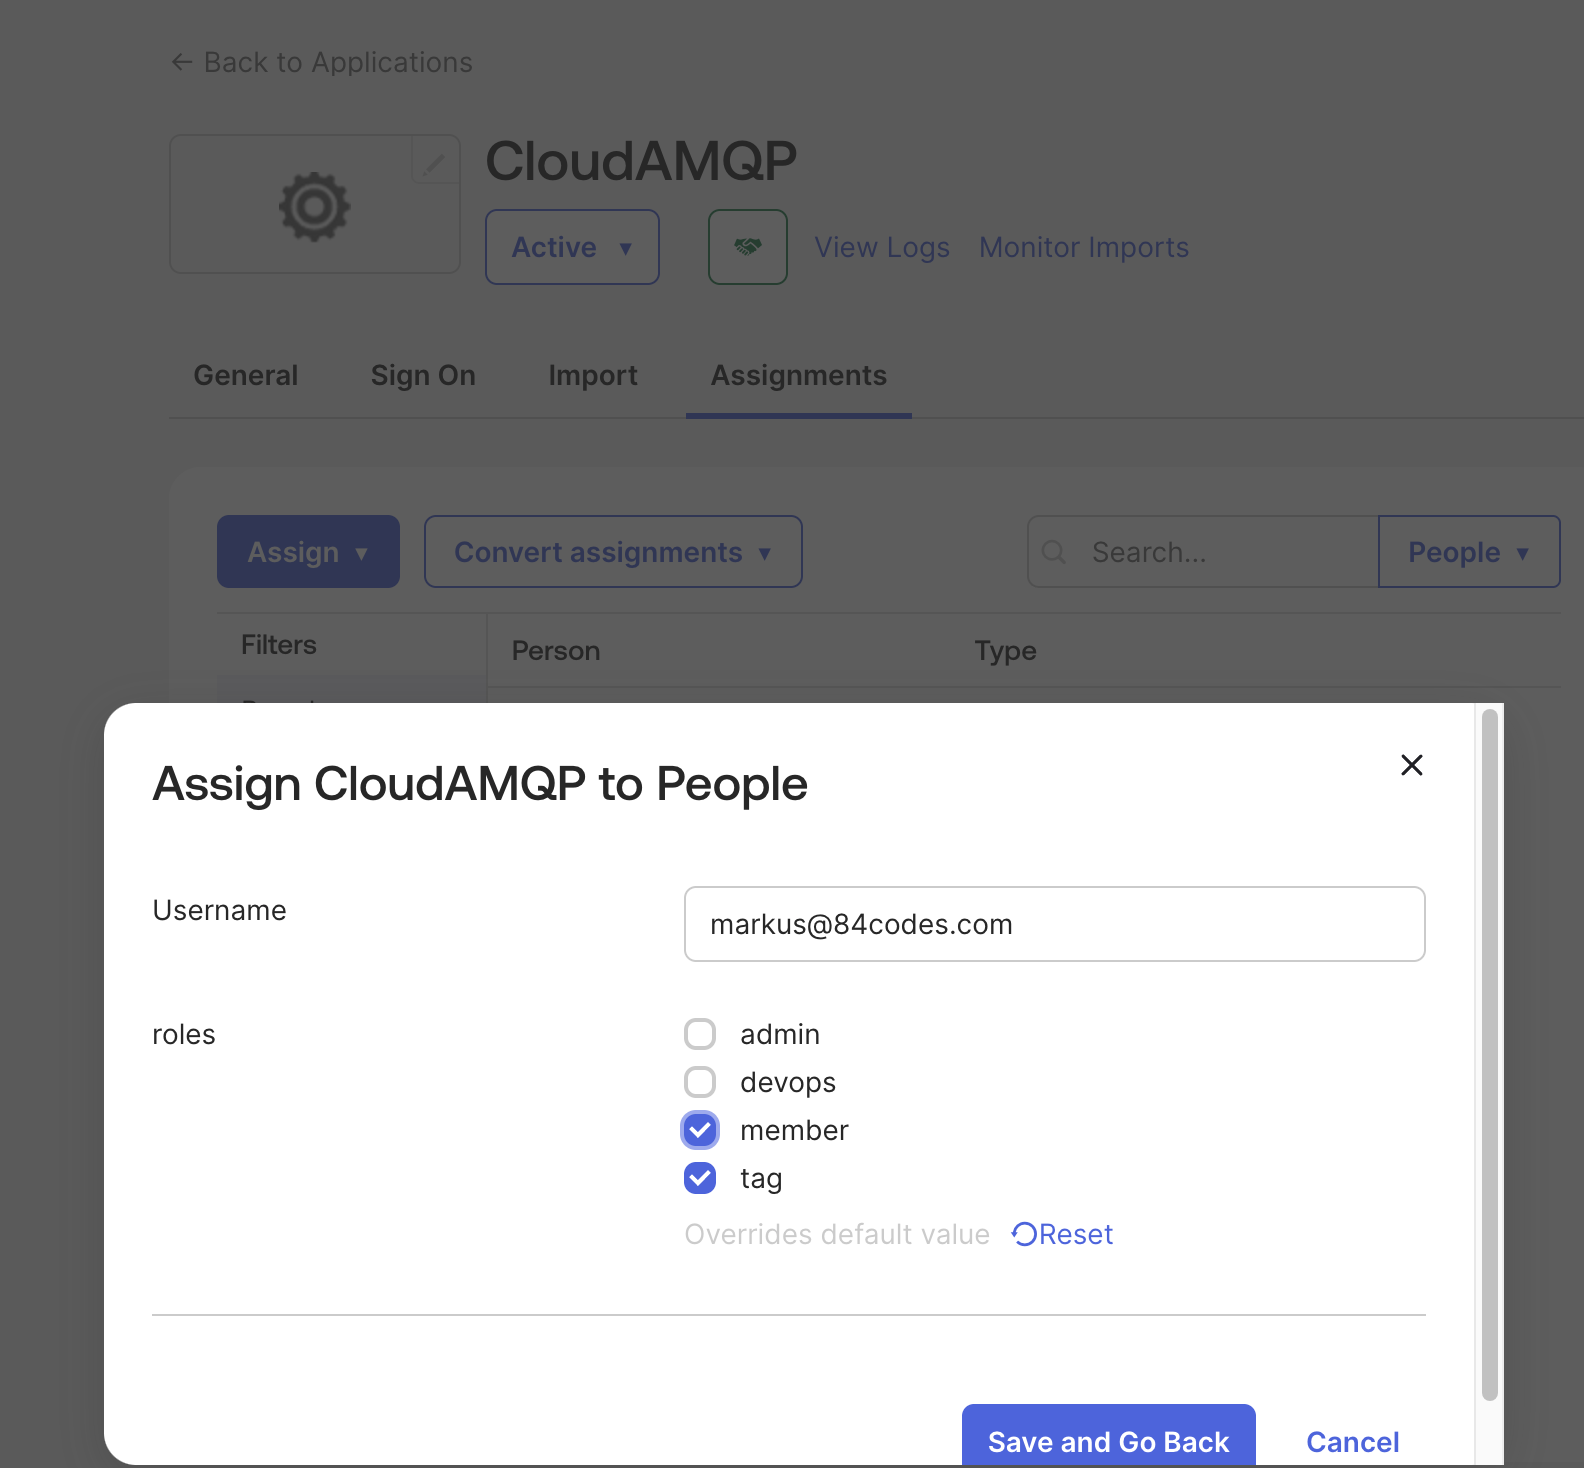
To assign the roles to your members go to the menu option Applications -> Applications, click on your created app in the list and the pen symbol next to a team member. From the drop-down, you should now be able to chose a role for this user.
-
Click Save
-
If you prefer to use group assignments, select “group” and “combine groups” in the attribute.
- Then you can assign the Application to a group, and select a separate role per group. Then have a user be a member of one or more groups to get both role and tag assigned. Note you can only pass the attribute to either user or group, not both.