CloudAMQP with Celery Getting started
Celery is a task queue library for Python.
This guide is for Celery v 5.0.0
There are some important settings for celery users on CloudAMQP, especially for users on shared instances with limited connections and number of messages per month.
Recommended settings
import os
broker_url = os.environ.get('CLOUDAMQP_URL')
broker_pool_limit = 1 # Will decrease connection usage
broker_heartbeat = None # We're using TCP keep-alive instead
broker_connection_timeout = 30 # May require a long timeout due to Linux DNS timeouts etc
result_backend = None # AMQP is not recommended as result backend as it creates thousands of queues
event_queue_expires = 60 # Will delete all celeryev. queues without consumers after 1 minute.
worker_prefetch_multiplier = 1 # Disable prefetching, it's causes problems and doesn't help performance
worker_concurrency = 50 # If you tasks are CPU bound, then limit to the number of cores, otherwise increase substainally
Command-line arguments
Celery worker command-line arguments can decrease the message rates substantially. Place these options after the word 'worker' in your command line because the order of the celery options is strictly enforced in Celery 5.0. For example,
celery -A my_celery_app worker --without-heartbeat --without-gossip --without-mingleWithout these arguments Celery will send hundreds of messages per second with different diagnostic and redundant heartbeat messages. Unfortunately details about these settings have been removed from the current documentation, but the implementation has not changed. Read more about Celery worker functionality in the documentation.
broker_pool_limit
Set the broker_pool_limit to 1 and make sure that your webserver spawns less processes/workers than your current CloudAMQP plan allows for concurrent connections.
Each process creates its own connection pool, so the formula for calculating your concurrent connection need is:
broker_pool_limit * (web dynos * web workers + worker dynos * worker concurrency)So make sure that you limit the number of gunicorn web workers with the -w flag and worker concurrency with -c
For more information about Celery Execution Pools and what they are all about, read this article .
broker_heartbeat
We recommend to disable heartbeats . We've enabled low TCP keep-alive intervals on all our RabbitMQ servers so that stale connections will be detected on the TCP level instead of in the application layer.
broker_heartbeat = None
broker_connection_timeout
We recommend to set broker_connection_timeout to 30. broker_connection_timeout is the default timeout in seconds before it give up establishing a connection to the CloudAMQP server.
broker_connection_timeout = 30
result_backend
By default celery is configured not to consume task results. If you do want the task results and you want to use RabbitMQ to store them, then use result_backend = 'rpc'.
Read more about different backends here: http://docs.celeryproject.org/en/latest/userguide/configuration.html#result-backend
NOTE: We highly advise against using the deprecated result_backend = 'amqp' since it might end up consuming all memory on your instance.
worker_send_task_events
By default celery doesn't send task event, but if you want to use a monitor tool for celery, like Flower, this must be enable. Enable it with these settings
worker_send_task_events = True
event_queue_expires = 60
With event_queue_expires set to 60 seconds all celeryev. queues will be deleted after 1 minute - if they do not have any consumers.
worker_prefetch_multiplier
Celerys way of doing prefetching (dynamic and globally) is very not very efficent, and actually causes problems quite often. We recommend limiting prefetching to 1, and only let each worker get one message at a time. This can only pose a problem if the latency between the broker and the worker is very high and the throughput very high, only then may you want to increase it. Read more at Celery's prefetch documentation.
worker_concurrency
This is how many process/threads/green-threads that should process tasks at the same time. If your workload is CPU bound then limit it to the number of cores you got (this is the default), more will only slightly decrease the performance. But if you're doing I/O, i.e. doing outgoing HTTP requests, talking to a database or any other external service, then you can increase it a lot, and gain a lot of performance, 200-500 is not unheard of. If your client is complaining about memory use being too high, you might need to set this to a lower value, for example 4.
Migrate between plans in Celery
With the setting task_always_eager=True all tasks will be executed locally by blocking until the task returns. That is, tasks will be executed locally instead of being sent to the queue. This forces all calls to .delay()/.apply_async() that would normally get delegated to the worker to instead execute synchronously. You can use this setting when migrating between dedicated plans:
- Add task_always_eager=True to settings.py, deploy
- Verified that the worker queue is empty
- Remove the CloudAMQP addon from your Heroku app
- Add it again with heroku addons:add cloudamqp:bunny
- Immediately redeployed without task_always_eager
Celery Flower
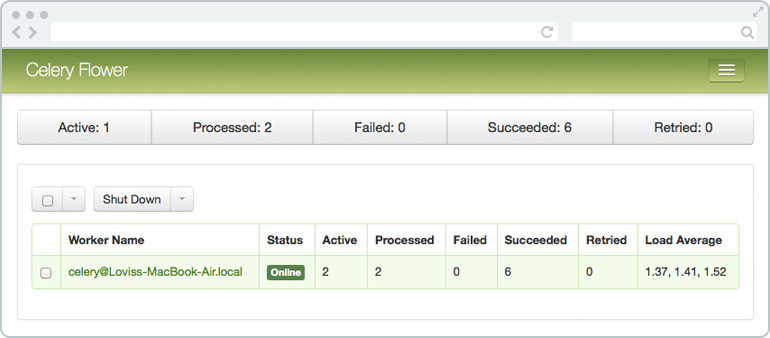
Flower is a web based tool for real-time monitoring and administrating Celery clusters (it is still under development). From Flower it is possible to overview task progress and history, show task details and graphs and statistics about the tasks. You can overview scheduled tasks, revoke or terminate tasks and much more.

Flower uses the RabbitMQ Management Plugin to get info about queues. To get the broker tab working with CloudAMQP you need to set the --broker_api flag to the URL of the RabbitMQ HTTP API including user credentials, see example below. Broker API port should be 443.
--broker=amqp://username:password@hostname:5671/vhost?ssl=true
--broker_api=https://username:password@hostname:443/api/
