How to get started with LavinMQ on CloudAMQP
Here's a step by step guide on how you can set up LavinMQ at CloudAMQP. Before you start, head over to the CloudAMQP getting started section and read the guide on how to activate your CloudAMQP account.
- Create your LavinMQ server (instance) in your selected cloud
- Complete a setup checklist for your new instance
New to LavinMQ? We’ve got your back
Select plan
Start by selecting a pricing plan. Your choice of plan depends on several things and this guide walks you through the options and describes when to use which pricing plan.
CloudAMQP offers 9 different LavinMQ plans: 7 dedicated instances and 2 shared instances.
The different plan options are available on the pricing page: https://www.cloudamqp.com/plans.html.
Dedicated Instances
A dedicated plan is not artificially limited in any way and therefore highly recommended for your production environment. The maximum performance is determined by the underlying instance.
The speed given on the pricing page is the burst speed, the maximum number of messages you can send per second, for your instance, during a certain amount of time. The given number of messages per second depends on the type of routing, size of messages, how many consumers/publishers used, datacenter, auto acknowledgment/persistence flags, etc.
Shared Instances
A shared instance is a virtual host (vhost) located on a shared server where other users’ actions might affect the performance of the whole server. All shared plans have a channel limit set to 200 and a maximum of 200 consumers per channel.
We recommend shared plans for testing or hobby applications.
Create the instance
Select a name for the instance and the selected pricing plan. A tag can also be added to separate instances between different projects.
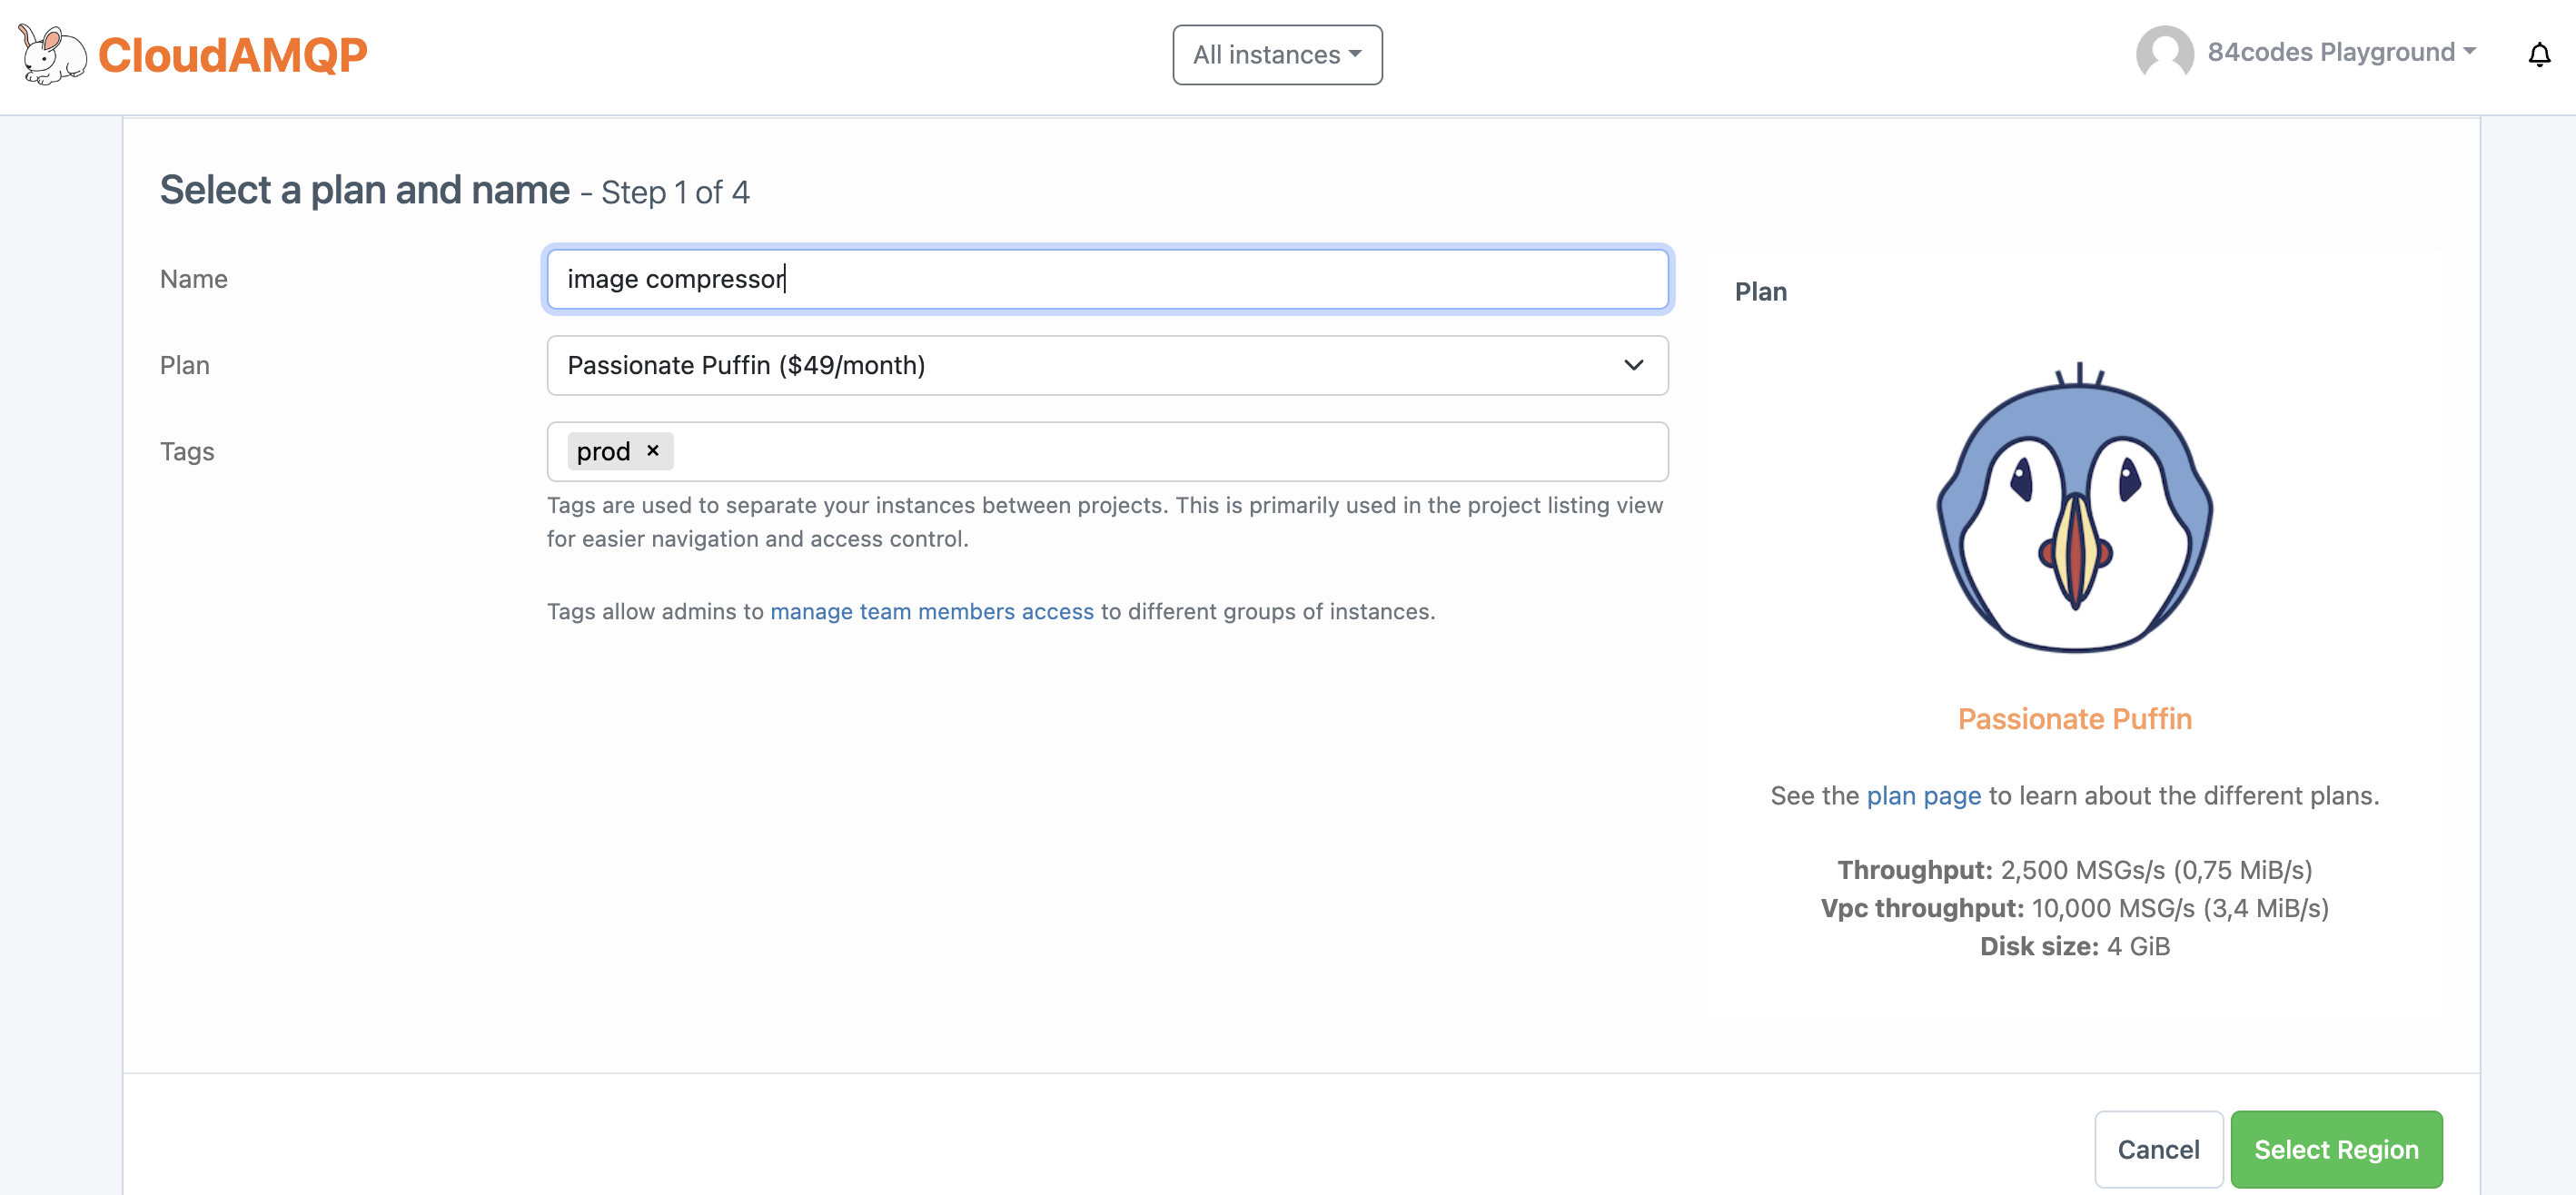
| Name | Name on the instance. The name helps you to remember where you use the instance. |
| Plan | The CloudAMQP pricing plan. |
| Tag (optional) | Tags helps you separate instances between projects. They facilitate the project listing view for easier navigation and access control. E.g., "Test,” “Prod,” “Staging.” |
Select a region and data center
Create the instance in the selected data center. CloudAMQP is available in all major clouds.
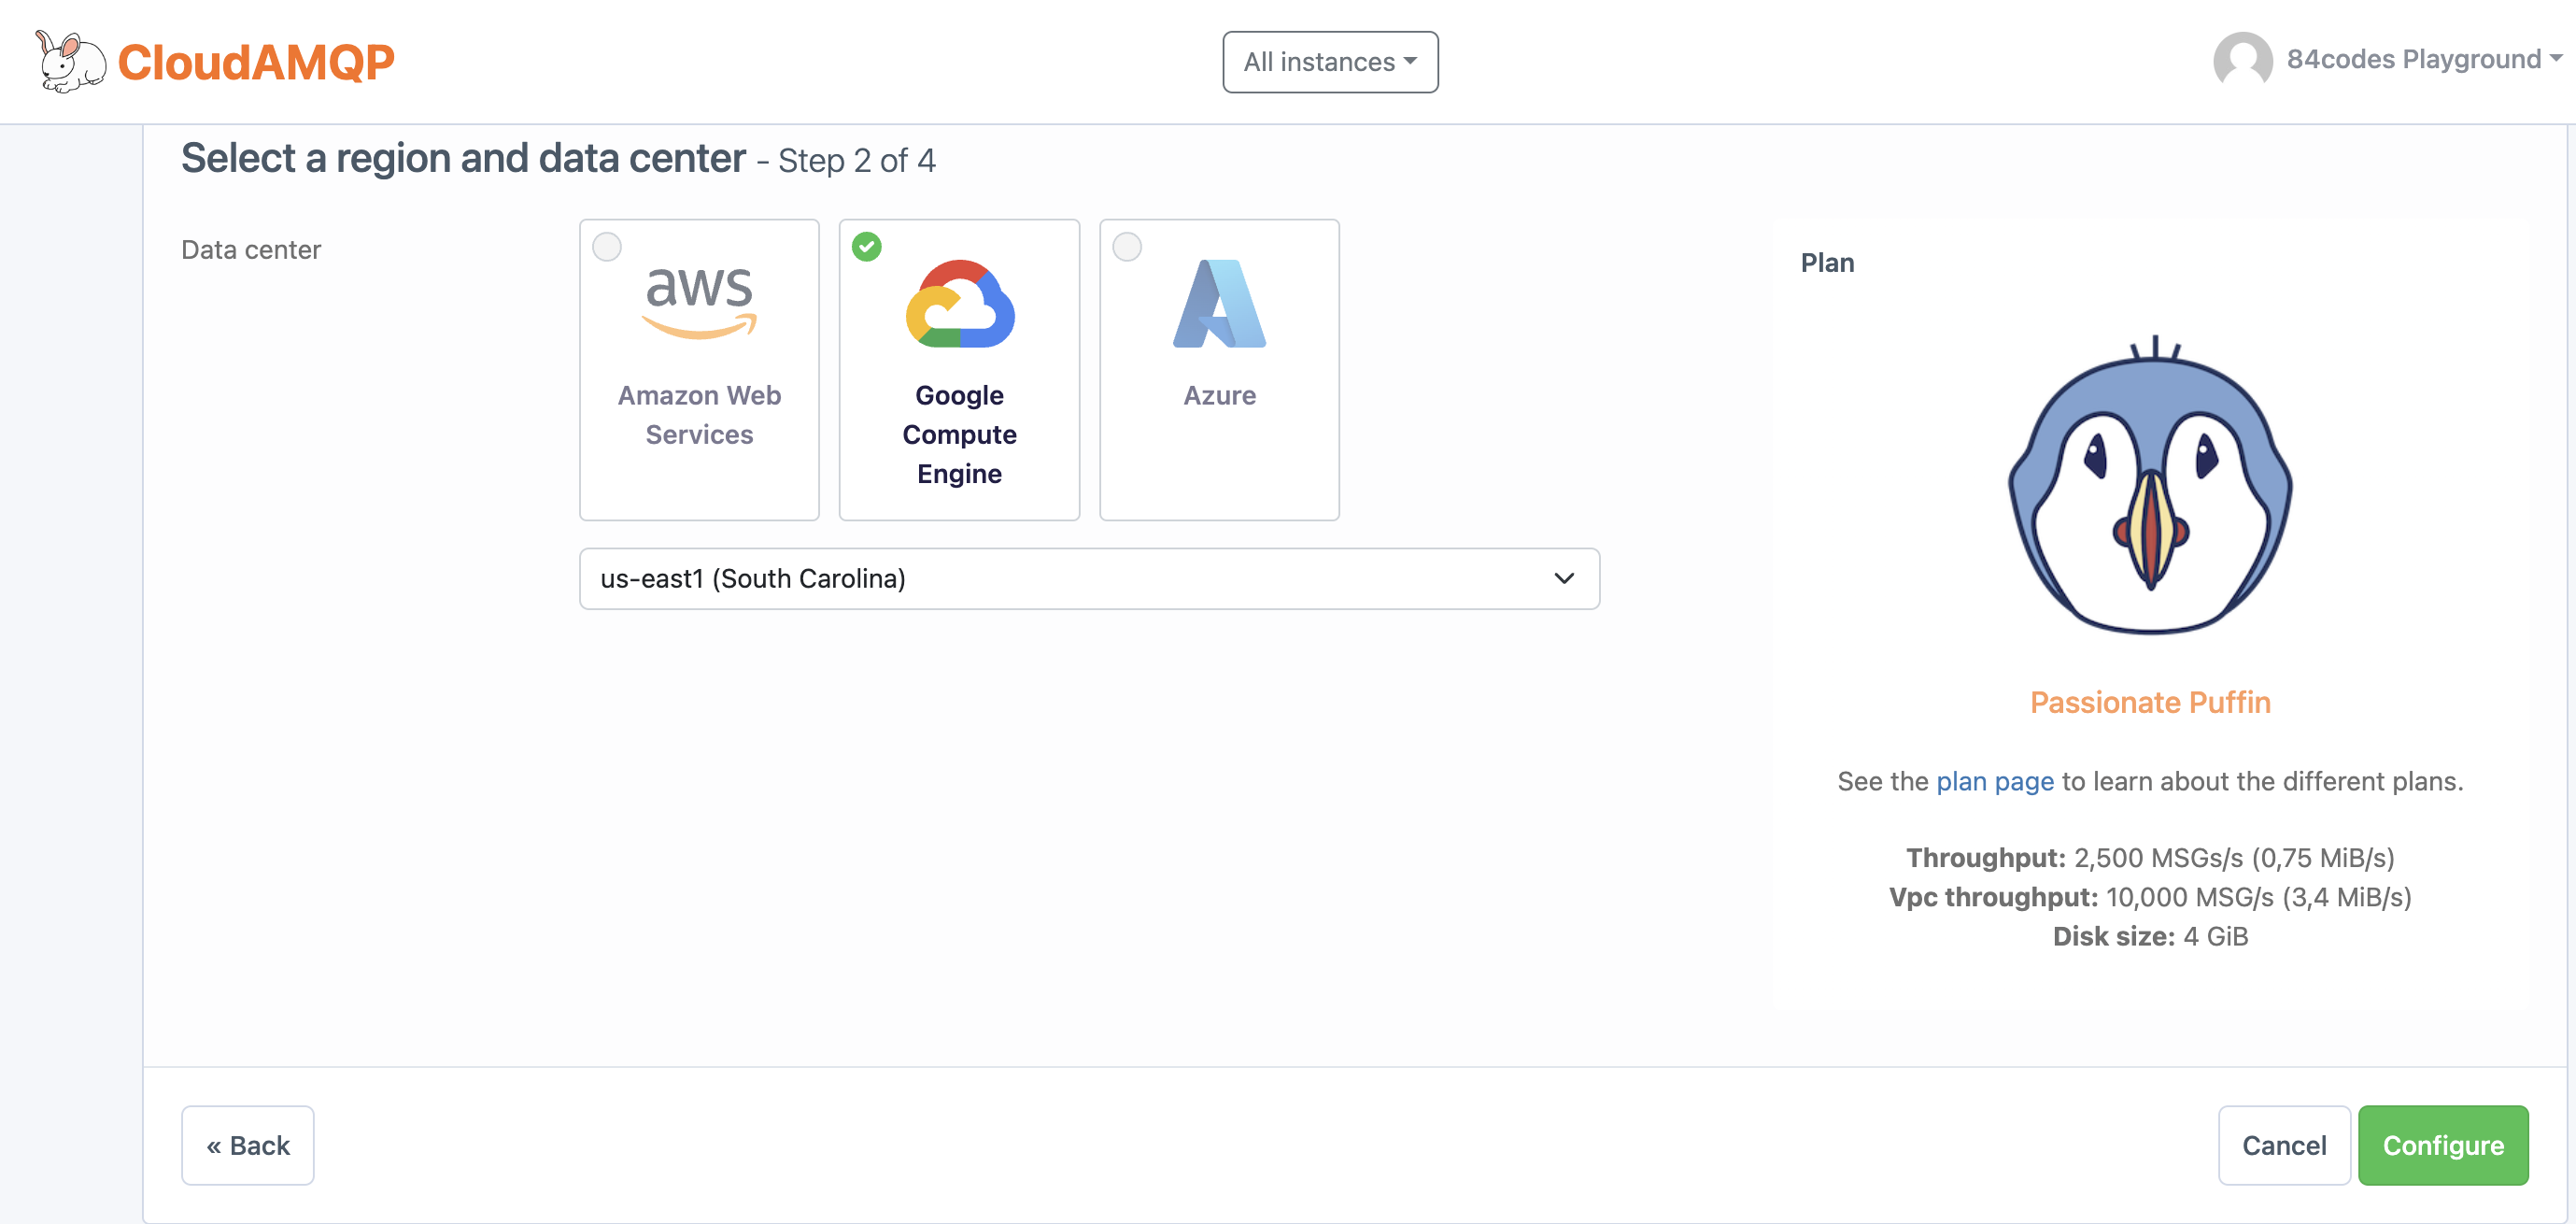
| Data center | Select the same data center and region as your applications. |
Select configuration
It is possible to set up a peering connection between a VPC and a CloudAMQP VPC. More information about how to do that is described here.
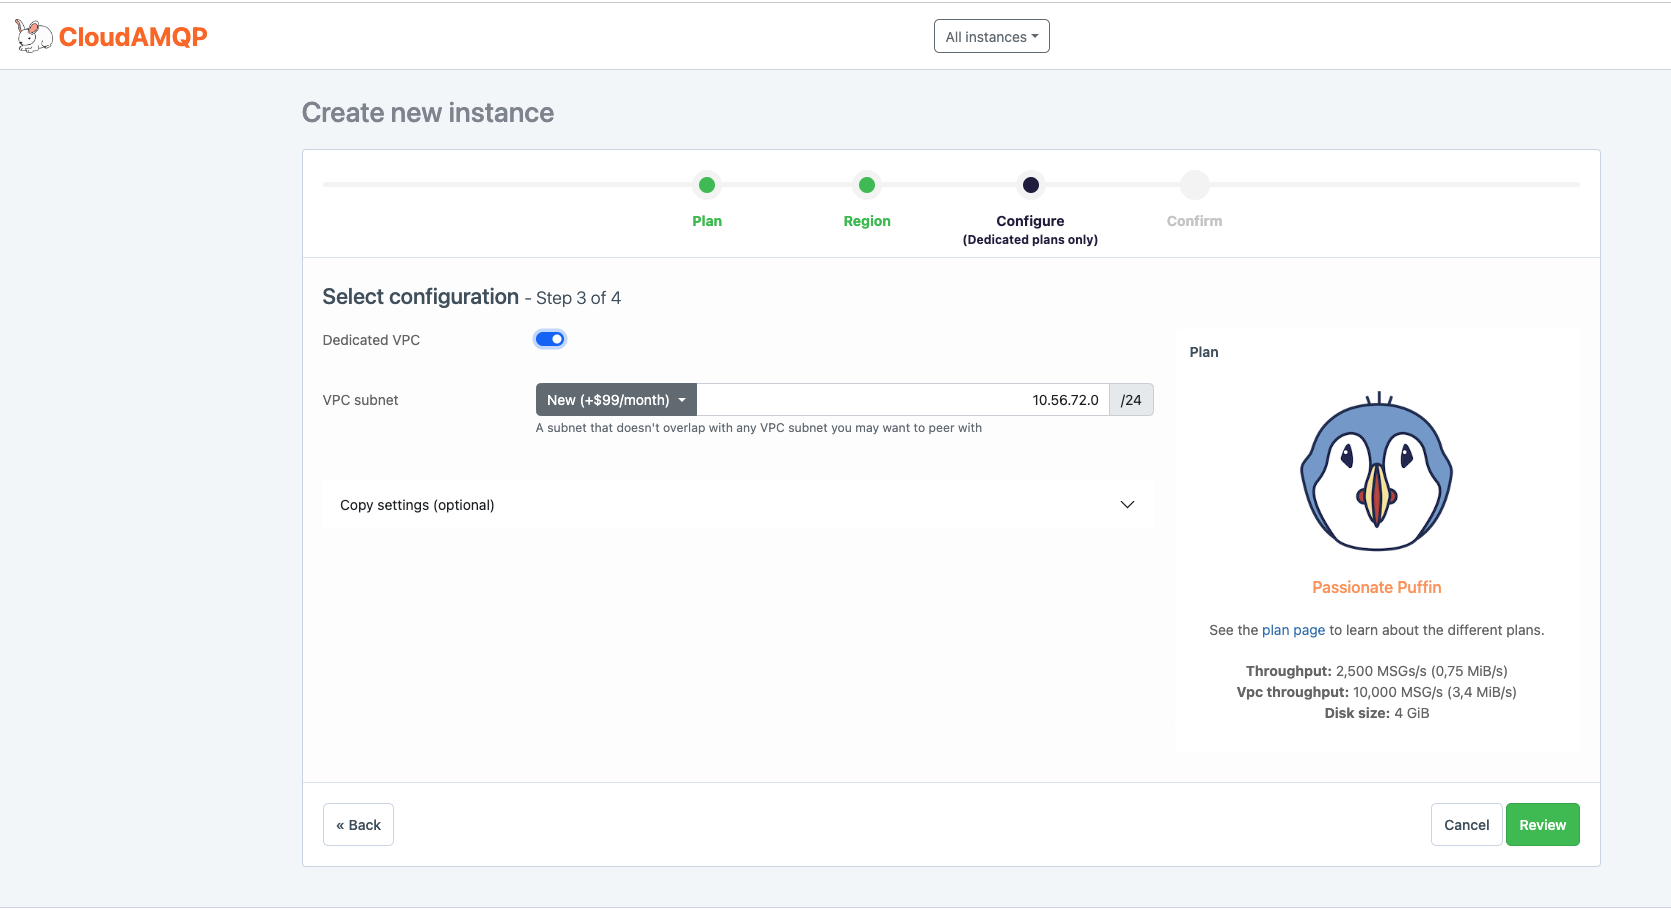
| Dedicated VPC | VPC peering with the CloudAMQP instance. The VPC subnet must be specified when creating a VPC. |
| Copy settings | Copies settings like alarms or firewall configurations from another instance. |
Confirm new instance
The final step is to verify the information provided and then press Create instance. The new instance is immediately provisioned, and all your instances can be viewed in the CloudAMQP Console. Instances can be connected in just a few minutes.
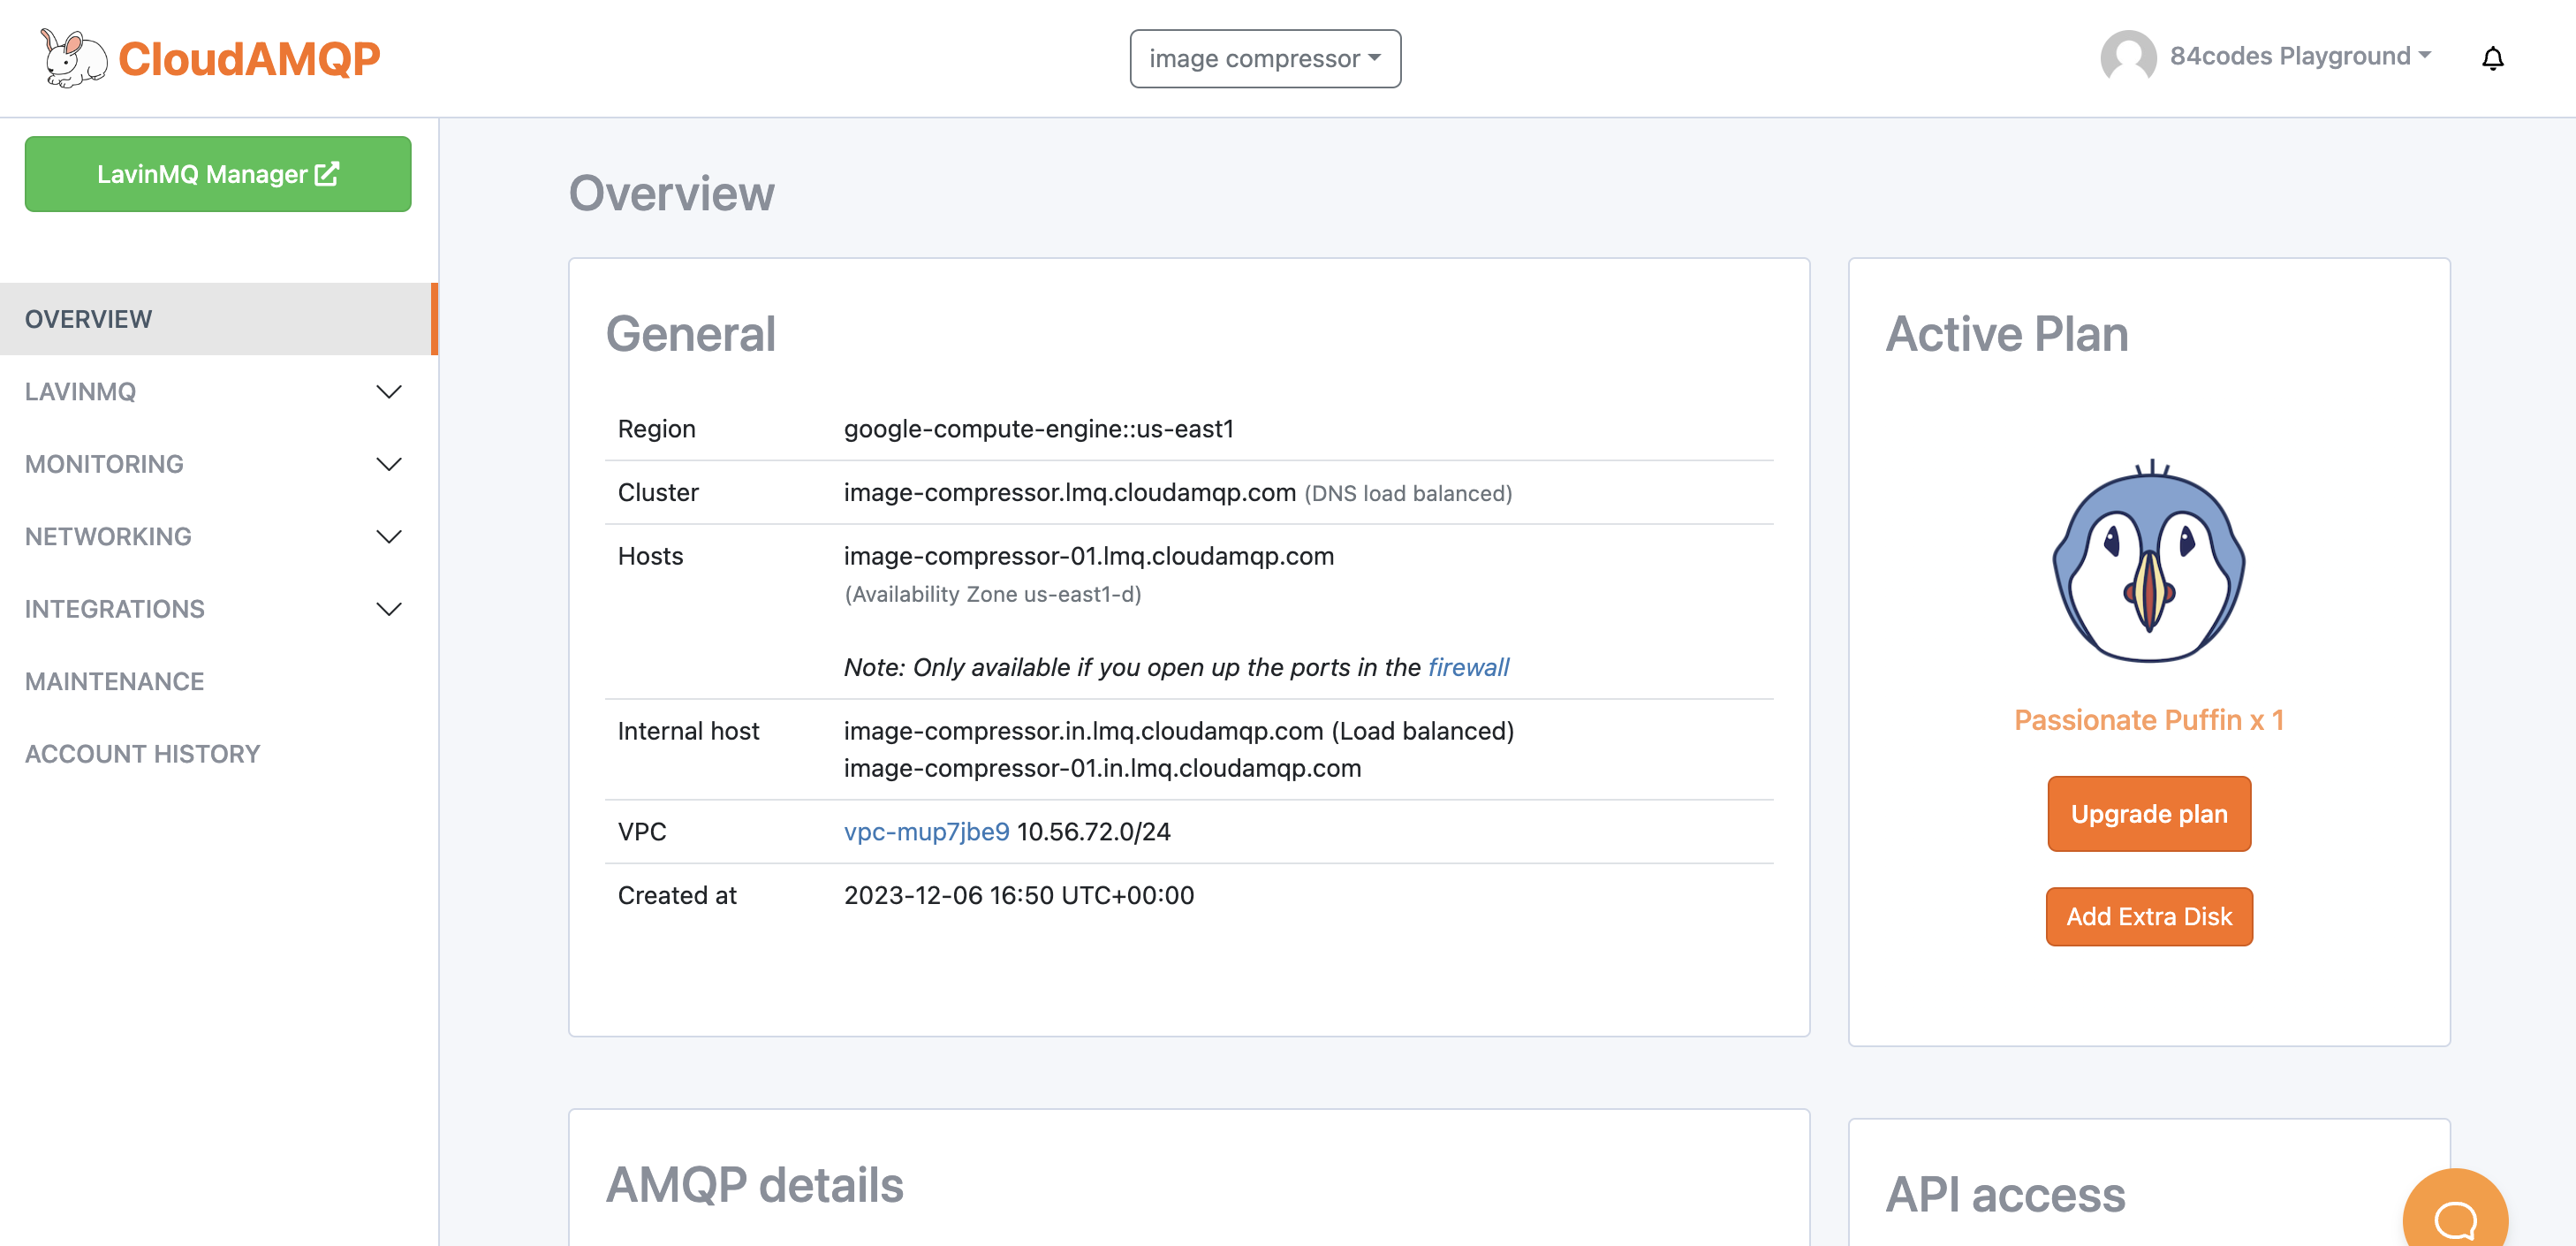
Instance details such as connection URL, server name, user/vhost, and password can be found on the details page in the CloudAMQP console.
Configure the new instance
CloudAMQP offers various monitoring tools and configuration settings, all available from the CloudAMQP console. Alarms can be set up that address performance issues promptly and automatically before they impact your business. Server metric is available via the console. It’s possible to enable and disable a firewall or set up VPC Connect.
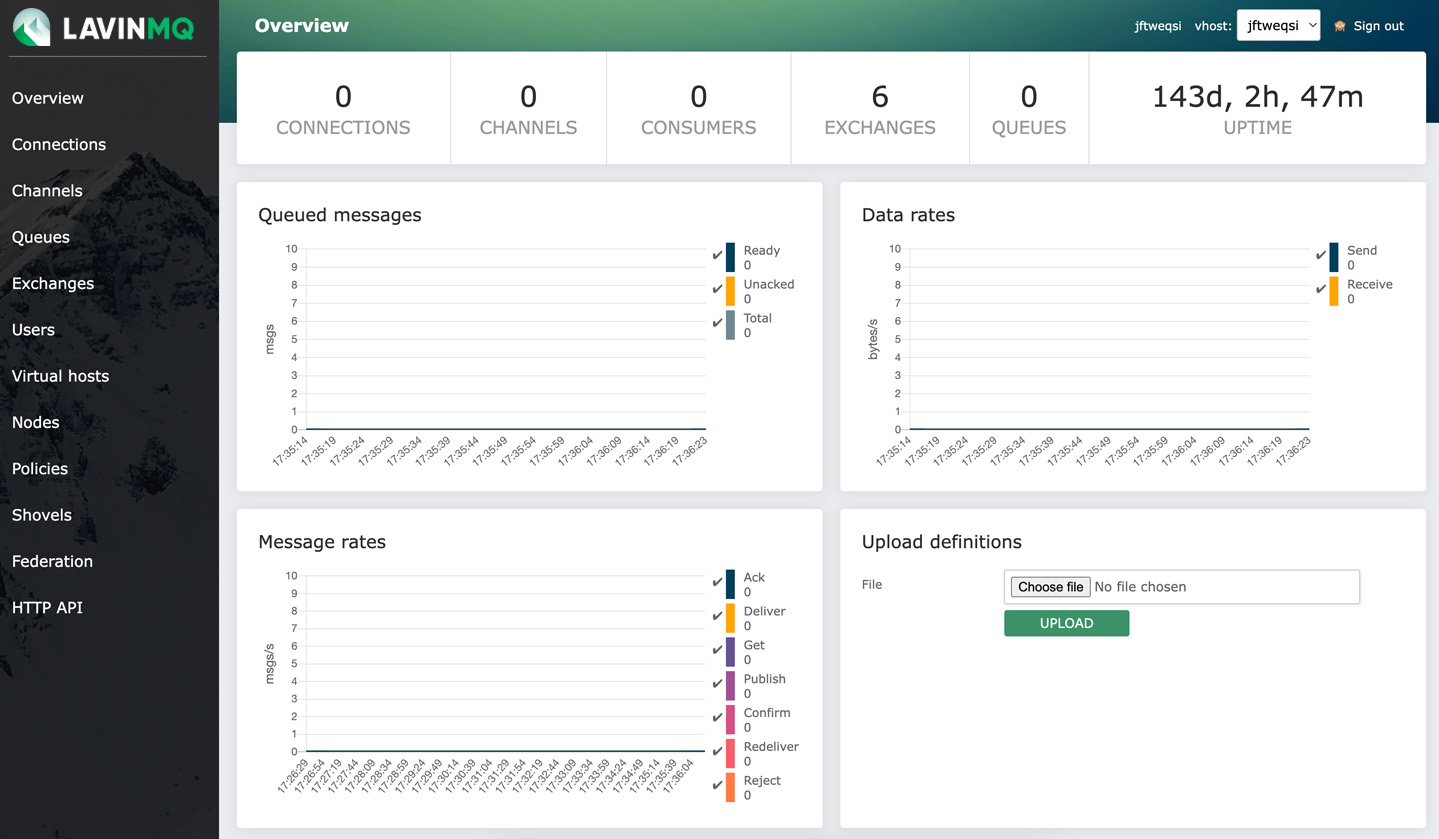
LavinMQ Management Interface
The LavinMQ management interface is available by pressing the green button in the top left corner. This interface visualizes your LavinMQ instance and shows, for example, the current message rate, queues and exchanges created, and the bindings between them. The management interface also makes it possible to create queues and publish messages manually, among other things.
Connect to the instance
It is time to start sending and receiving messages from your broker. The AMQP URL is available on the details page in the CloudAMQP console. We recommend setting up an environment variable, e.g., CLOUDAMQP_URL and letting your deployments connect to a LavinMQ instance in CloudAMQP using this variable.
Sample code is available for most languages.
Ensure to complete the following step before moving on;
- Set up your instance in your selected cloud
- Get familiar with LavinMQ management
- Get familiar with the CloudAMQP console
You're now acquainted with the basics and ready to send your first messages, congratulations! Bookmark this checklist to refer back to when setting up a production environment in LavinMQ.
Checklist for production environment
-
LavinMQ version
Use one of the latest LavinMQ versions. -
Environment variables
Ensure to use an environment variable instead of having connection details in your code. - Use the hostname Use the cluster hostname when connecting your clients. Do not use the server's IP address when connecting, as that might change.
- Configure the firewall A firewall lets you restrict access to your cluster to which only your servers will have access.
-
Set up CloudAMQP alarms
- Add a recipient.
- We configure some recommended alarms by default, but it’s recommended to set up queue, connections, consumer, and channel alarms according to your use case.
- Tweak configurations CloudAMQP configures your LavinMQ cluster, but some configurations can be changed by sending us an email to support@cloudamqp.com and we can help you out. Config that we can help you change here
- VPC or PrivateLink/Private Service Connect If using a VPC or PrivateLink/Private Service Connect, create peerings to your services.
- Export metrics and logs Metrics and logs can be exported to third-party providers such as CloudWatch, Datadog, Newrelic, Stackdriver, Librato, Papertrail, Loggly, Logentries, and Splunk.
- Coming soon Custom domain To use a custom domain, generate a certificate by just setting up a record and enabling it. You can also upload your certificate in the Custom Domain view.