Microsoft Entra ID - SAML login on CloudAMQP
-
Go to
https://portal.azure.com
> Enterprise applications > New application > Create new application > Non-gallery application
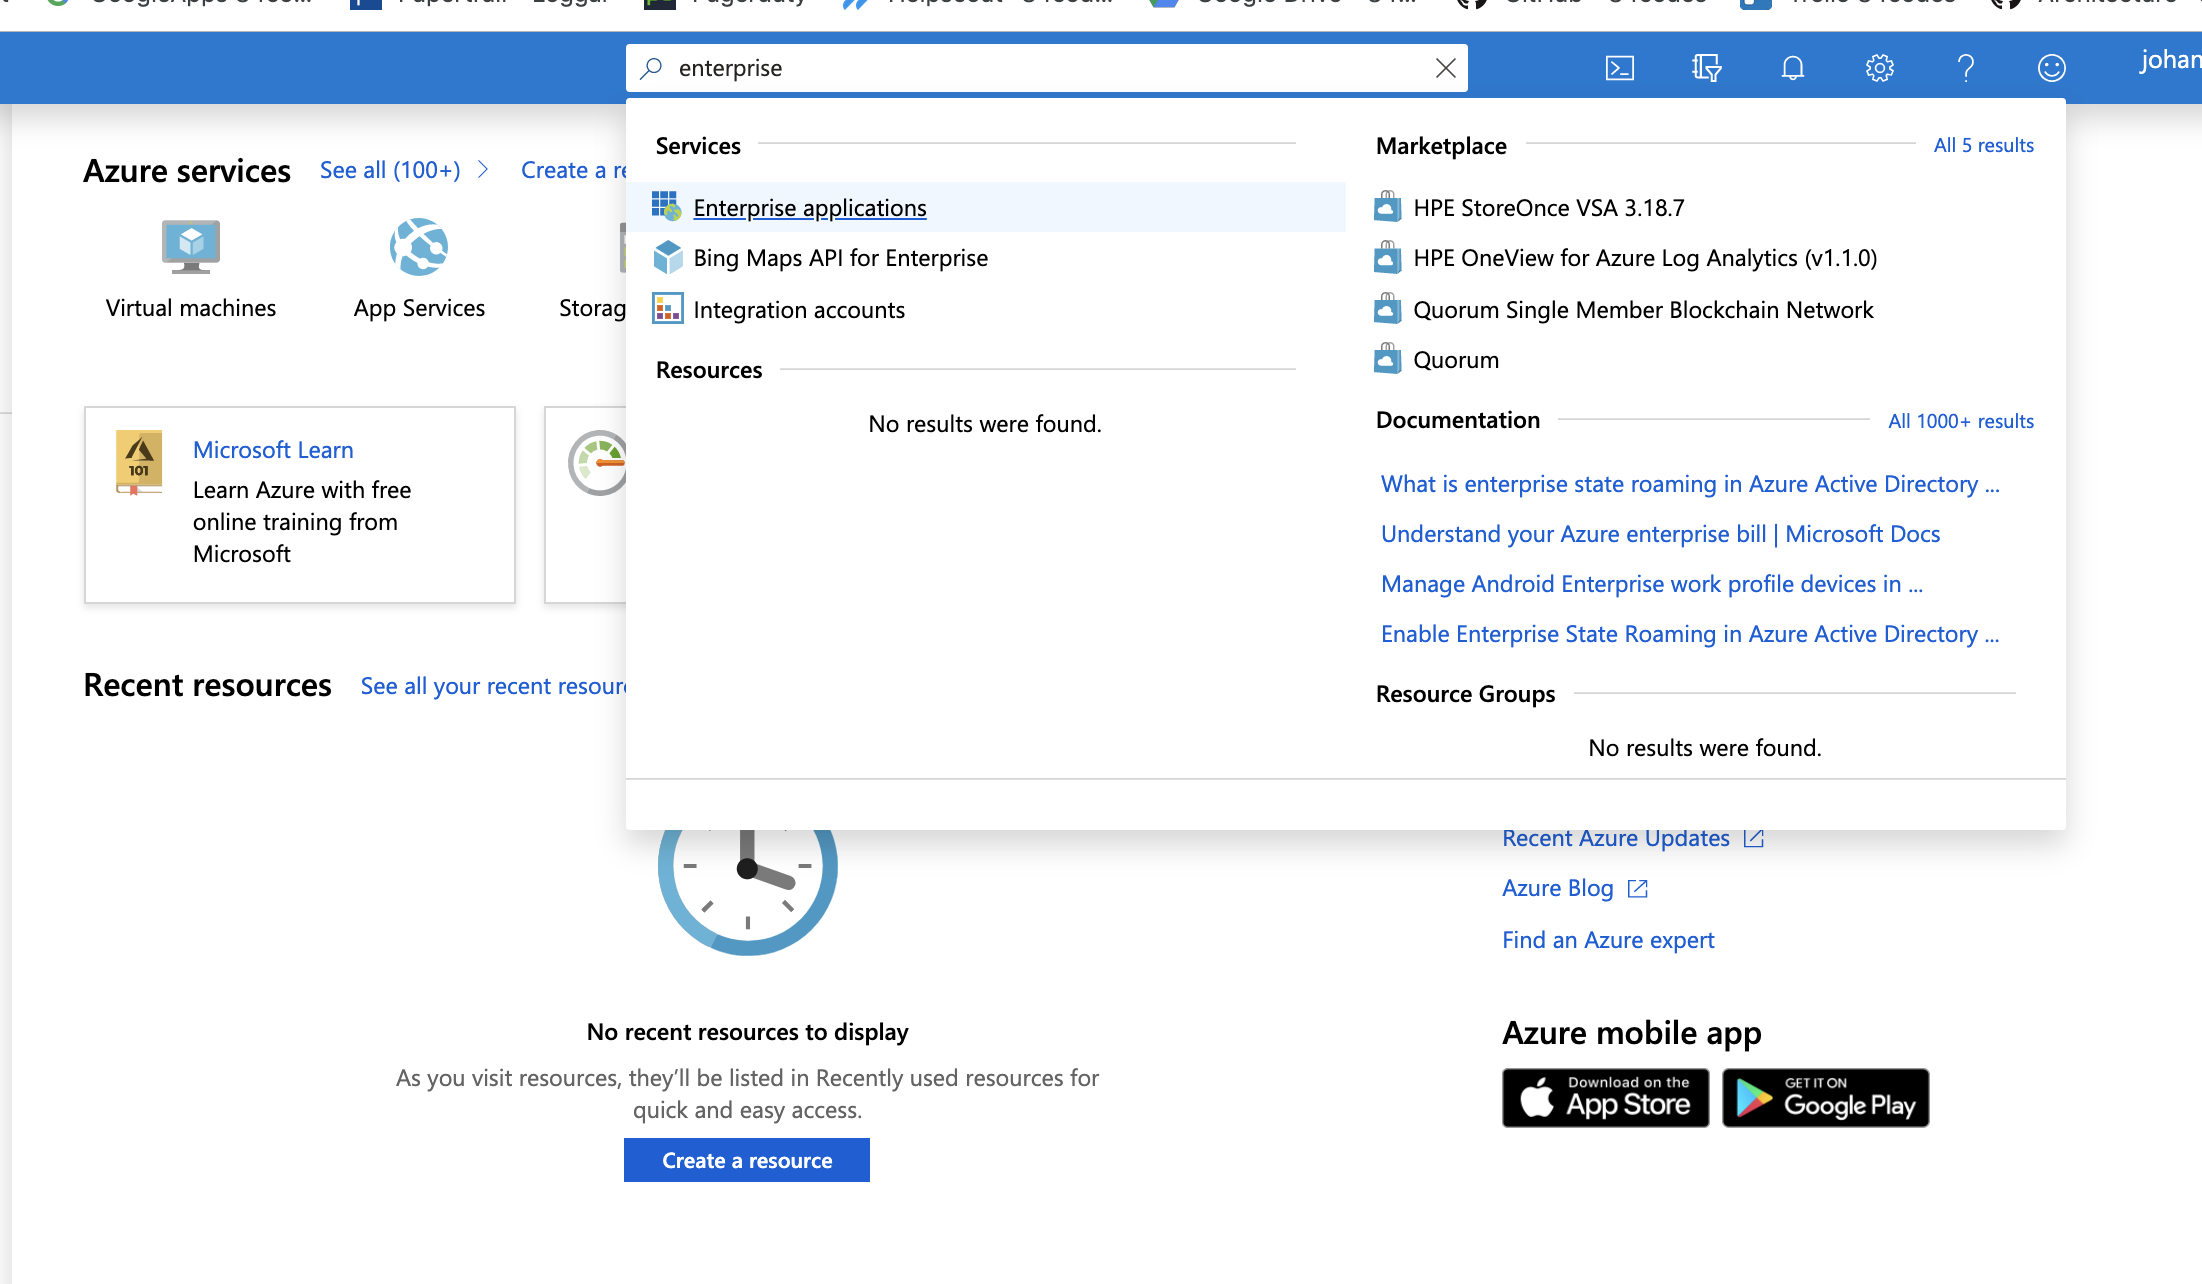
- Click New Application
-
Click
Non-gallery Application.
Enter the name of your new app in the right hand section, i.e. CloudAMQP and click
Add
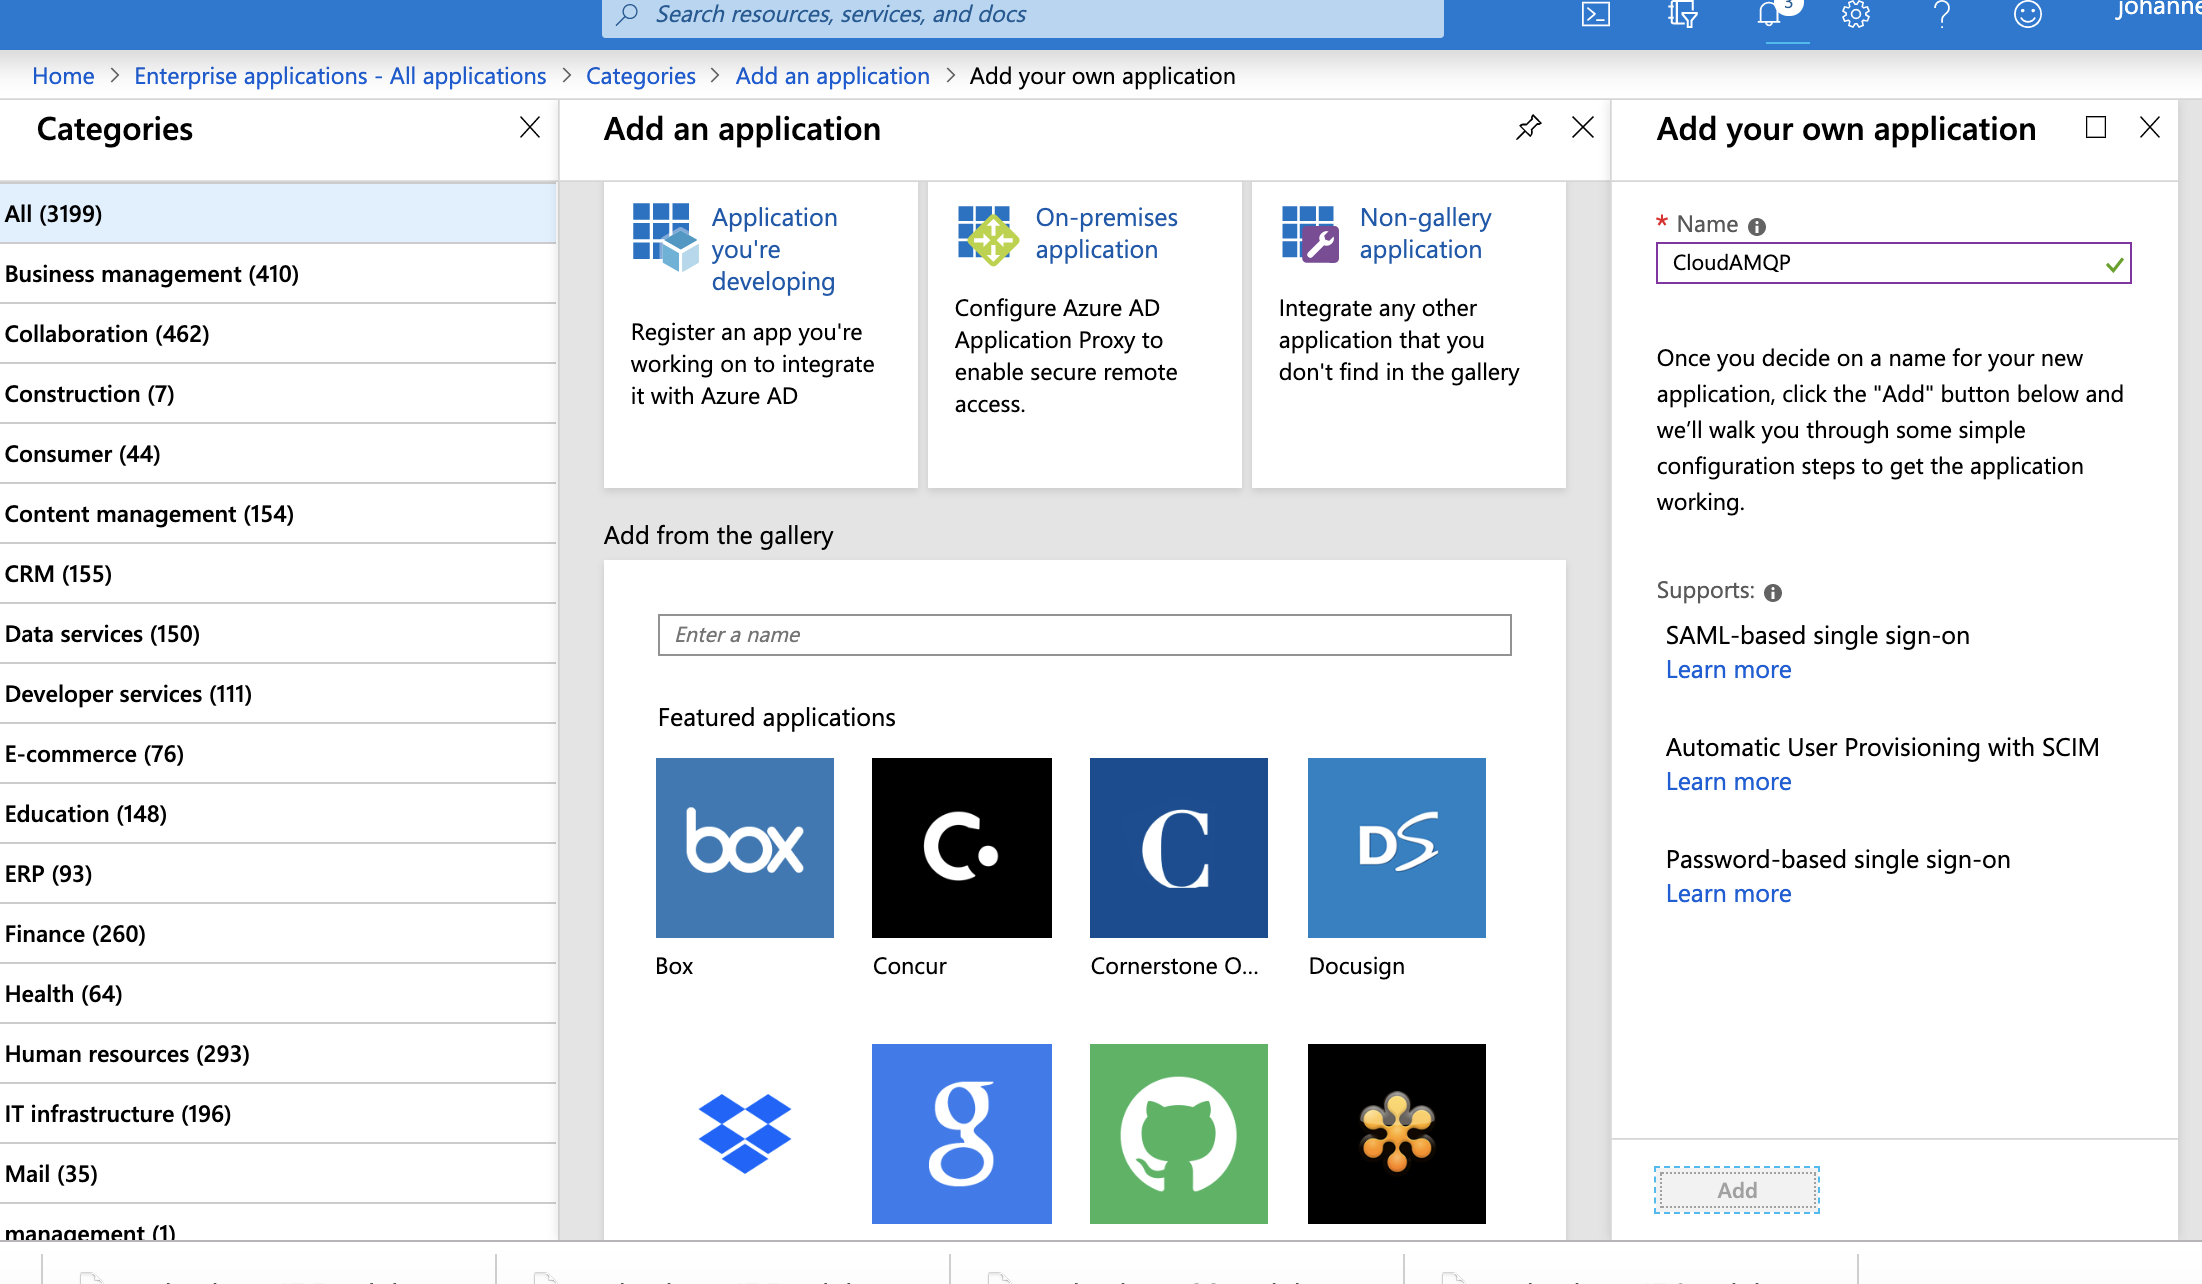 The application is now created.
-
Go back to
Home - Enterprise Applications - All applications
and search for your newly created app if you dont see it in the list.
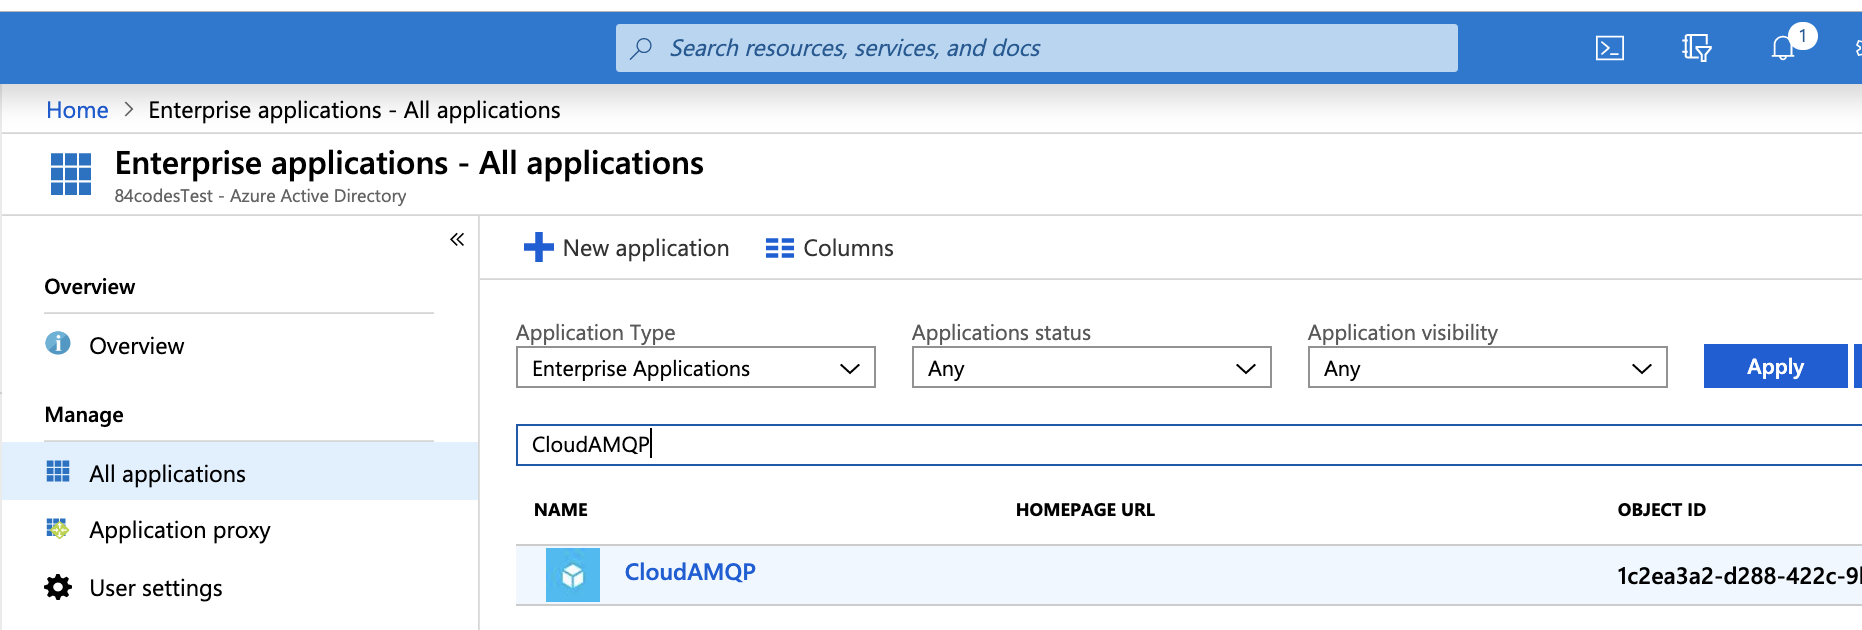 Click on the app to open it.
-
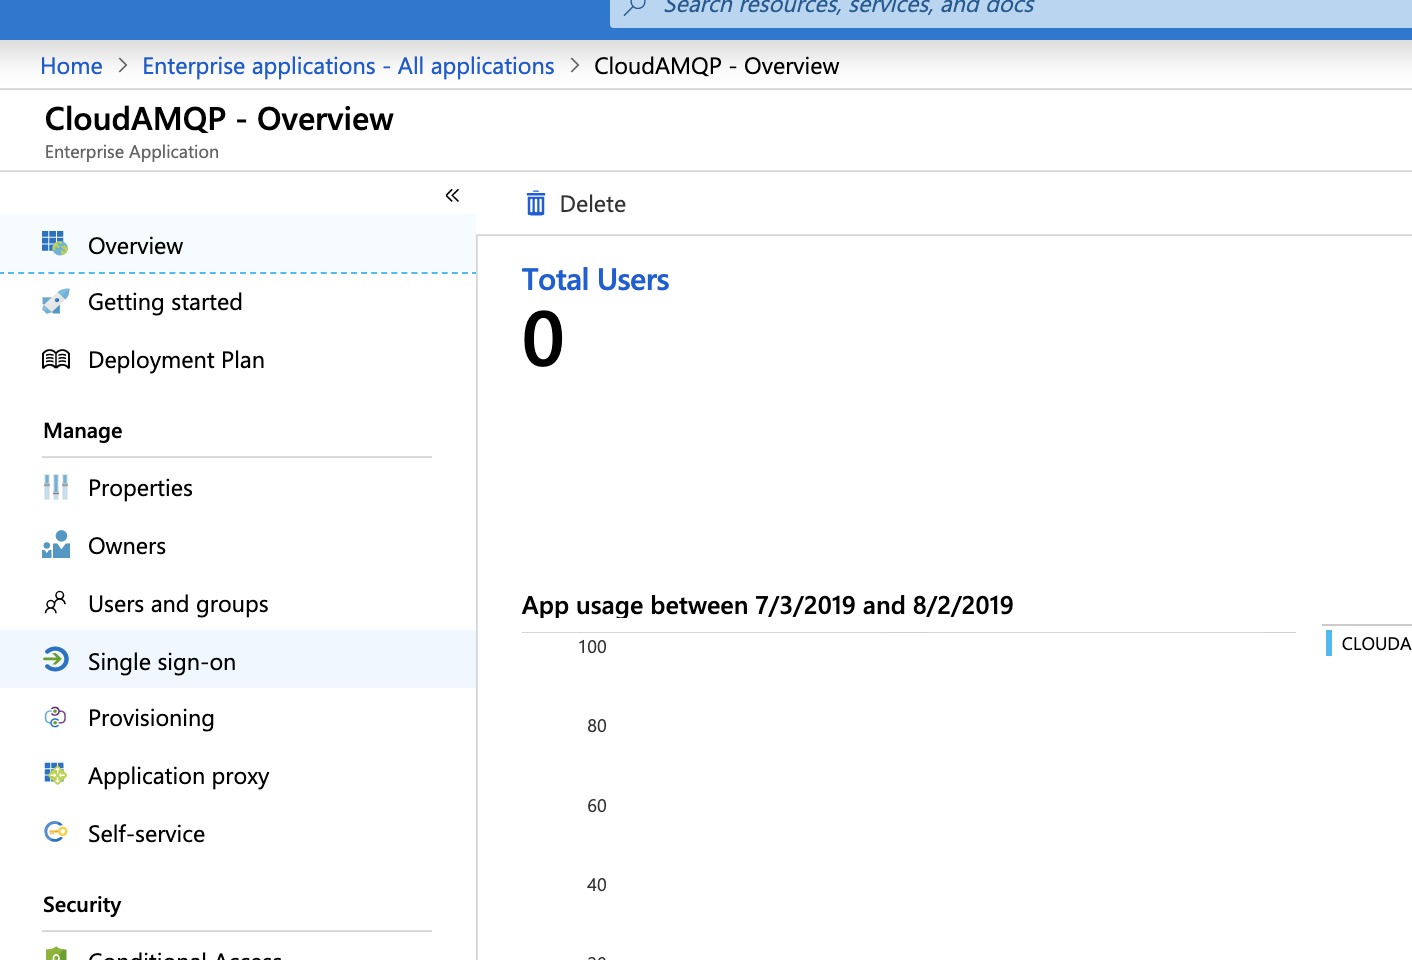
Go to
Single sign-on
using the link on the left side.
-
Click
SAML
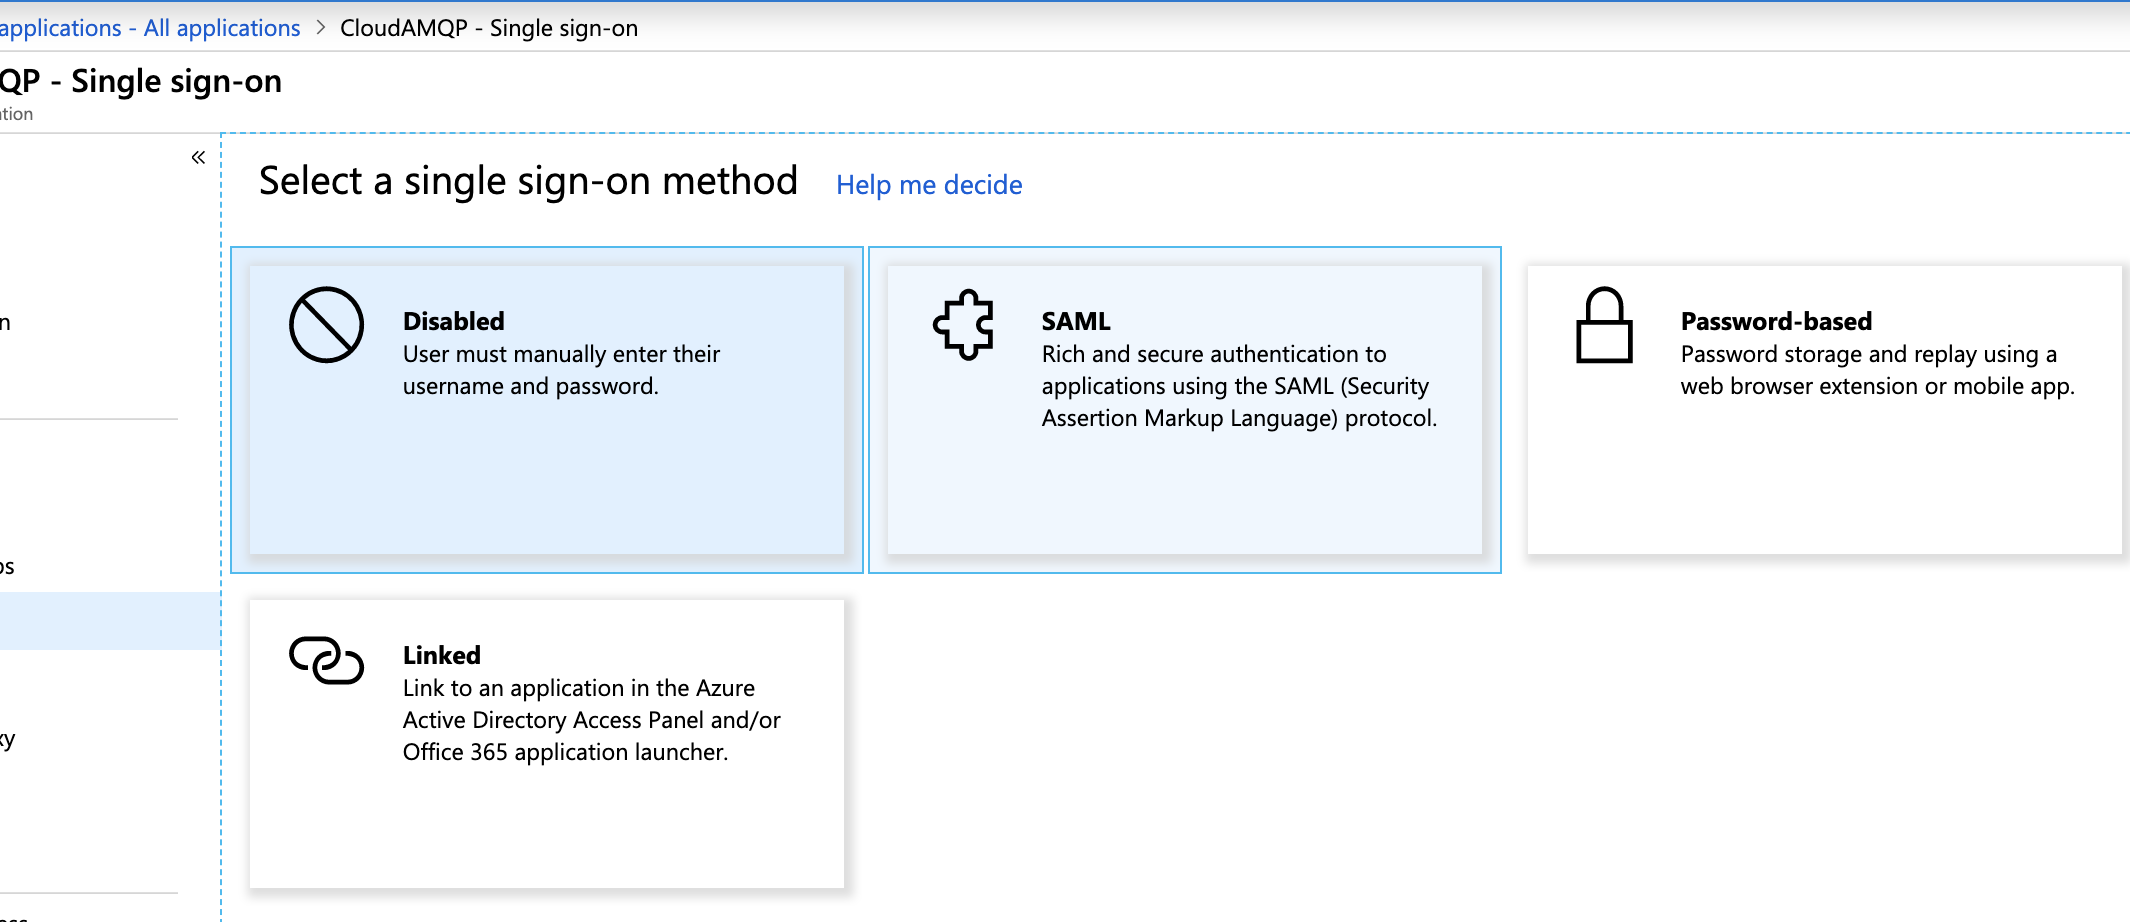
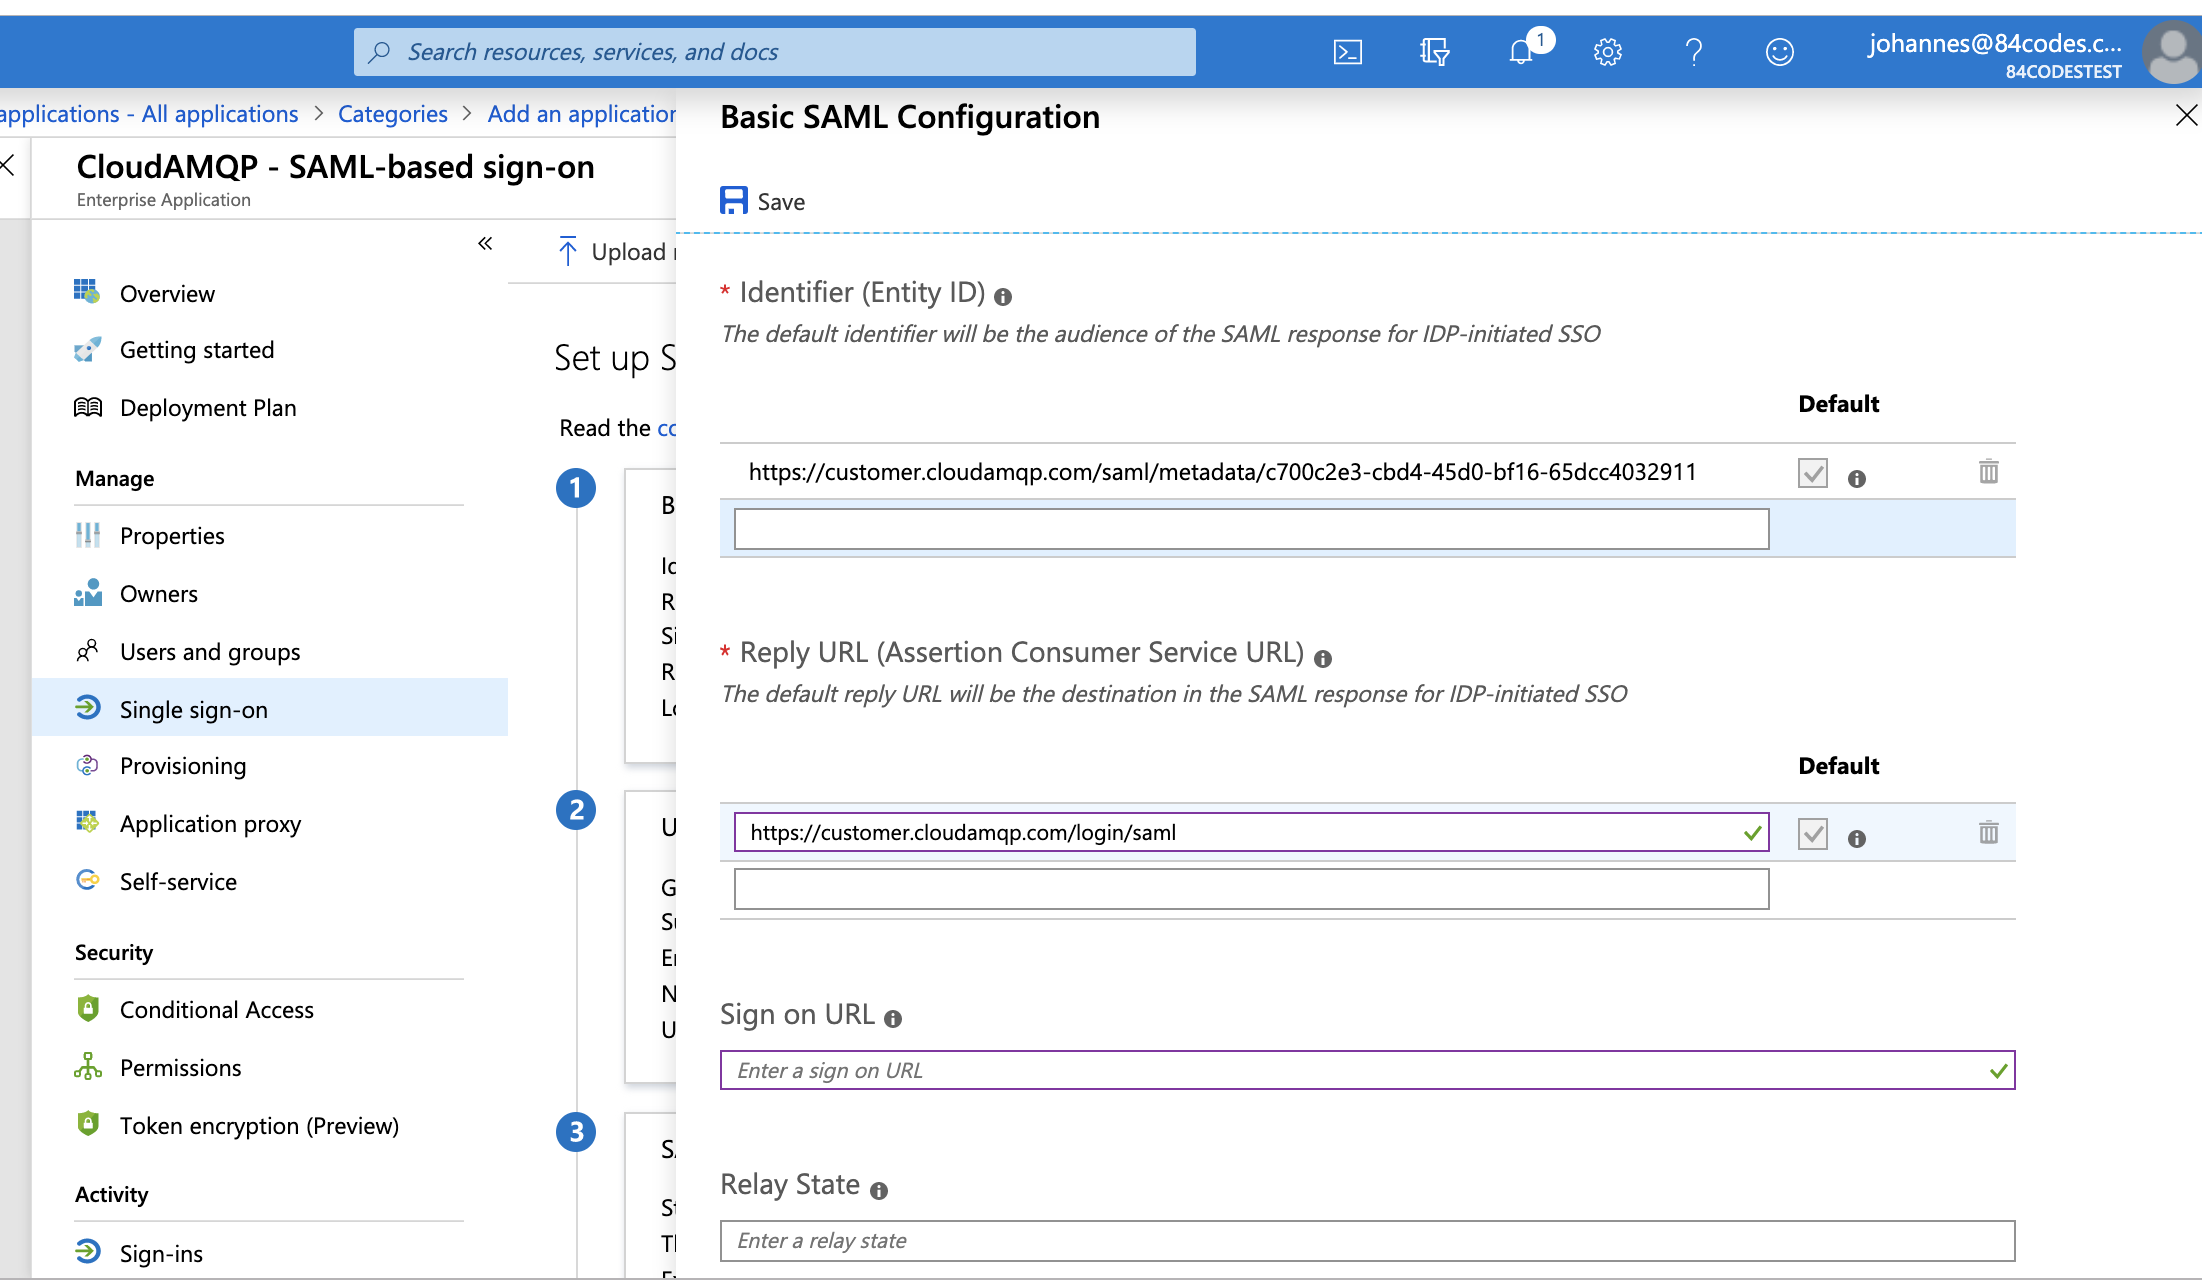
- Click the edit pen for Basic SAML Configuration
-
Add
Identifier (Entity ID)
and
Reply URL (Assertion Consumer Service URL)
with the values you'll find at
https://customer.cloudamqp.com/team/saml.
NOTE: Leave the
Sign on URL
field BLANK. Click
Save
-
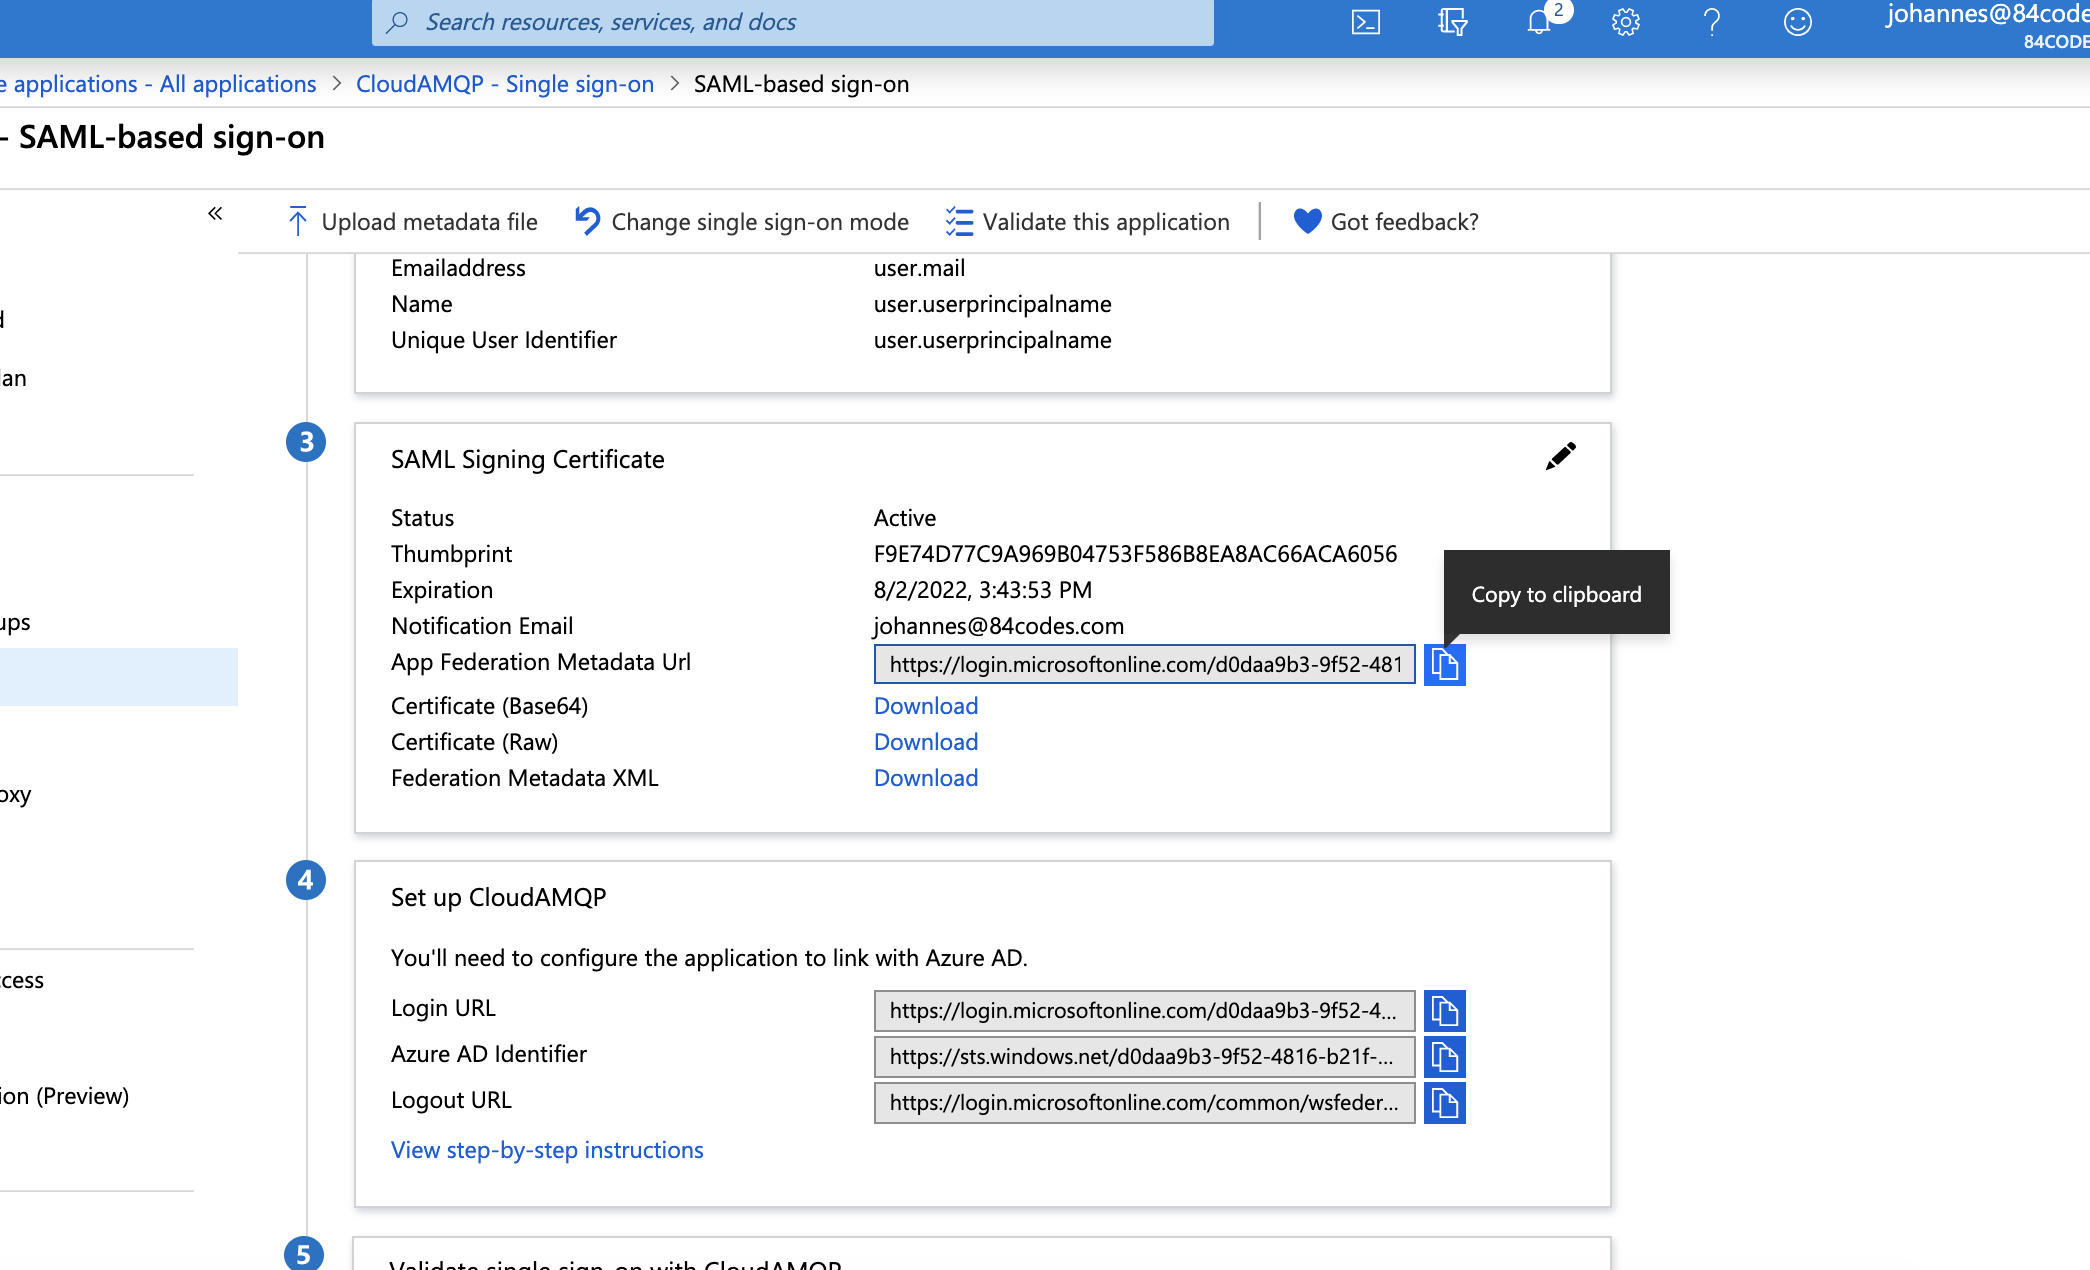
Download the
Federation Metadata XML
and upload it at
https://customer.cloudamqp.com/team/saml
-
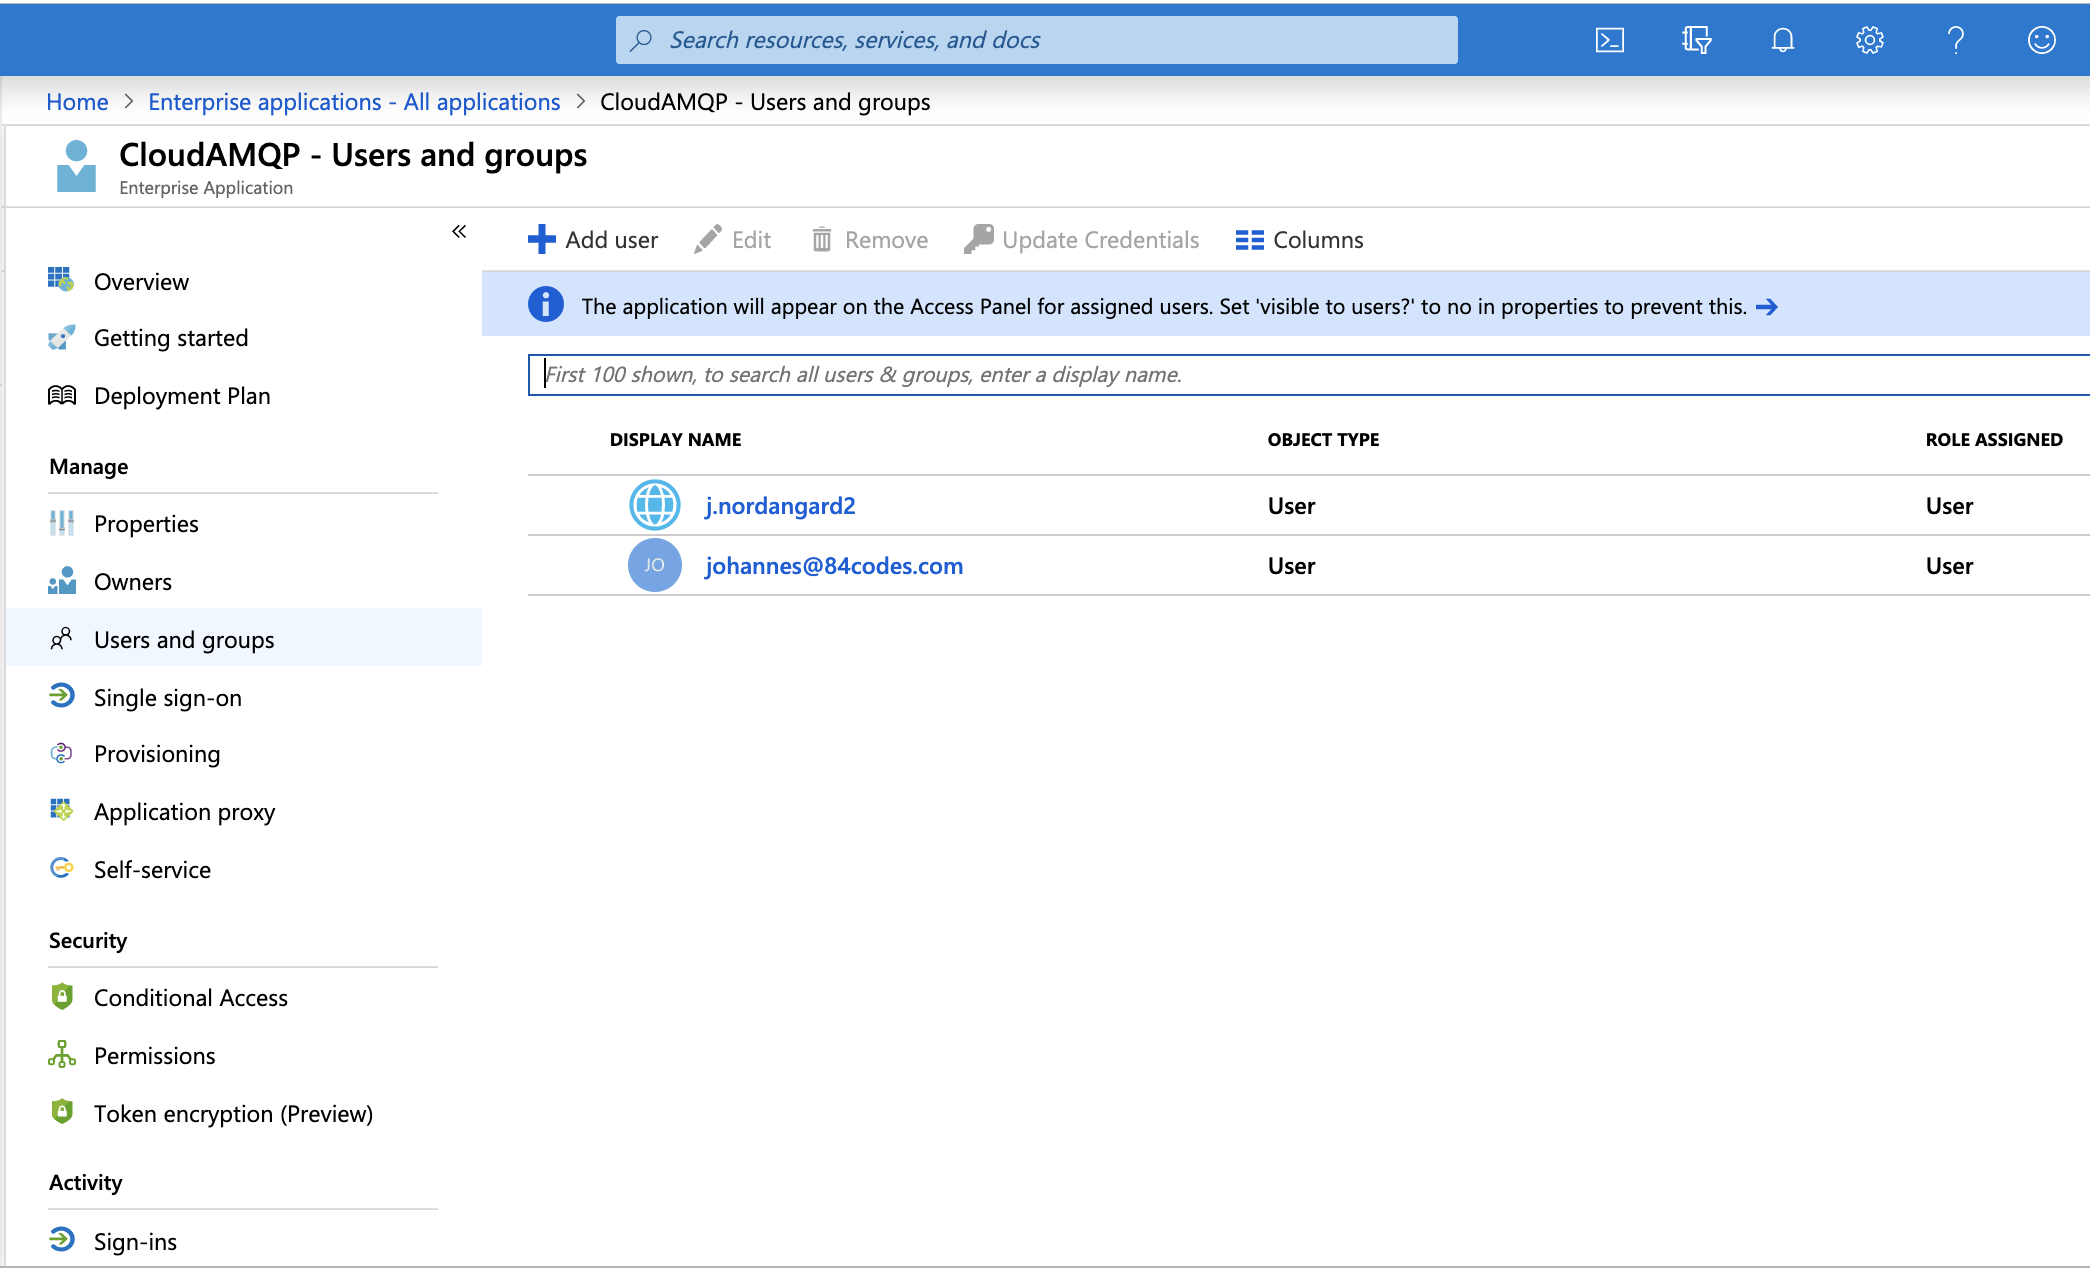
Add users and/or groups that should have access.
Please note that if an account is removed from the "Users and groups" in Azure, the account will still have access in the CloudAMQP console and the user will need to be deleted from the CloudAMQP console to cease access.
-
Important:
When SAML has been configured, the first login for any new users (not existing in CloudAMQP) will have to be
IdP-initiated. This means new users will not be able to sign in for the first time using the
Sign in with SAML
on the CloudAMQP login page, but instead they will login via
https://myapps.microsoft.com/
 For existing users, they will an invite to the CloudAMQP Team by admins (shown below). From there, they will then log in via
https://myapps.microsoft.com/
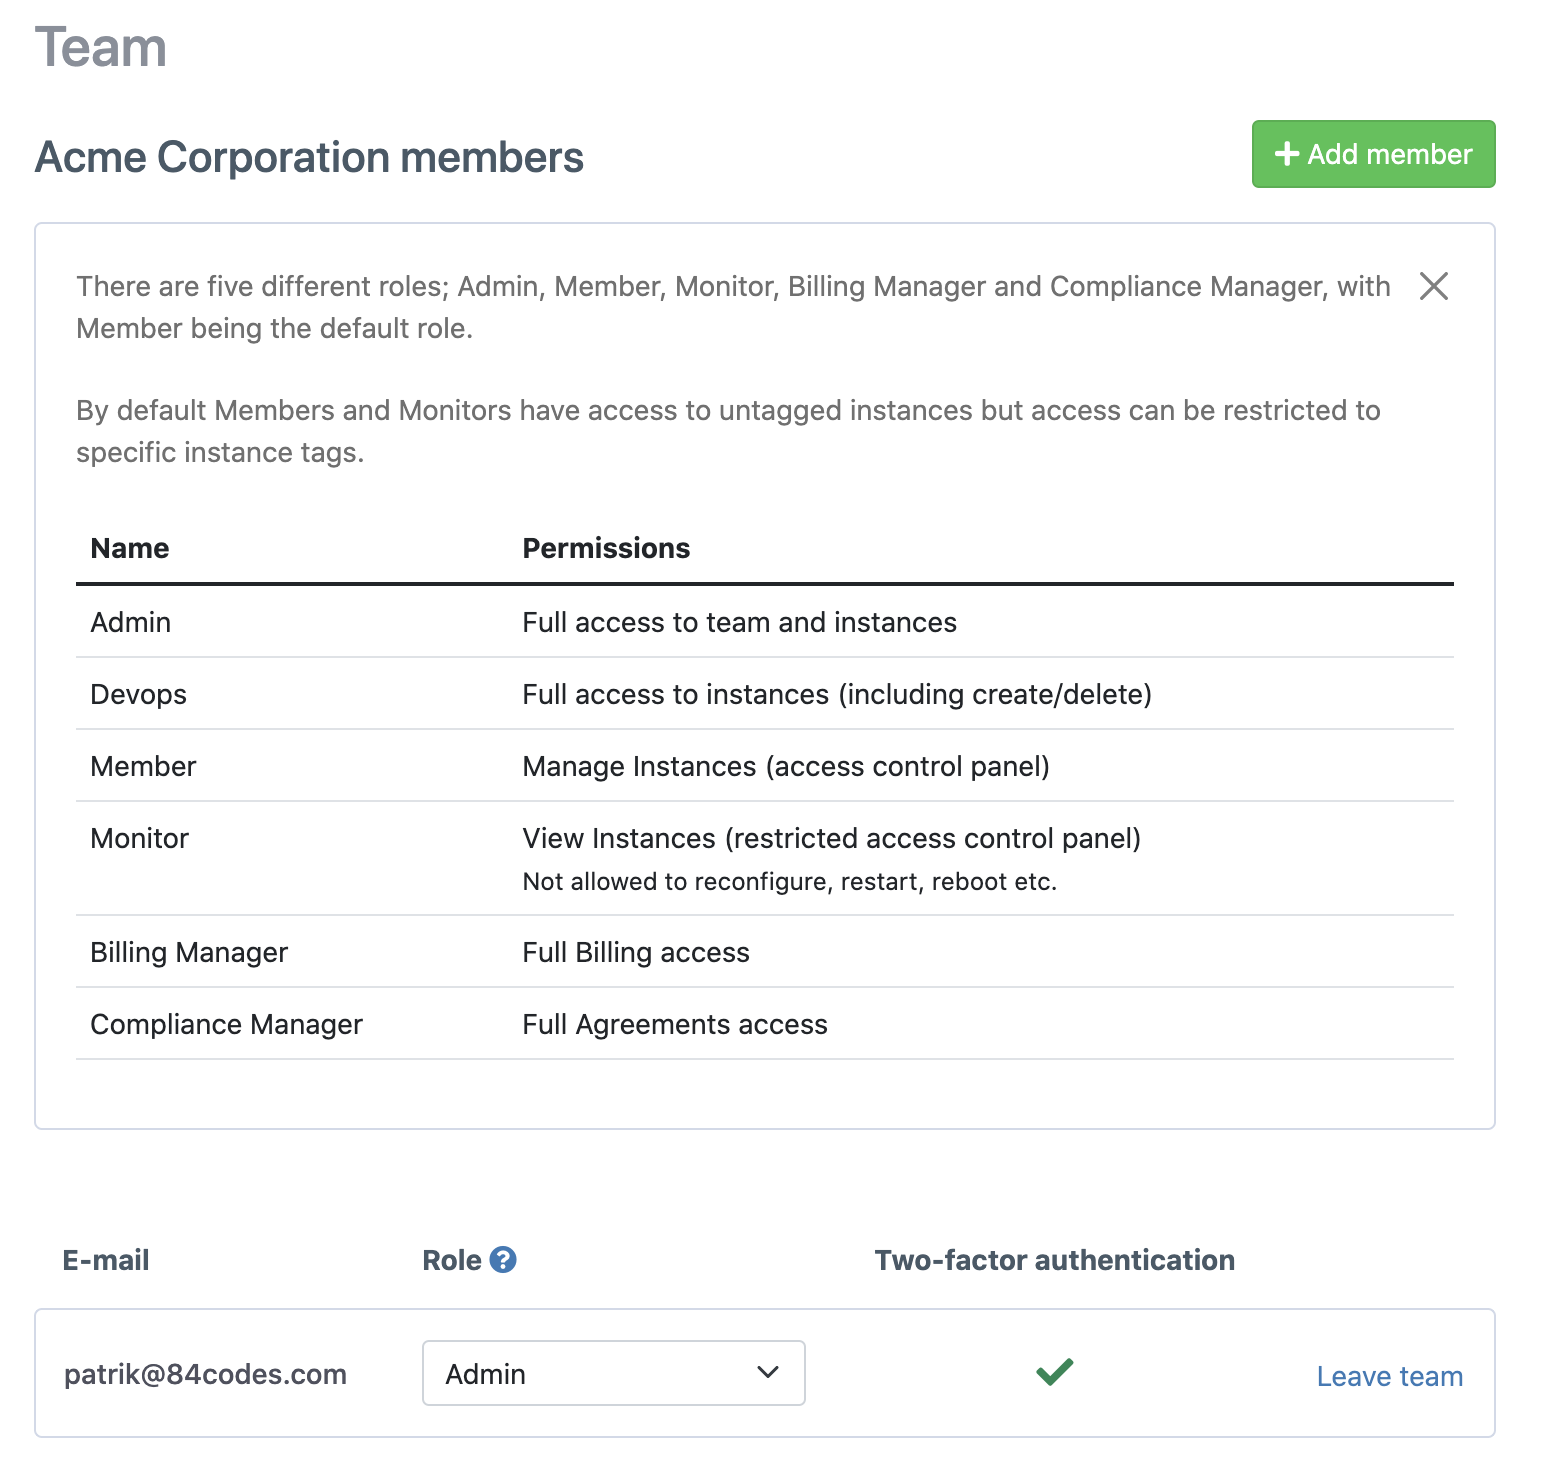 Afterwards, all users able to log in via
Sign in with SAML
on the CloudAMQP login page.

[Optional] Assigning roles and tags
- Provision user roles through a User Property
- Provision user roles and tags through Users and Groups via app roles
There are several ways to assign and manage roles and/or tags:
Provision user roles through a User Property
- Let's begin by setting up the User Property field, in this example we'll be using the Job title field. Navigate to your Enterprise application and click Manage > Users and Groups.
-
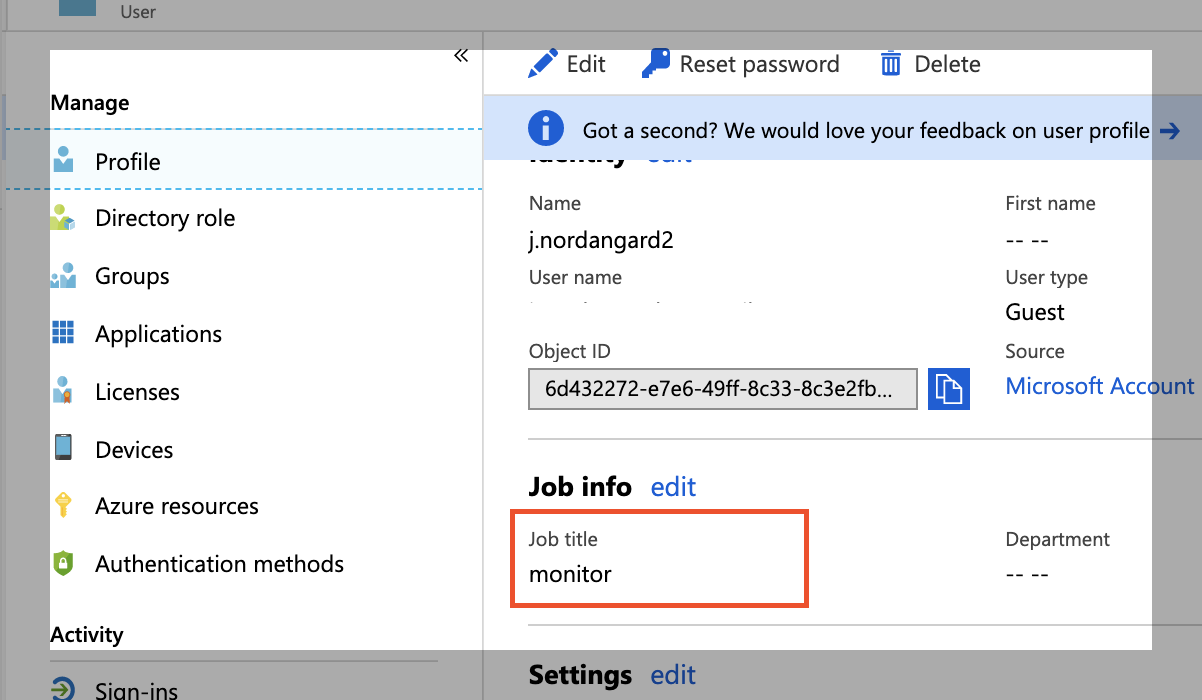
Select on one of the users, navigate to the Properties tab and input a CloudAMQP role in the
Job title field.
In this example, the role "Monitor" will be assigned to the user. Each user will need to specify a role so this can be assigned automatically on CloudAMQP. Roles can be found at
https://customer.cloudamqp.com/team/saml
-
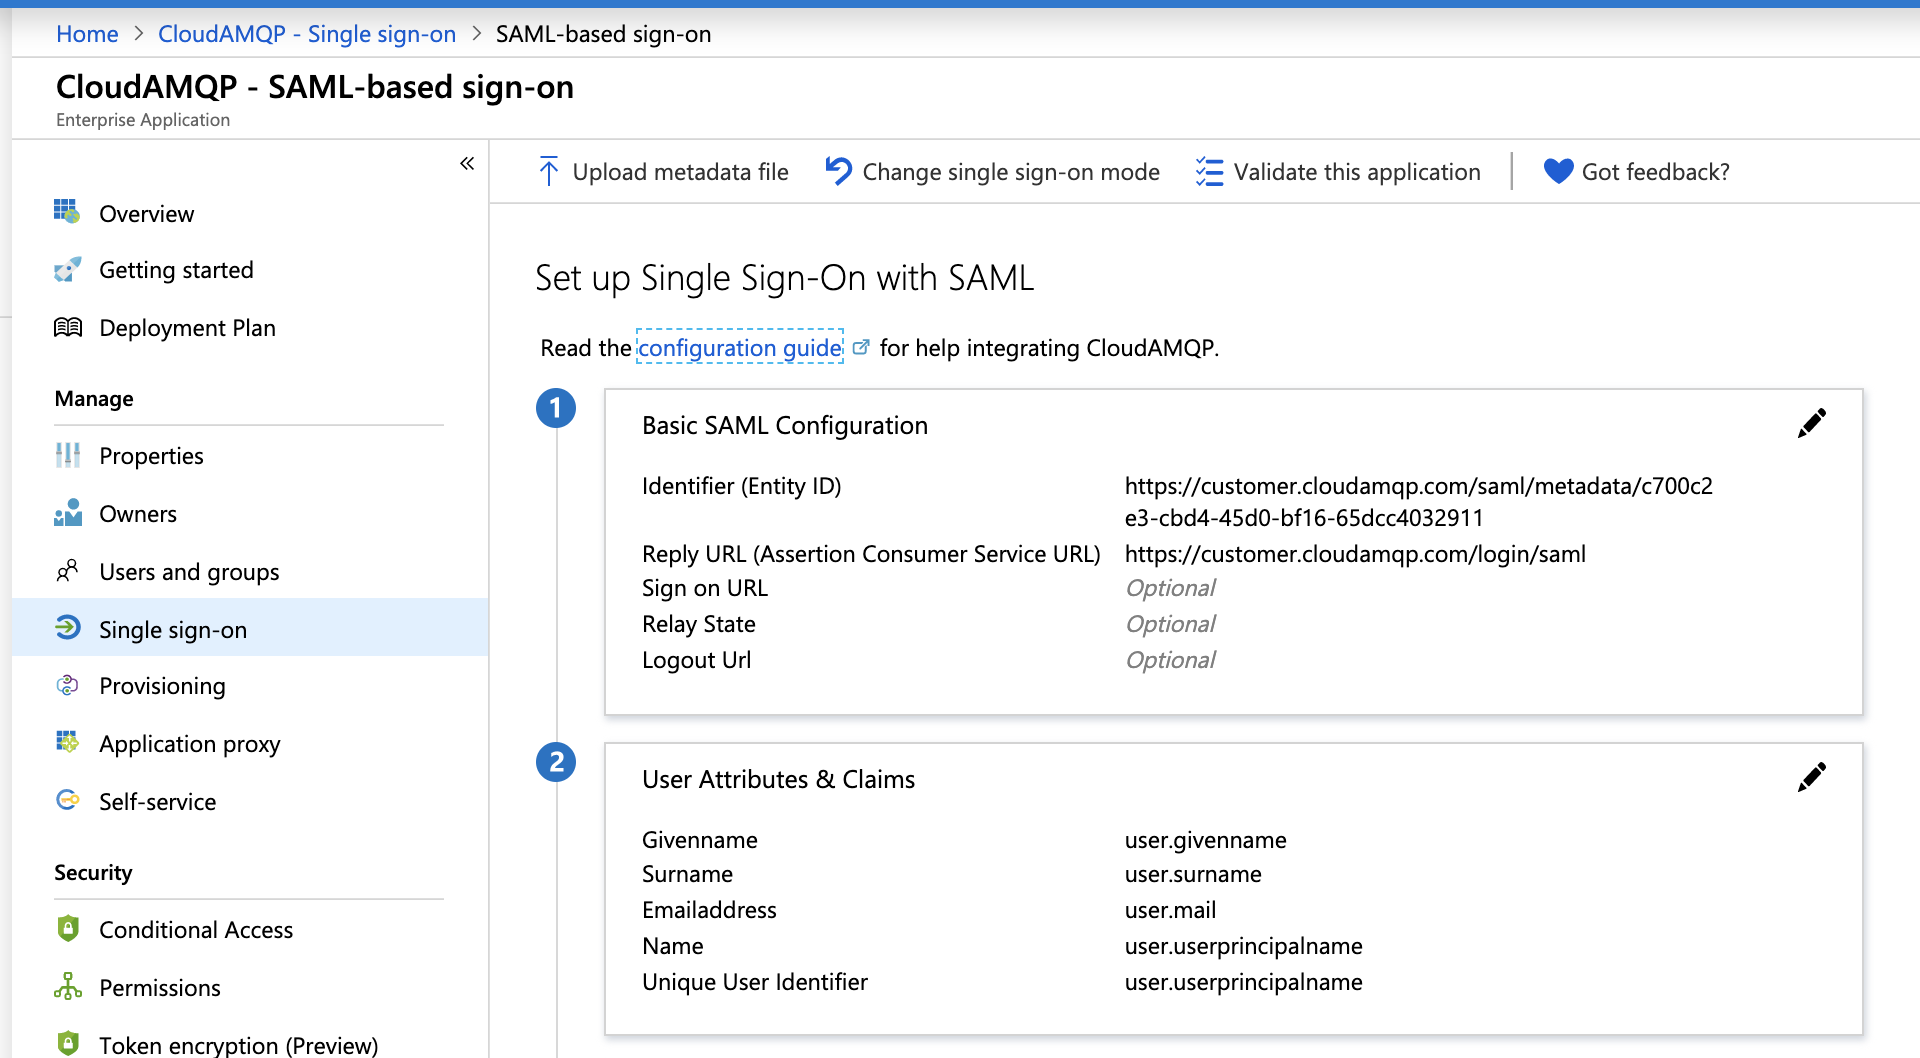
Now we'll link the Property field to the Single sign-on application. Start by opening the
Enterprise application > Manage > Single sign-on
, and click the pen symbol at the
User attributes and Claims section
-
Click
Add new claim
and enter the following
Name: 84codes.roles
Source: Transformation, this opens the option to select Transformation: Join().
Parameter 1: Enter the key found at https://customer.cloudamqp.com/team/saml
Separator: "/"
Parameter 2: select user.jobtitle, or any field from the user profile you wish to use to specify the CloudAMQP role to assign.
Click Save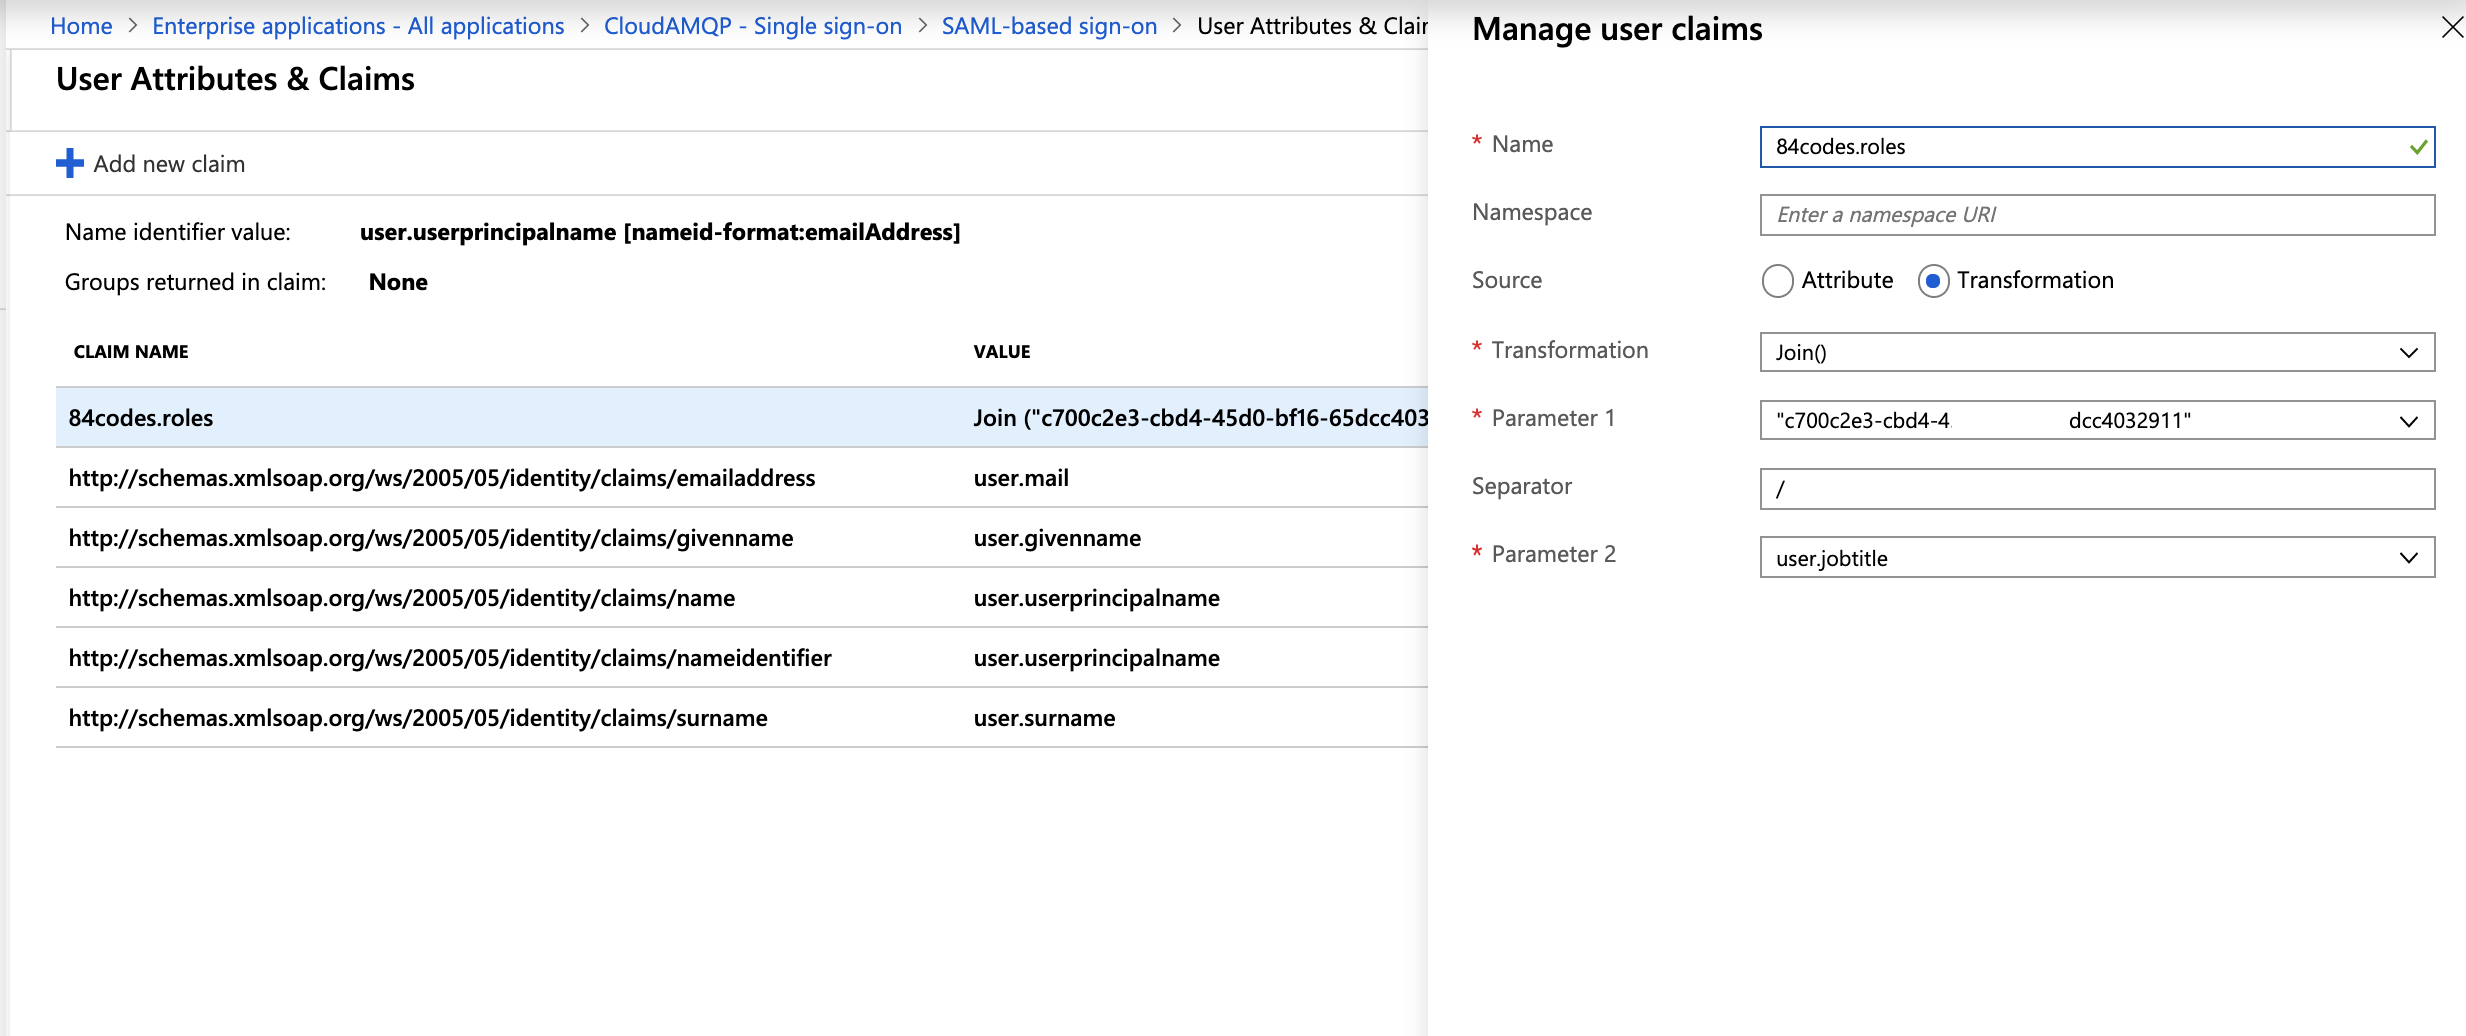
This means utilising any of the User Property fields, i.e. an Extension attribute, to assign a CloudAMQP role.
Provision user roles and tags through Users and Groups via app roles
-
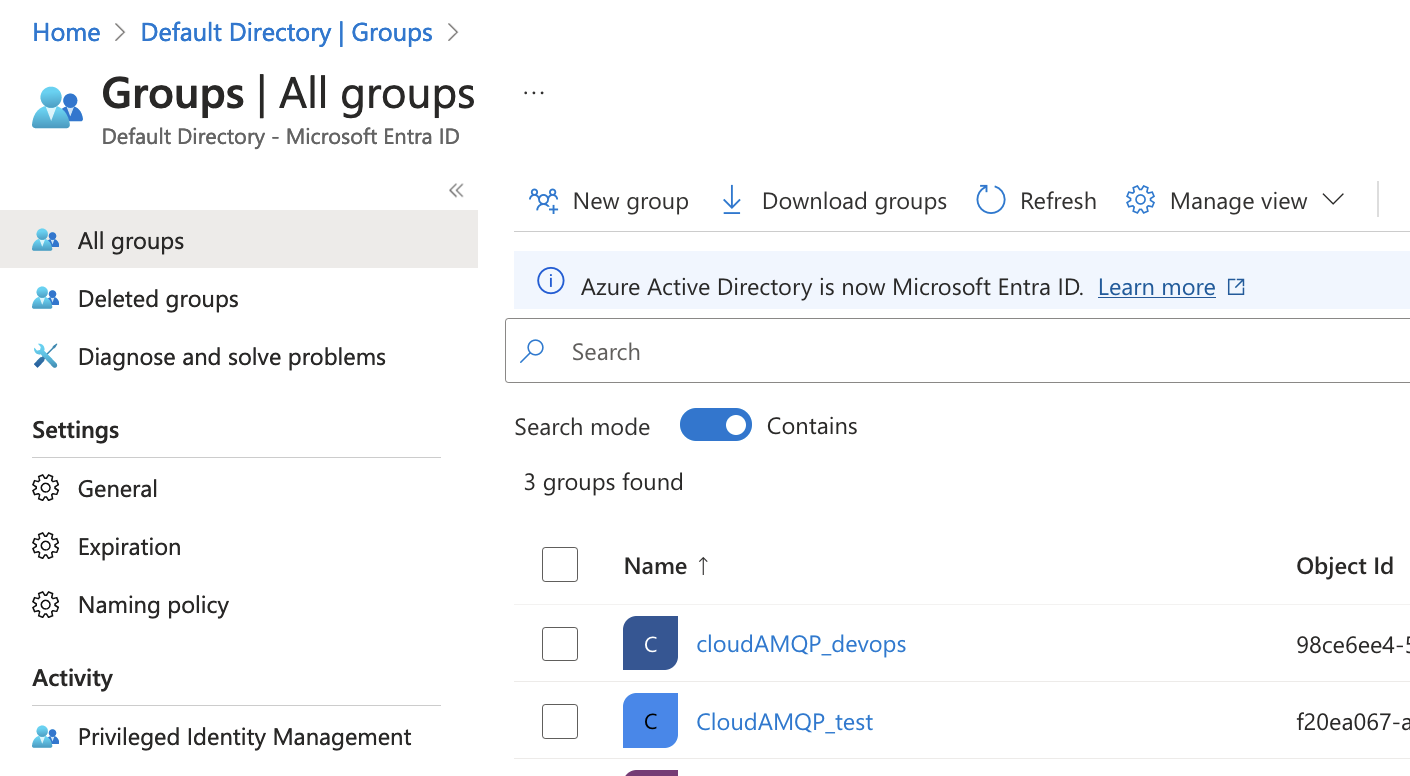
In this example, let's start by setting up a separate group per role/tag and assigning users. Here, we've create the group "CloudAMQP_devops" and added members to the group who require the devops role.
-
Next, we'll create the app role that specifies the role or tag. Navigate to
Microsoft Entra ID > Manage > App registrations
and locate your application. Then navigate to
Manage > App roles.
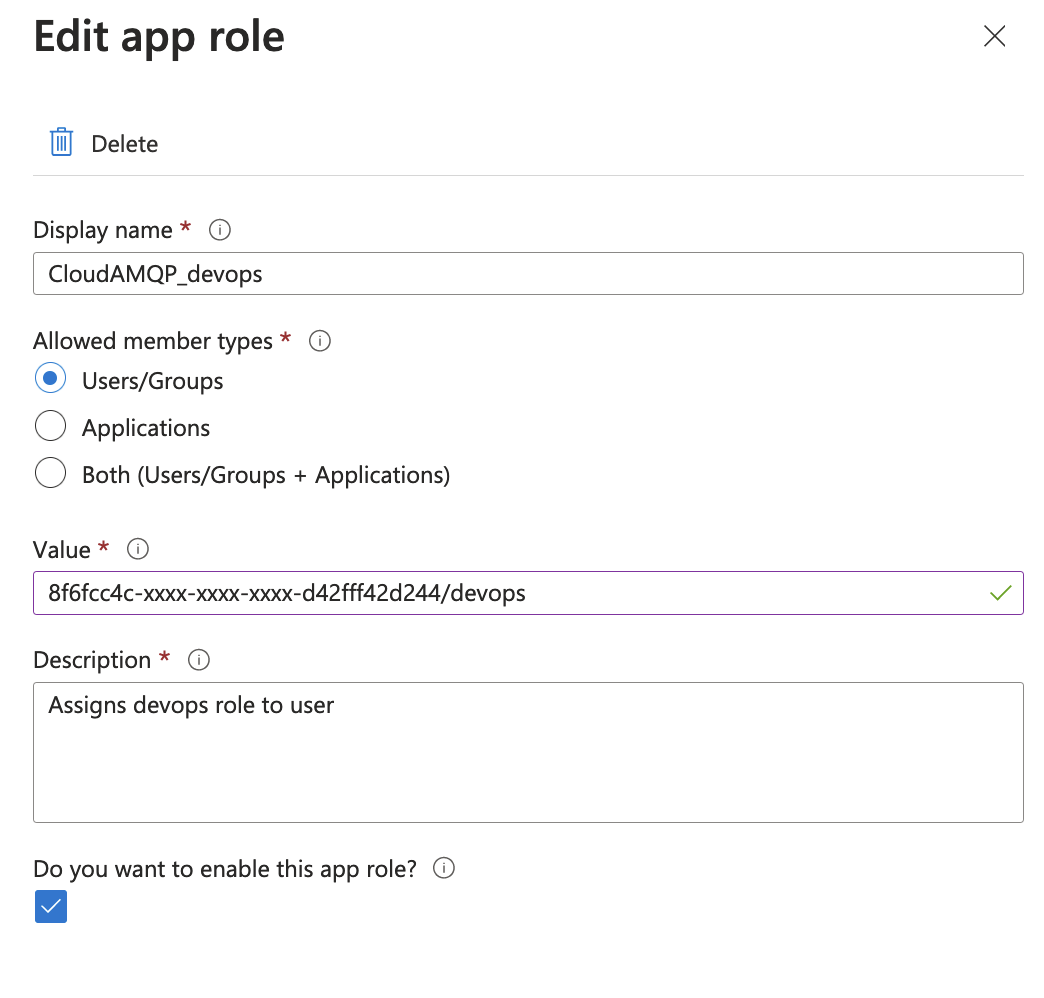
Here, we've created the "CloudAMQP_devops" app role to assign the role "devops".
You'll need to create an app role for each role and tag you want to assign. The value requires the key found at
https://customer.cloudamqp.com/team/saml
, a separator "/" and your role or tag value. Here, we've used "devops".
-
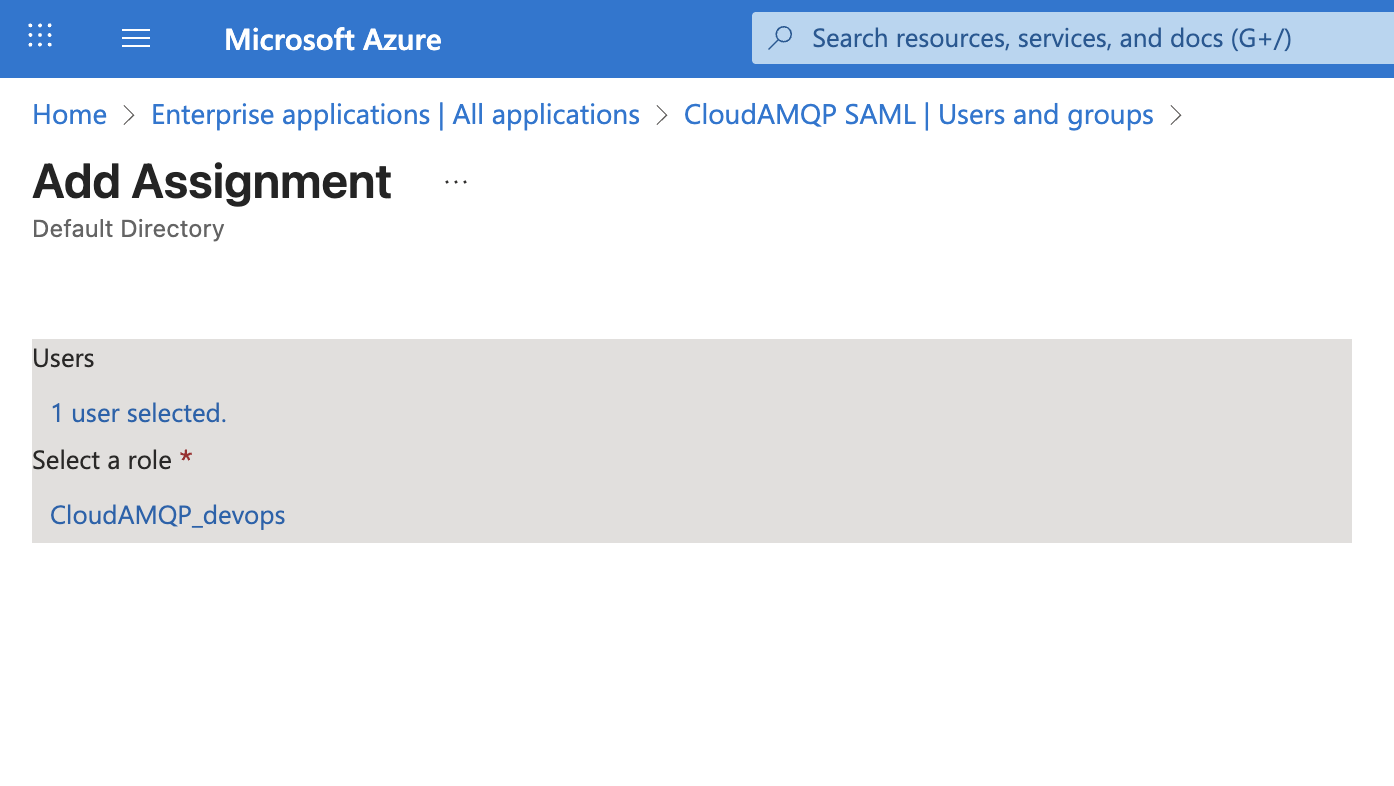
Once the app roles are created, we can assign app roles to users or groups. Start by navigating to your
Enterprise Application > Manage > Users and groups.
Click
Add user/group
to assign app roles.
-
Now we will configure SAML to use the assigned roles by creating a claim. Navigate to your CloudAMQP Enterprise application to add the "user.assignedroles" as a claim. Click
Single sign-on
and the pen symbol next to attributes and claims. In the claim, assign attribute "user.assignedroles" to "84codes.roles".
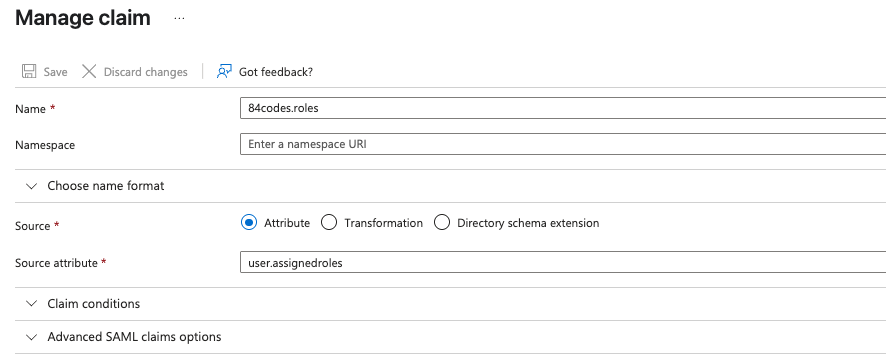
This means having the ability to assign multiple app roles to have both roles and multiple tags if desired. You can create many groups and tags to achieve different role/tag combinations. For example, "Devops" group users can have access to instances under the "Production" and "Staging" tags, and "Member" group users can only access instances under the "Developer" tag.
Please note:
- New users on CloudAMQP (i.e. no existing user account on CloudAMQP) will need to login via https://myapps.microsoft.com/ to be automatically provisioned. Afterwards, they will be able to log in via Sign in with SAML on the CloudAMQP login page.
- Existing users not part of the team will need to be invited to the CloudAMQP team and then log in via https://myapps.microsoft.com/ to apply the user role/tags. Please note the invite doesn't need to have the exact role/tags in CloudAMQP as it will be overridden when they login via myapps. Afterwards, they will be able to log in via Sign in with SAML on the CloudAMQP login page.